11
Fig. 11-
54
Fig.
11-55
•
~
-
0
0
•
-
0
-
•
.
,
Fig. 1
1-56
Fig.
11-57
11
:
IS
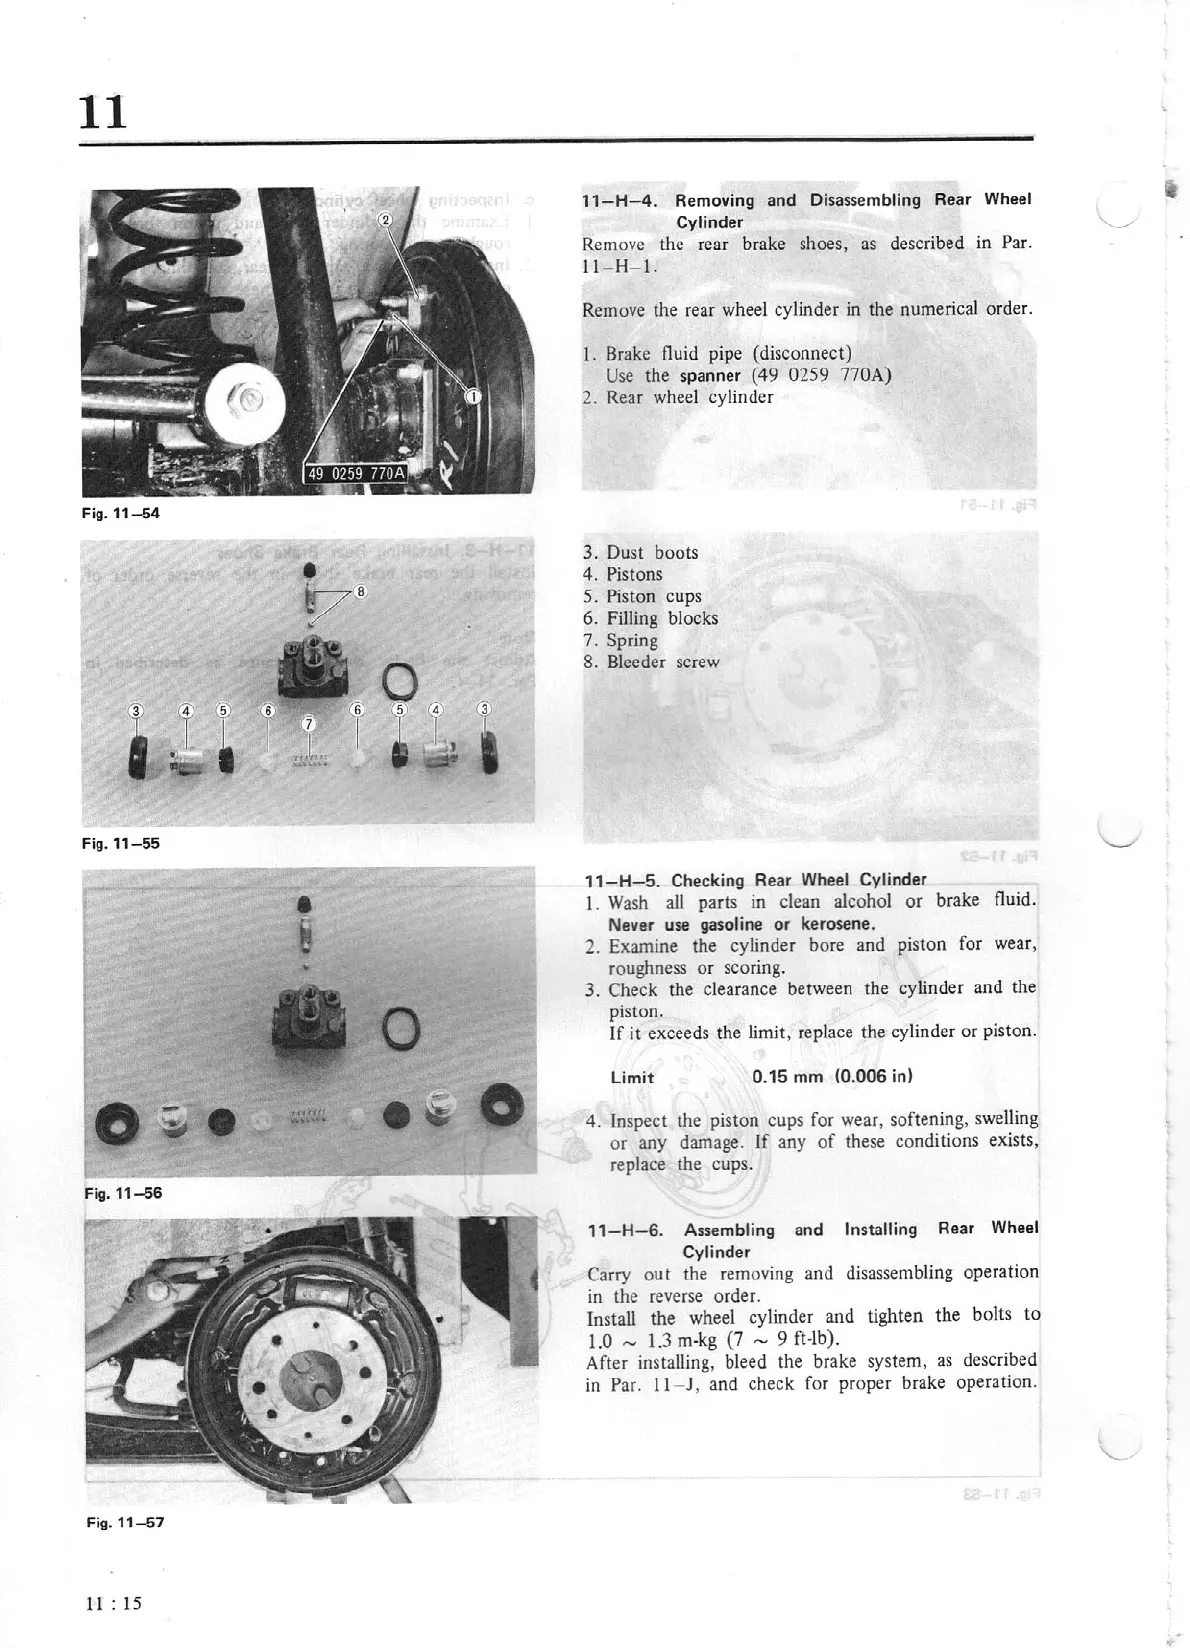
11-H-4
.
Removing
and
Disassembling
Rear Wheel
Cylinder
./
Remove
the
rear brake shoes, as described in Par.
11
- H-
1.
Remove the rear wheel cylinder in
the
numerical order.
1.
Brake
flui<l
pipe
(disconnect)
Use
the
spanner
(49
0259
770
A)
2.
Rear wheel cylinder
3.
Dust
boots
4.
Pistons
S. Piston
cups
6.
Filling blocks
7.
Spring
8.
Bleeder screw
11-H-5
.
Checking Rear
Wheel Cylinder
I .
Wash all
parts
in clean alcohol
or
brake fluid
.
Never
use
gasoline
or
kerosene.
2.
Examine the cylinder
bore
and
piston for wear,
roughness
or
scoring.
3.
Check the clearance between the cylinder
and
the
piston.
If
it exceeds the limit, replace
the
cylinder
or
piston.
Limit
0.15
mm
(0.006
in)
4.
In
spect
the piston cups for wear, softening, swelling
or
any
damage.
If
any
of
these
cond
itions exists,
replace the cups.
11-H-6.
Assembling
and
Installing
Rear
Wheel
Cylinder
Carry
out
the removing
and
disassembling operation
in the reverse order.
Install
the
wheel cylinder
and
tighten
the
bolts
to
1.0
,...,
1.3
m-kg
(7
-
9
ft·lb).
After installing, bleed the brake
system,
as described
in
Par.
11
- J,
and
check
for
proper
brake operation.