14
Fig.
14-25
Fig.14-26
Detail
of
B
8
mm
(0.31
in)
Fig.
14-27
Flg.
14-28
1
4:
7
7 mm
(0.28
in)
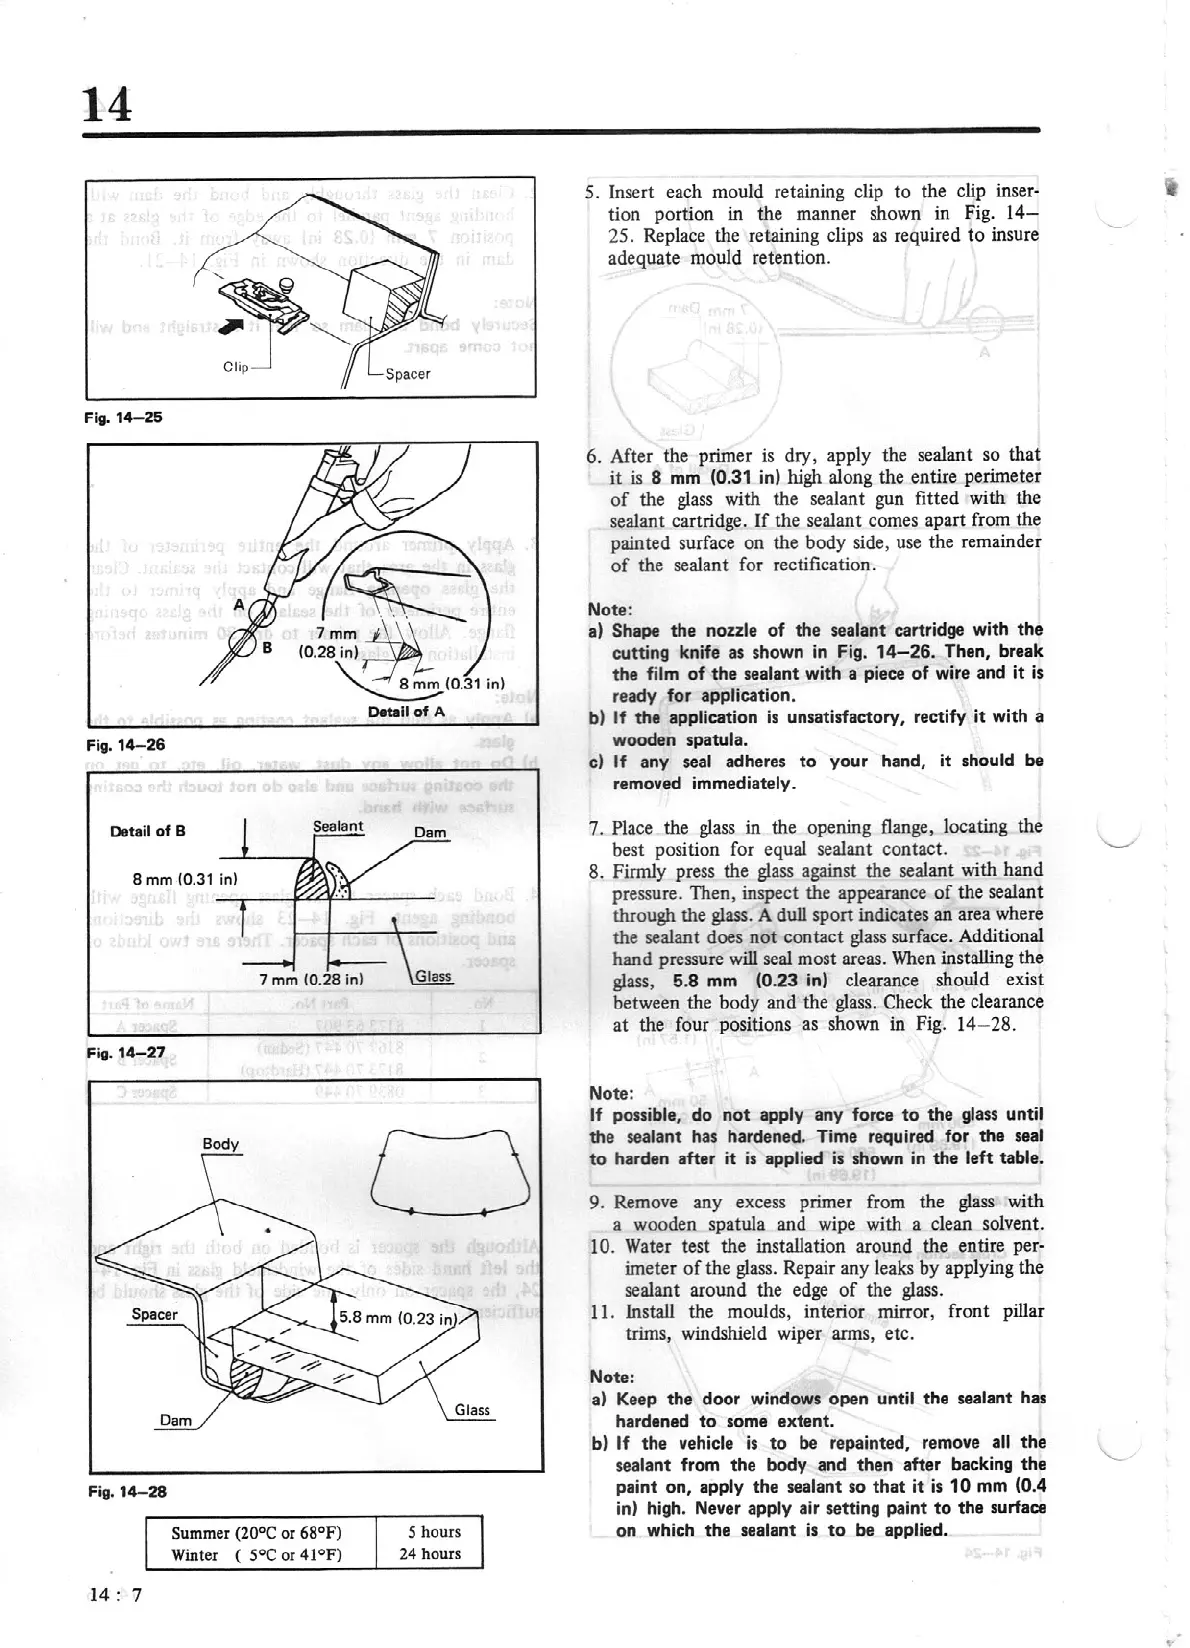
Summer
(20°C
or
68°F)
Winter (
soe
or
41°
F)
0
S
hours
24 hours
5. Insert each mould retaining clip
to
the clip inser-
tion portion in the manner shown in Fig.
14-
25. Replace the retaining clips
as
requir
ed
to insure
adequate mould retention.
6. After the primer
is
dry, apply the sealant so that
it
is
8
mm
(0.31
in) high
along the entire perimeter
of
the
glass
with the sealant gun fitted with the
sealant cartridge.
If
the sealant comes apart from the
painted surface on the body side, use the remain
de
r
of
the sealant for rectification.
Note:
a) Shape
the
nozzle
of
the sealant cartridge with
the
cutting knife as shown
in
Fig.
14-26.
Then, break
t
he
fi
lm
of the
sealant
with a piece
of
wire and
it
is
ready for
application.
b)
If
the applicati
on
is
unsatisfactory, rectify
it
with a
wooden
spatula.
cl
If
any
seal
adheres
to
y
our
hand, it
should
be
removed immediately.
7. Place the
glass
in the opening flange, locating the
best position for equal sealant contact.
8. Firmly press the
glass
against the sealant with hand
pressure. Then, inspect the appearance
of
the
sealant
through the glass. A dull sport indicates an area where
the sealant does
not
contact
glass
surface. Additional
hand
pressure
will
seal most areas. When installing the
glass, 5.8 mm
(0.23
in) clearance should exist
be
tween the body and the glass. Check the clearance
at
the four positions as shown in Fig.
14
- 28.
Note:
If
possible,
do
not
apply
any force
to
the
glass
until
the sealant
has hardened. Time required for the
seal
to
harden after
it
is applied
is
shown in
the
left table.
9. Remove any excess primer from the
glass
with
a wooden spatula and wipe with a clean solvent.
10. Water test the installation around the
entire per-
imeter
of
the glass. Repair any leaks by applying the
se
alant around the e
dge
of
the glass.
11
.
Install the moulds,
int
erior mirror, front pillar
trims,
windshield wiper arms, etc.
Note:
a)
Keep
the
door windows open
until the sealant
has
hardened
to
some extent.
b)
If
the
vehicle
is
to
be
repainted, remove
all
the
sealant
from the body and then after backing
the
paint
on
,
apply
the
sealant
so
that
it
is
10
mm
(0.4
in) high. Never
apply
air setting paint to
the
surface
on which
the
sealant
is
to
be
applied.