EasyManuals Logo

Delta ASDA-A2 User Manual

Delta ASDA-A2
721 pages
To Next Page IconTo Next Page
To Previous Page IconTo Previous Page
Page #31 background imageLoading...
Page #31 background image
ASDA-A2 Chapter 2 Installation
2-2 Revision February, 2017
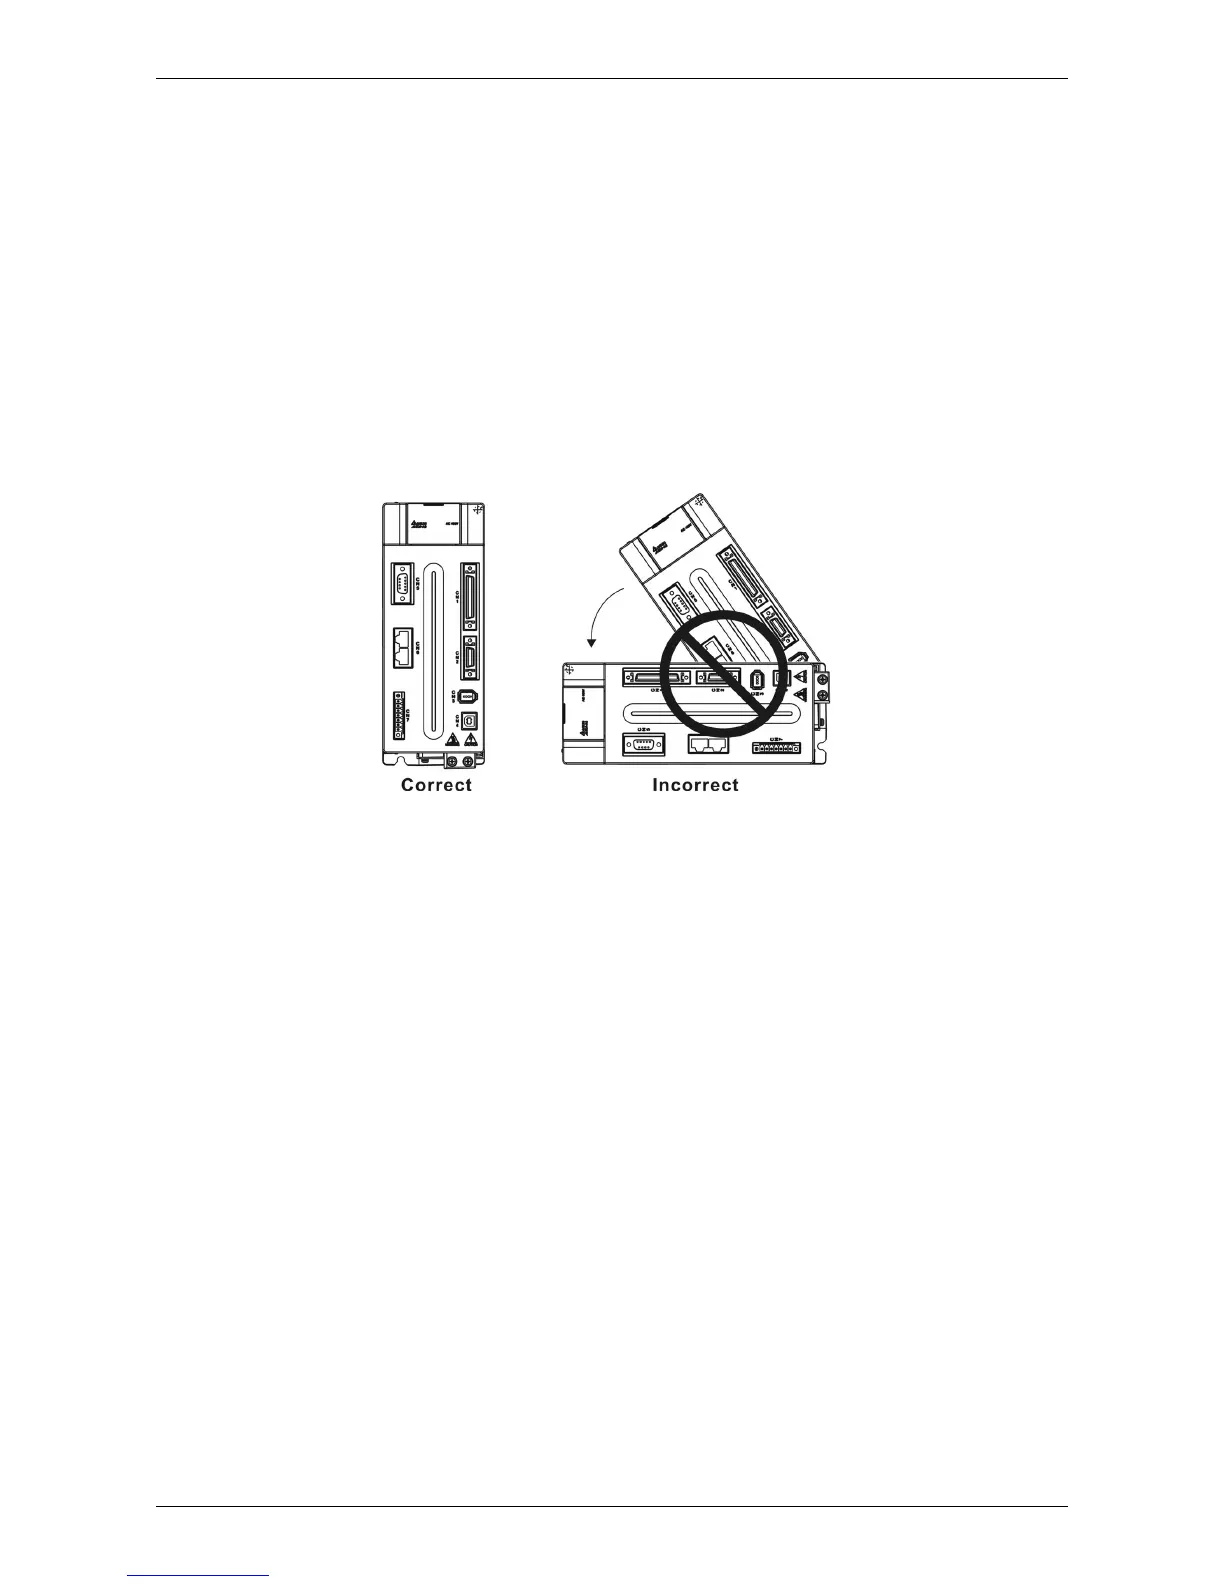
2.4 Installation Direction and Space
Notes:
Incorrect installation may result in a drive malfunction or premature failure of the drive and
motor.
The ASDA-A2 servo drive should be mounted perpendicular to the wall or in the control panel.
In order to ensure the drive is well ventilated, ensure that the all ventilation holes are not
obstructed and sufficient free space is given to the servo drive. Do not install the drive in a
horizontal position or malfunction and damage will occur.
Do not parallel connect the servo drive, or it might burn out the soft-start resistance or the
commutator and danger will occur.

Table of Contents

Other manuals for Delta ASDA-A2

Questions and Answers:

Question and Answer IconNeed help?

Do you have a question about the Delta ASDA-A2 and is the answer not in the manual?

Delta ASDA-A2 Specifications

General IconGeneral
Control ModePosition, Speed, Torque
ModelASDA-A2 Series
Operating Voltage200 ~ 230VAC / 380 ~ 480VAC
Power Supply200-230VAC ±10%, single-phase
Communication InterfaceRS-485, CANopen
FeedbackIncremental encoder, Absolute encoder
ProtectionOvercurrent, Overvoltage, Undervoltage, Overheating, Short Circuit
Operating Temperature0°C
Storage Temperature-20°C
Humidity20% to 90% RH (non-condensing)
Position Control Mode FeaturesElectronic Cam
WeightVaries depending on the model. Please refer to the specific model's datasheet.

Related product manuals