6/02
4-69
DC1632/2240
REP 9.1, REP 9.2
Repairs and Adjustments
Prelaunch Training/Review
REP 9.1 Drum Cartridge
Parts List on PL 4.1
Removal
WARNING
To avoid personal injury or shock, do not perform repair or adjustment activities with
the power switch on or electrical power applied to the machine.
1. Remove Drum Cartridge.
a. Open Left Cover Assembly.
b. Open Front Cover.
c. Actuate orange release and pull out Drum Cartridge.
CAUTION
Drum Cartridge photoreceptor damage is likely if Drum Cartridge is handled carelessly.
This results in image quality defects. Use caution when Drum Cartridge is removed from
machine.
d. Place Drum Cartridge in a black bag.
REP 9.2 ROS Shutter Motor
Parts List on PL 8.1
Removal
WARNING
To avoid personal injury or shock, do not perform repair or adjustment activities with
the power switch on or electrical power applied to the machine.
1. Remove Rear Cover (REP 14.2).
2. Remove Power Switch Cover (REP 14.6).
3. Remove Upper Rear Left Cover (REP 14.4).
4. Close Left Cover Assembly.
5. Remove MSI Tray (REP 7.1).
6. Remove Left Cover Assembly (REP 8.1).
7. Remove Registration Transport (REP 8.6).
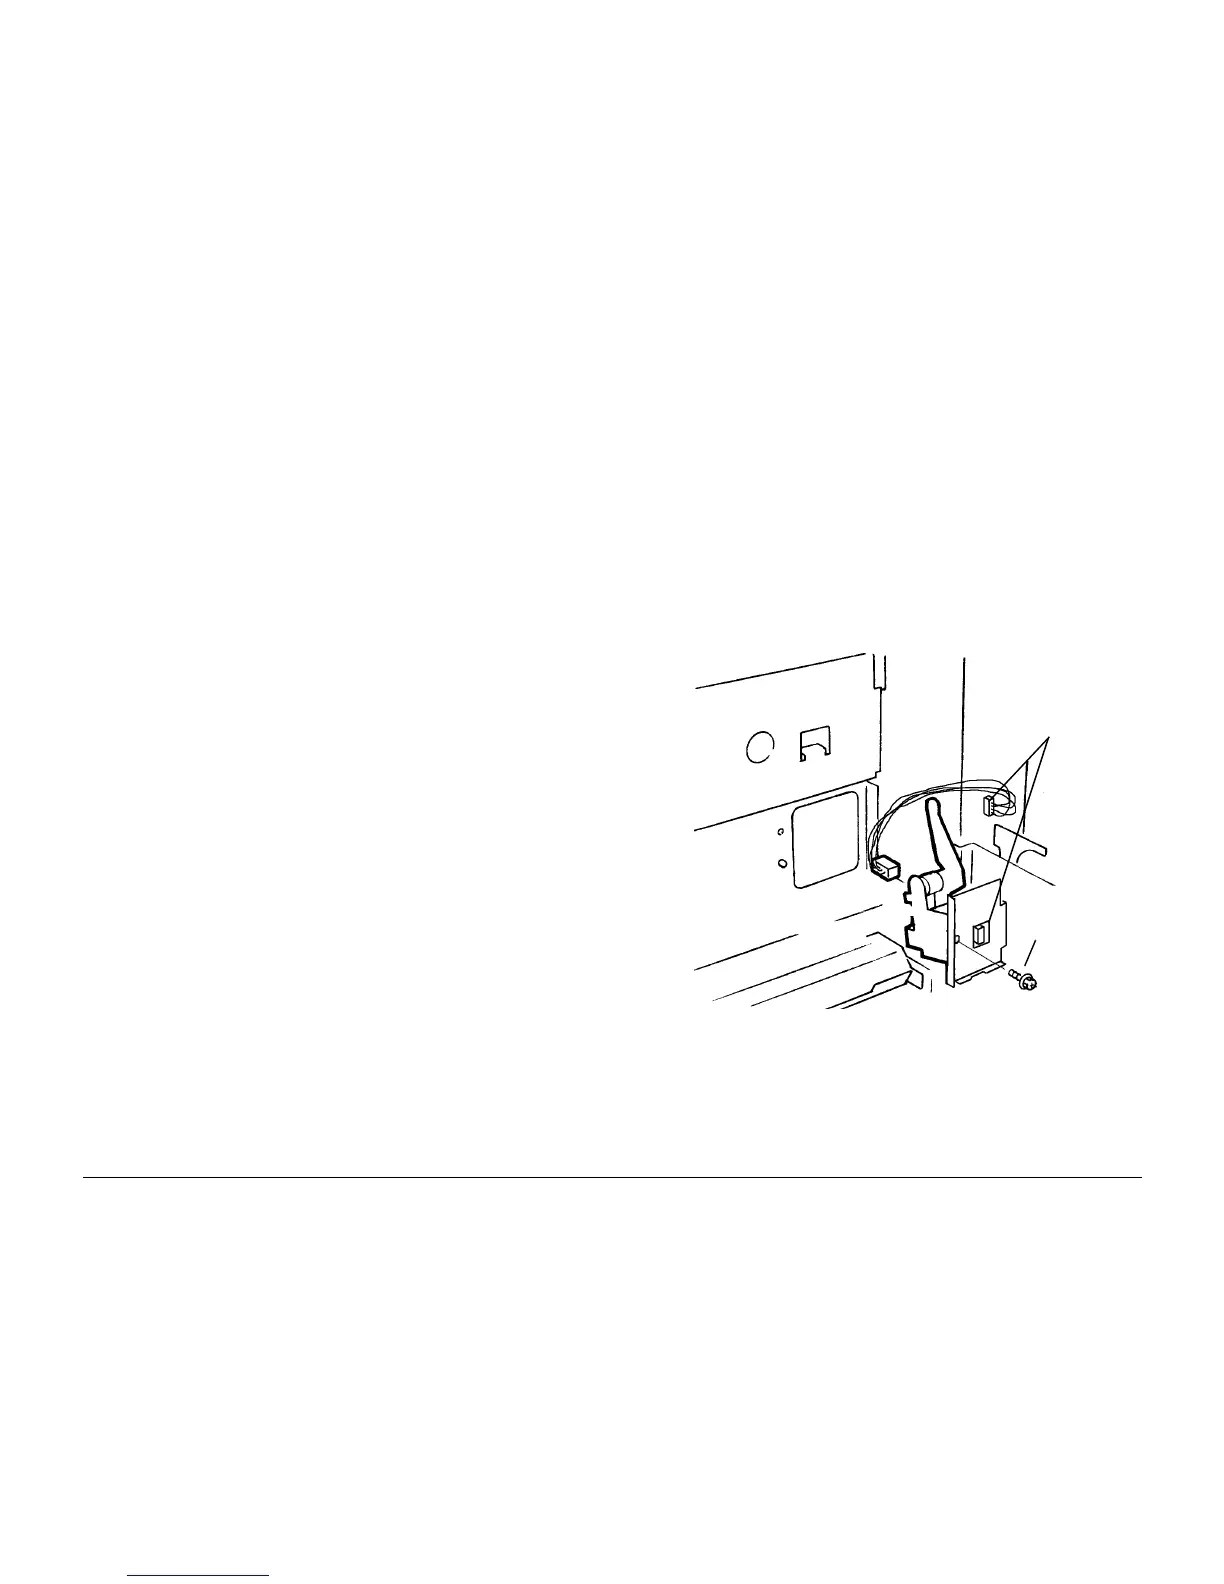
8. Remove Shutter Actuator(Figure 1).
Figure 1 Removing Shutter Actuator
Replacement
Ensure solenoid arm engages
1
Disconnect
2
Remove
Screw
3
Pull out
Shutter
Actuator

 Loading...


