6/02
4-75
DC1632/2240
REP 9.9
Repairs and Adjustments
Prelaunch Training/Review
REP 9.9 Developer Housing
Parts List on PL 6.2
Removal
WARNING
To avoid personal injury or shock, do not perform repair or adjustment activities with
the power switch on or electrical power applied to the machine.
1. Remove Front Cover (REP 14.7).
2. Remove Drum Cartridges.
3. Remove Waste Cartridge (REP 9.4).
4. Remove Waste Cartridge Cover (REP 9.3).
5. Remove Fuser Front Cover (REP 14.8).
6. Move Xerographic Release Lever up to a mid position.
7. Remove Dispenser Assembly Cover (REP 9.6).
8. Remove all Dispenser Assemblies (REP 9.7).
NOTE: In next step, do not remove sensor.
9. Remove housing for Waste Cartridge Full Sensor (REP 9.5).
NOTE: In next step, it may not be necessary to disconnect harnesses for Plate Assembly (PL
4.2) to remove a developer housing.
10. Remove Plate Assembly (REP 9.8).
CAUTION
IBT belt damage results when Developer Housing is removed carelessly.
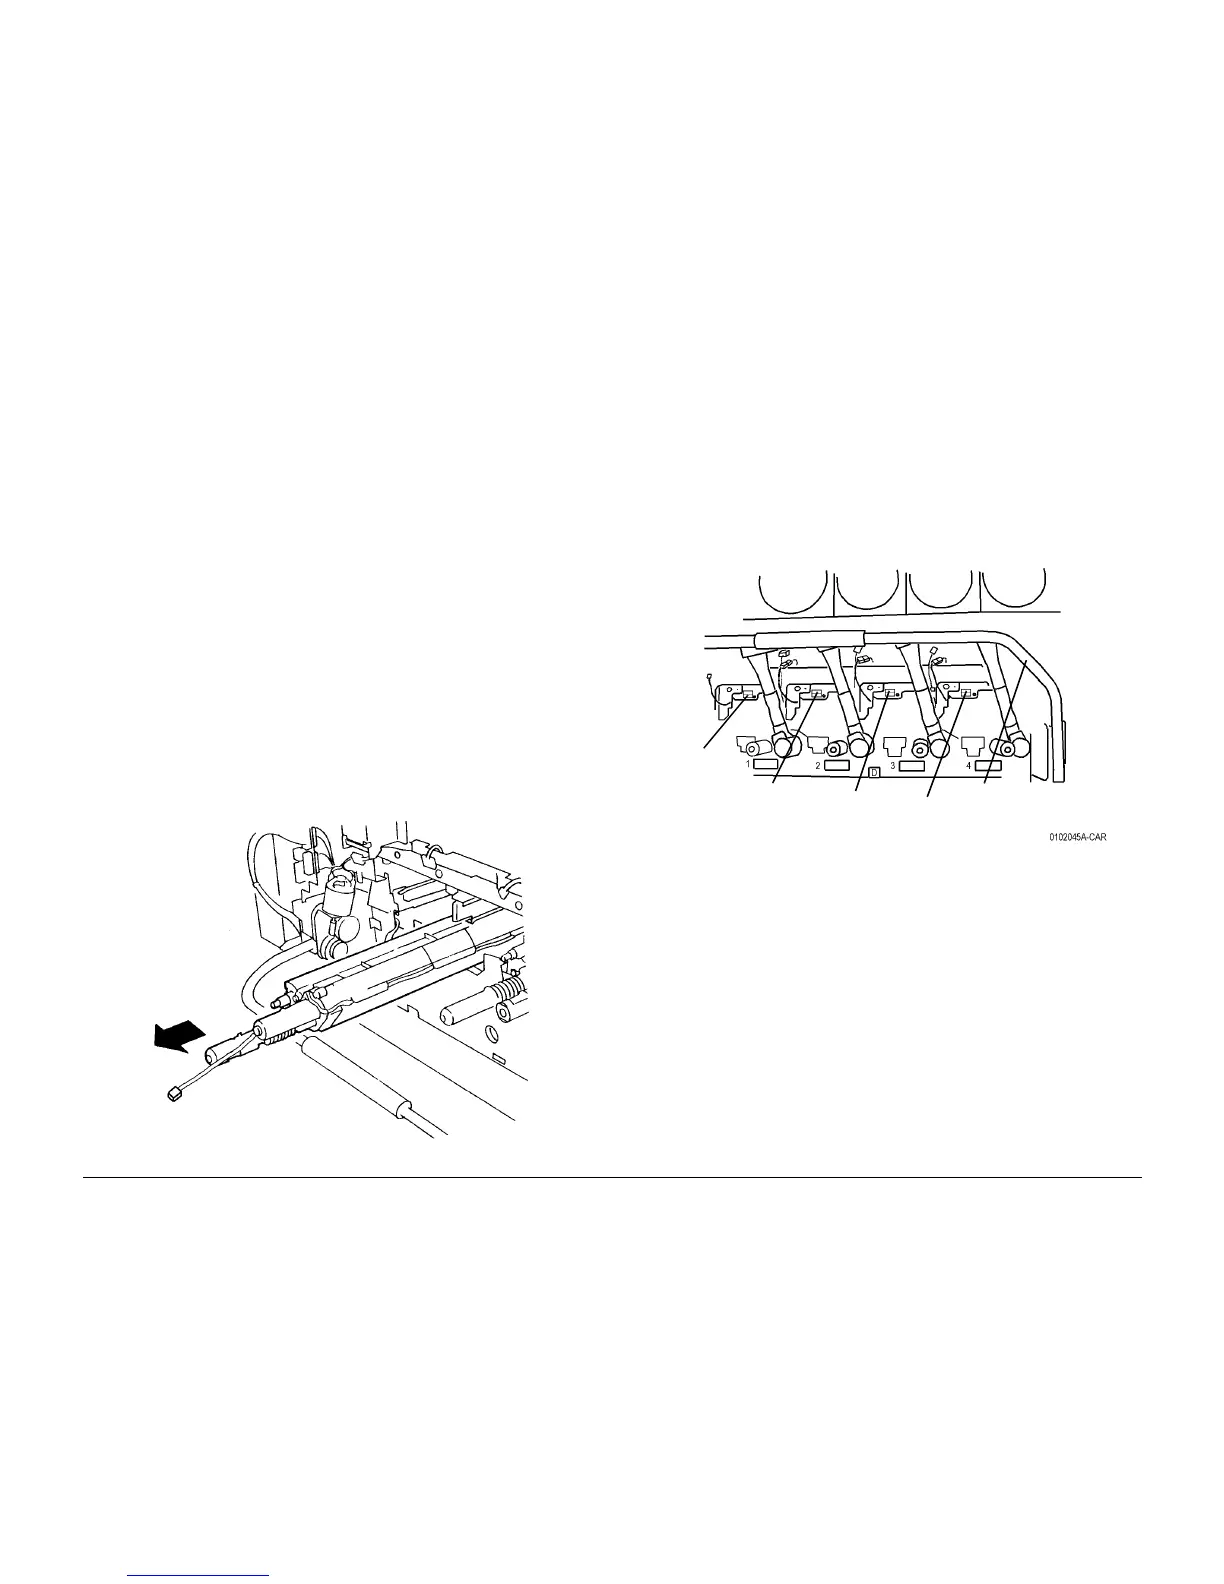
11. Remove Developer Housing (Figure 1).
Figure 1 Removing Developer Housing
Replacement
NOTE: If installing a new Developer Housing, go to step 1. If reinstalling existing developer
housing, go to 5.
1. Install new Developer (REP 9.10) as required.
2. Remove ATC Sensor Setup Data Tag from new Developer Housing. On tag, highlight K,
C, M, or Y as required for color of developer housing. Tag will be installed during machine
reassembly.
CAUTION
Image quality defects occur when ATC Sensor Data is mishandled in dC921.
3. During machine assembly, install ATC Sensor Setup Data Tag as shown (Figure 2).
Figure 2 Installing ATC Sensor Setup Data Tag
4. Perform dC921 ATC Sensor Setup (ADJ 9.2).
5. While reinstalling Developer Housing ensure pin at rear of Developer Housing engages
hole in rear frame of machine.
1
Raise Xerographic
Release Lever
2
Position Tag in correct location
Tag with K
highlighted
Tag with C
highlighted
Tag with M
highlighted
Tag w i th Y
highlighted
 Loading...


