6/02
4-95
DC1632/2240
REP 10.1, REP 10.2
Repairs and Adjustments
Prelaunch Training/Review
REP 10.1 Fuser
Parts List on PL 7.1
Removal
WARNING
To avoid personal injury or shock, do not perform repair or adjustment activities with
the power switch on or electrical power applied to the machine.
WARNING
Personal injury may result from grasping hot areas of Fuser Module. If a hot Fuser Mod-
ule must be removed, grasp Fuser Module by black plastic frame component, shown in
figure (Figure 1).
CAUTION
Damage to work surface may result if a hot Fuser Module is removed and positioned on an
unprotected work surface. Place a hot fuser on ten sheets of paper.
1. Open Left Cover Assembly.
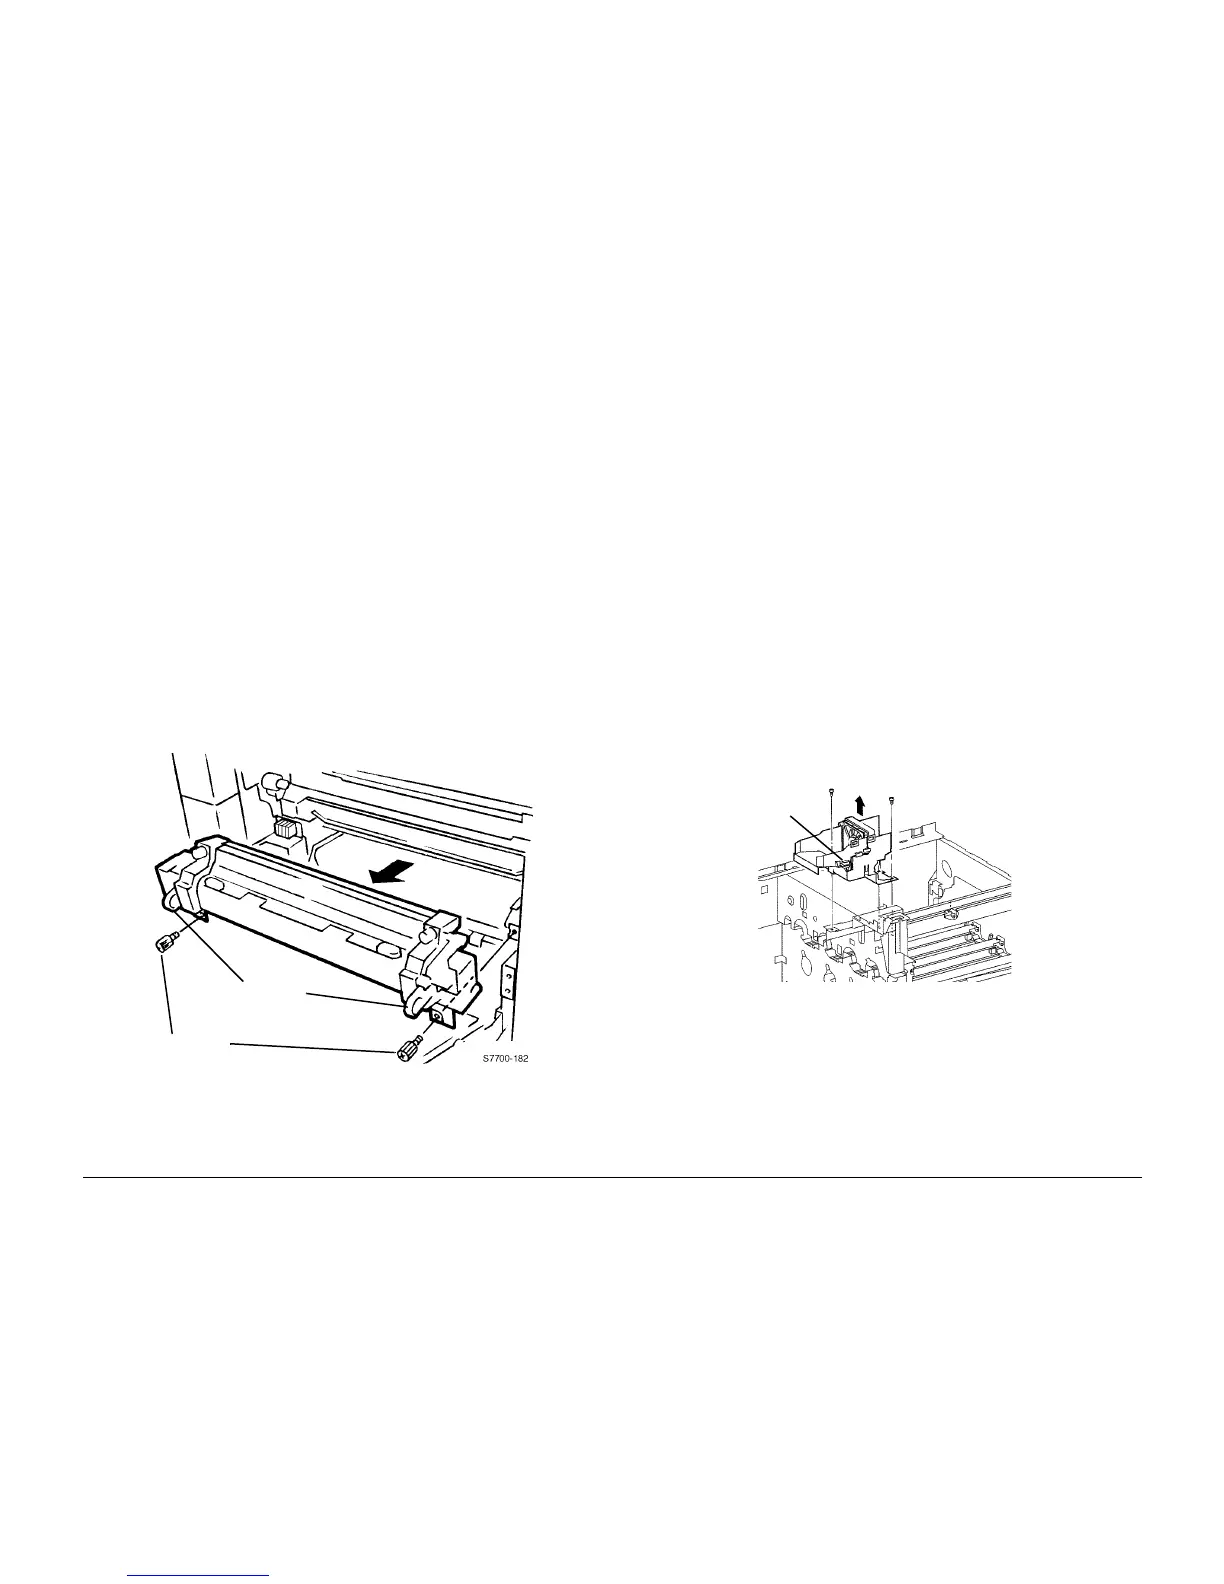
2. Remove Fuser Module (Figure 1).
a. Loosen Screws (2). (PL 1.1)
WARNING
If machine was making copies within 30 minutes, Fuser Module is hot. Grasp
Fuser Module using Grip Rings.
b. Use Grip Rings to pull Fuser Module out.
Figure 1 Removing Fuser Module
REP 10.2 Fuser Fan
Parts List on PL 8.1
Removal
WARNING
To avoid personal injury or shock, do not perform repair or adjustment activities with
the power switch on or electrical power applied to the machine.
WARNING
Personal injury may result from grasping hot areas of Fuser Module. If a hot Fuser Mod-
ule must be removed, grasp Fuser Module by black plastic frame component, shown in
figure (Figure 1).
CAUTION
Damage to work surface may result if a hot Fuser Module is removed and positioned on an
unprotected work surface. Place a hot fuser on ten sheets of paper.
1. Open Front Cover.
2. Remove Right Cover (REP 14.3).
3. Remove Top Cover (REP 14.1).
4. Remove Rear Cover (REP 14.2).
5. Remove Fuser Cooling Fan (Figure 1).
a. Disconnect P/J.
b. Remove Screws (2) and lift to remove Fuser Cooling Fan.
Figure 1 Removing Fuser Cooling Fan
Grip Rings
Screws (2)
P/J
Screws (2)

 Loading...


