6/02
4-82
DC1632/2240
REP 9.20
Prelaunch Training/Review
Repairs and Adjustments
REP 9.20 Right Lift Assembly
Parts List on PL 5.1
Removal
WARNING
To avoid personal injury or shock, do not perform repair or adjustment activities with
the power switch on or electrical power applied to the machine.
1. Open Front Cover.
2. Remove Fuser Front Cover (REP 14.8).
3. Remove Waste Cartridge (REP 9.4).
4. Remove Waste Cartridge Cover (REP 9.3).
5. Remove Inner Left Harness Cover (REP 14.10).
6. Release and move Xerographic Release Lever down.
7. Remove Drum Cartridges.
8. Remove Right Cover (REP 14.3).
9. Remove Belt Module (REP 9.15).
10. Remove Xerographic Release Lever (REP 9.18).
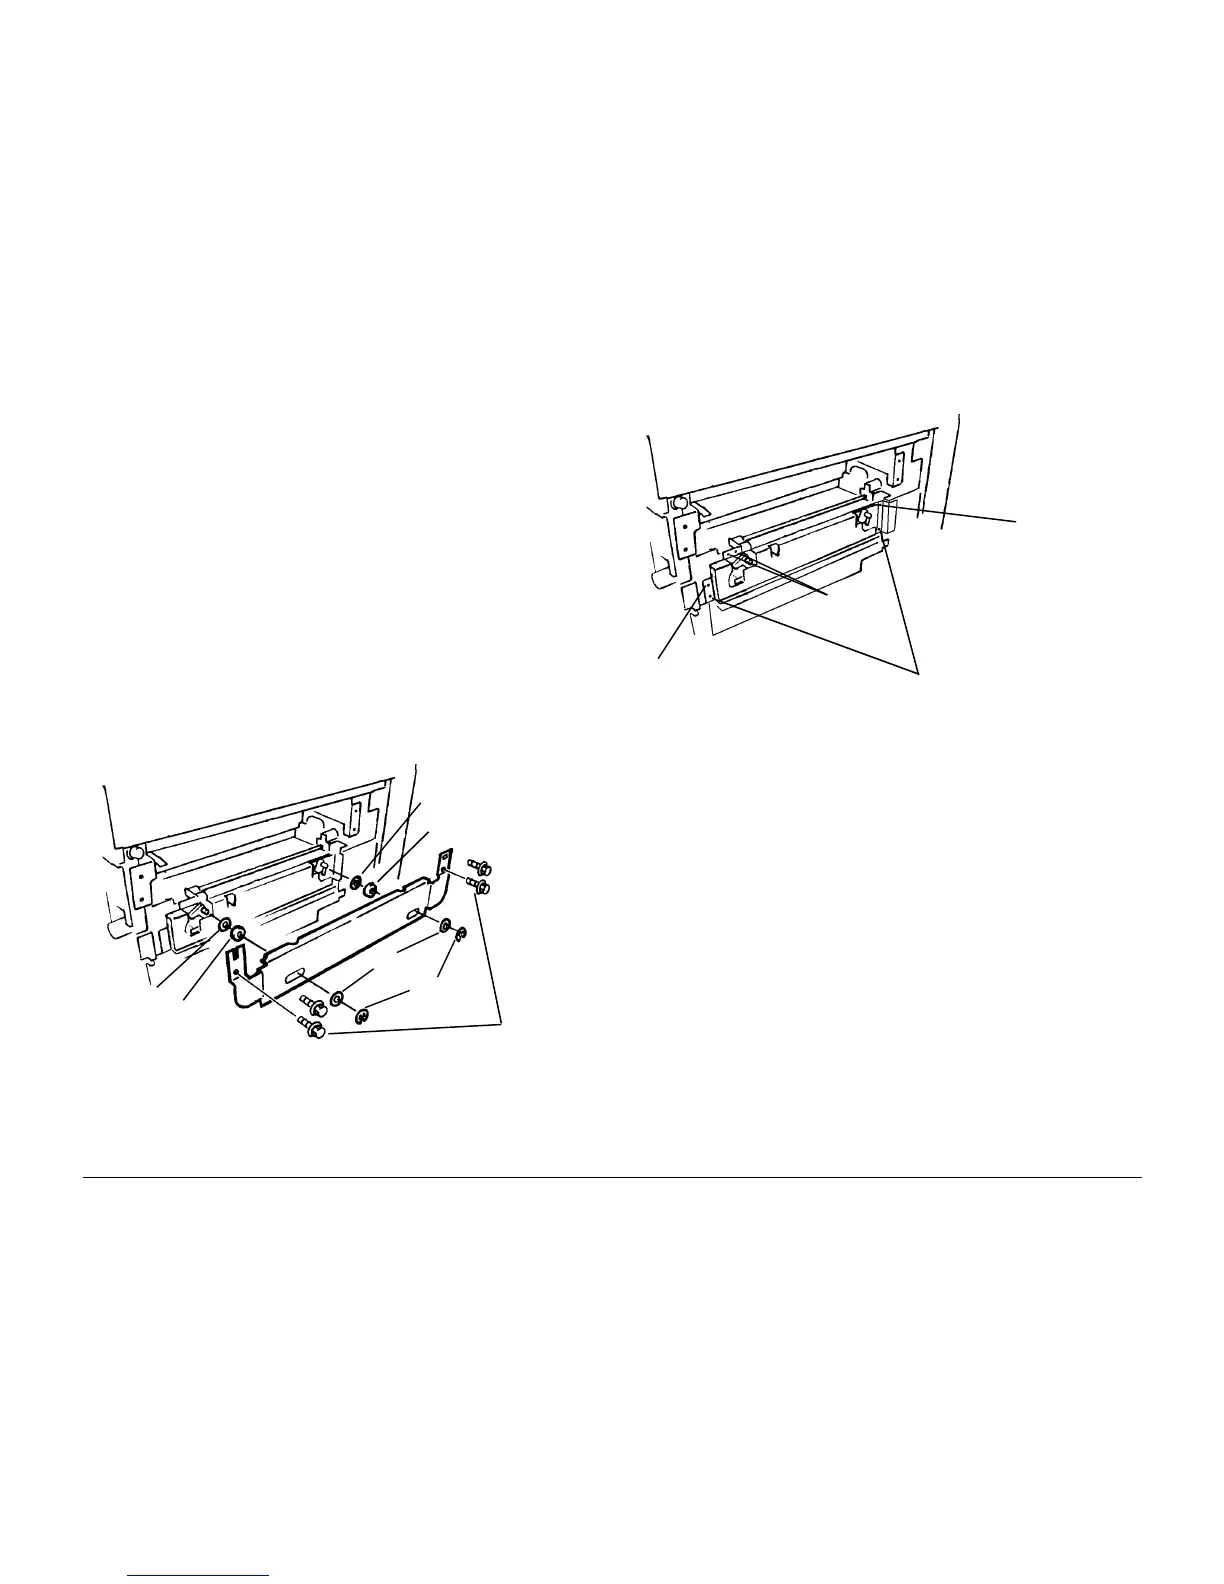
11. Remove Lift Bracket (Figure 1).
a. Remove E-Rings (2) and Washers (2).
b. Remove Screws (4) and remove Lift Bracket.
c. Remove Bearings (2) and Washers (2).
Figure 1 Removing Lift Bracket
12. Remove Right Xerographic Lift (Figure 2).
a. Remove Auger Mounting Screws (2).
b. Remove Lift Position Screw.
c. Remove Secondary Position Screw.
d. Remove Lower Screws (2).
e. Remove Right Xerographic Lift.
Figure 2 Removing Right Xerographic Lift
Replacement
Move Xerographic Release Lever to down position before reinstalling Belt Module.
Washers (2)
E-Rings (2)
Screws (4)
Bearing
Washer
Washer
Bearing
Lift Posi-
tion
Screw
Lift Secondary
Position Screw
Auger
Mounting
Screws (2)
Lower Screws (2)
 Loading...


