6/02
4-178
DC1632/2240
ADJ 9.13
Prelaunch Training/Review
Repairs and Adjustments
ADJ 9.13 UI Display Calibration
Purpose
Adjust the display by making the buttons on the display correspond to the Touch Panel, so that
users can correctly select the content indicated on the display.
Perform this adjustment when UI PWB or the Control Panel are replaced.
Adjustment
NOTE: Use the touch pen for the adjustment as it is installed in the UI Control Panel of the
machine. A tapered substitute can be replaced if the pen has been lost. In this case, care
should be taken not to have the UI surface scratched.
1. Switch off the power and remove the Control Panel Cover.
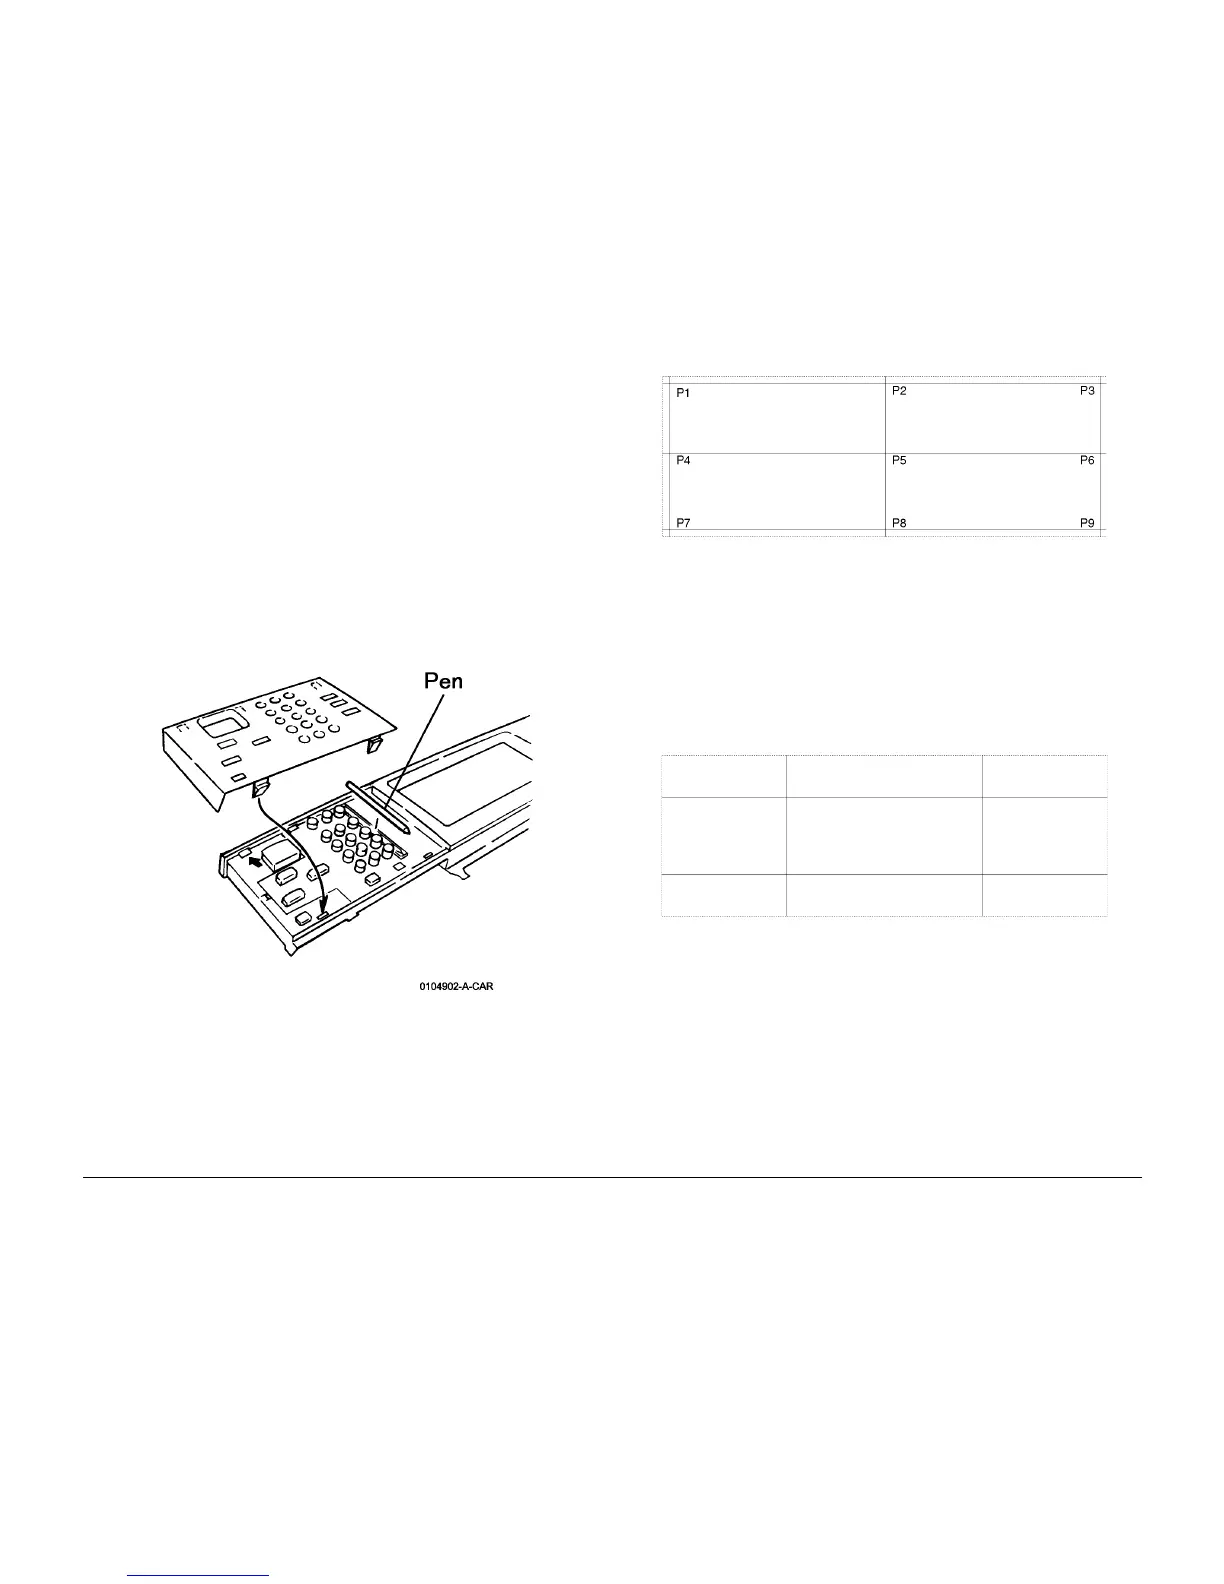
2. Remove the Touch Pen (Figure 1).
Figure 1 Accessing the Touch Pen
3. Switch on the power while simultaneously holding down the numerical keys 0, 1, and 3
on the Control Panel.
Calibration Screen 1 will be displayed (Figure 2).
Figure 2 Calibration Screen 1
4. In numeric sequence (P 1 to P 9), touch the intersections of the vertical and horizontal
lines with the touch pen. A message is displayed on the screen after each touch.
After pressing down all the buttons, the machine will calculate the deviation and the cor-
rection value on the coordinates. This automatic calculation takes about 0.1 second.
5. Calibration Screen 2 will be displayed (Figure 3).
6. Apply the adjusting pen to each of the four line intersections. A black square should
appear at the point of contact, and a beep should sound.
ï If four beeps are heard, adjustment is OK.
ï If you donít hear four beeps, repeat the adjustment from step 3.
Figure 3 Adjustment Screen #2
7. Switch off the power. Restore the pen to its original place and reinstall the Control Panel
Cover.

 Loading...


