6/02
4-71
DC1632/2240
REP 9.5, REP 9.6
Repairs and Adjustments
Prelaunch Training/Review
REP 9.5 Full Toner Sensor
Parts List on PL 4.1
Removal
WARNING
To avoid personal injury or shock, do not perform repair or adjustment activities with
the power switch on or electrical power applied to the machine.
1. Open Front Cover.
2. Remove Waste Cartridge (REP 9.4).
3. Remove Waste Cartridge Cover (REP 9.3).
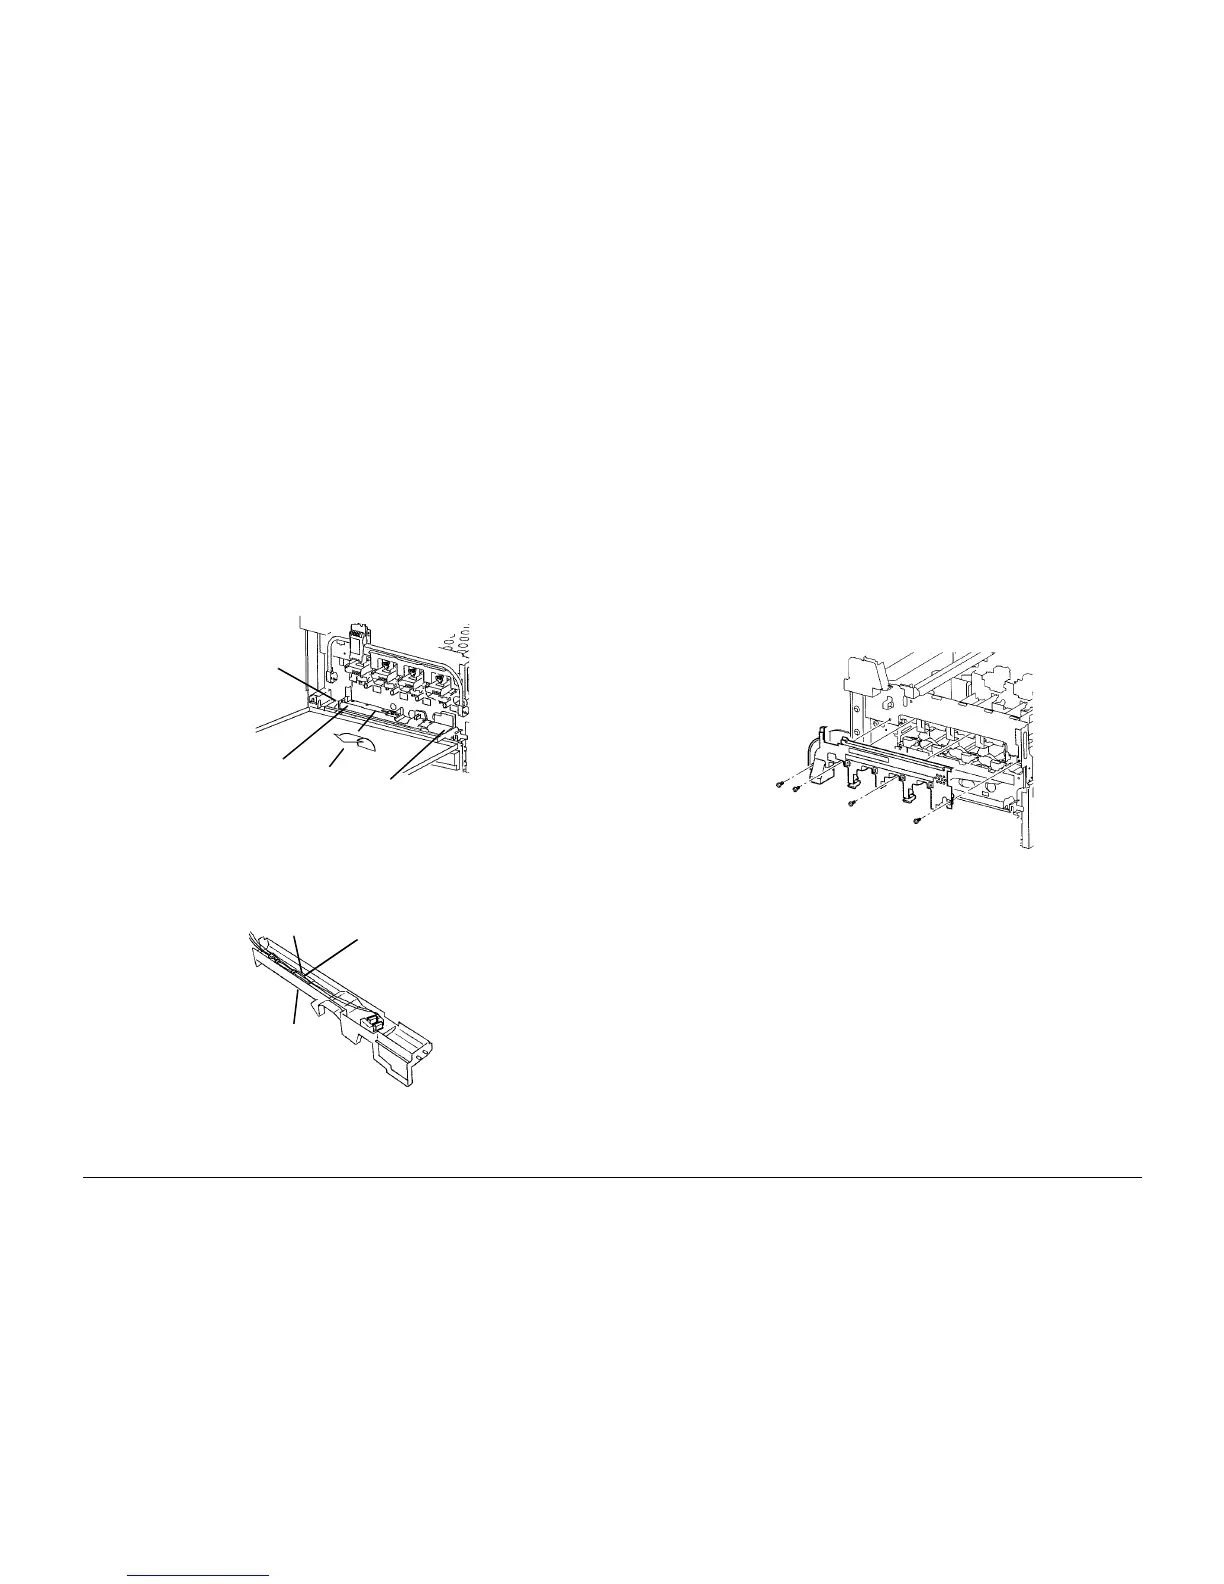
4. Access Waste Cartridge Full Sensor (Figure 1).
a. Lift Left End slightly and pull left to disengage Mounting Tabs.
b. Rotate Sensor Support and remove. Left End harness connection limits movement.
Figure 1 Accessing Waste Cartridge Full Sensor
5. Remove Waste Cartridge Full Sensor (Figure 2).
a. Push against Sensor Head while releasing Locking Tabs.
b. Disconnect sensor from harness.
Figure 2 Removing Waste Cartridge Full Sensor
REP 9.6 Inner Cover
Parts List on PL 10.2
Removal
WARNING
To avoid personal injury or shock, do not perform repair or adjustment activities with
the power switch on or electrical power applied to the machine.
1. Open Front Cover.
2. Open Left Cover Assembly.
3. Remove Y, M, C, K, Drum.
4. Remove Fuser Front Cover (REP 14.8).
5. Release and move Xerographic Release Lever half way down.
6. Remove Dispenser Assembly Cover (Figure 1).
a. Remove Screws (4).
b. Remove Dispenser Assembly Cover.
Figure 1 Removing Toner Transport Cover
Left
End
Mounting Tabs
Sensor
Support
Connected
Harness
Locking
Tabs
Waste Car-
tridge Full
Sensor
Sensor
Head
Screws (4)

 Loading...


