1 External Memory Devices
31-6 WindO/I-NV4 User’s Manual
Uploading
This procedure shows how to upload specified data from the External Memory Device folder on the external memory
device for the currently running project.
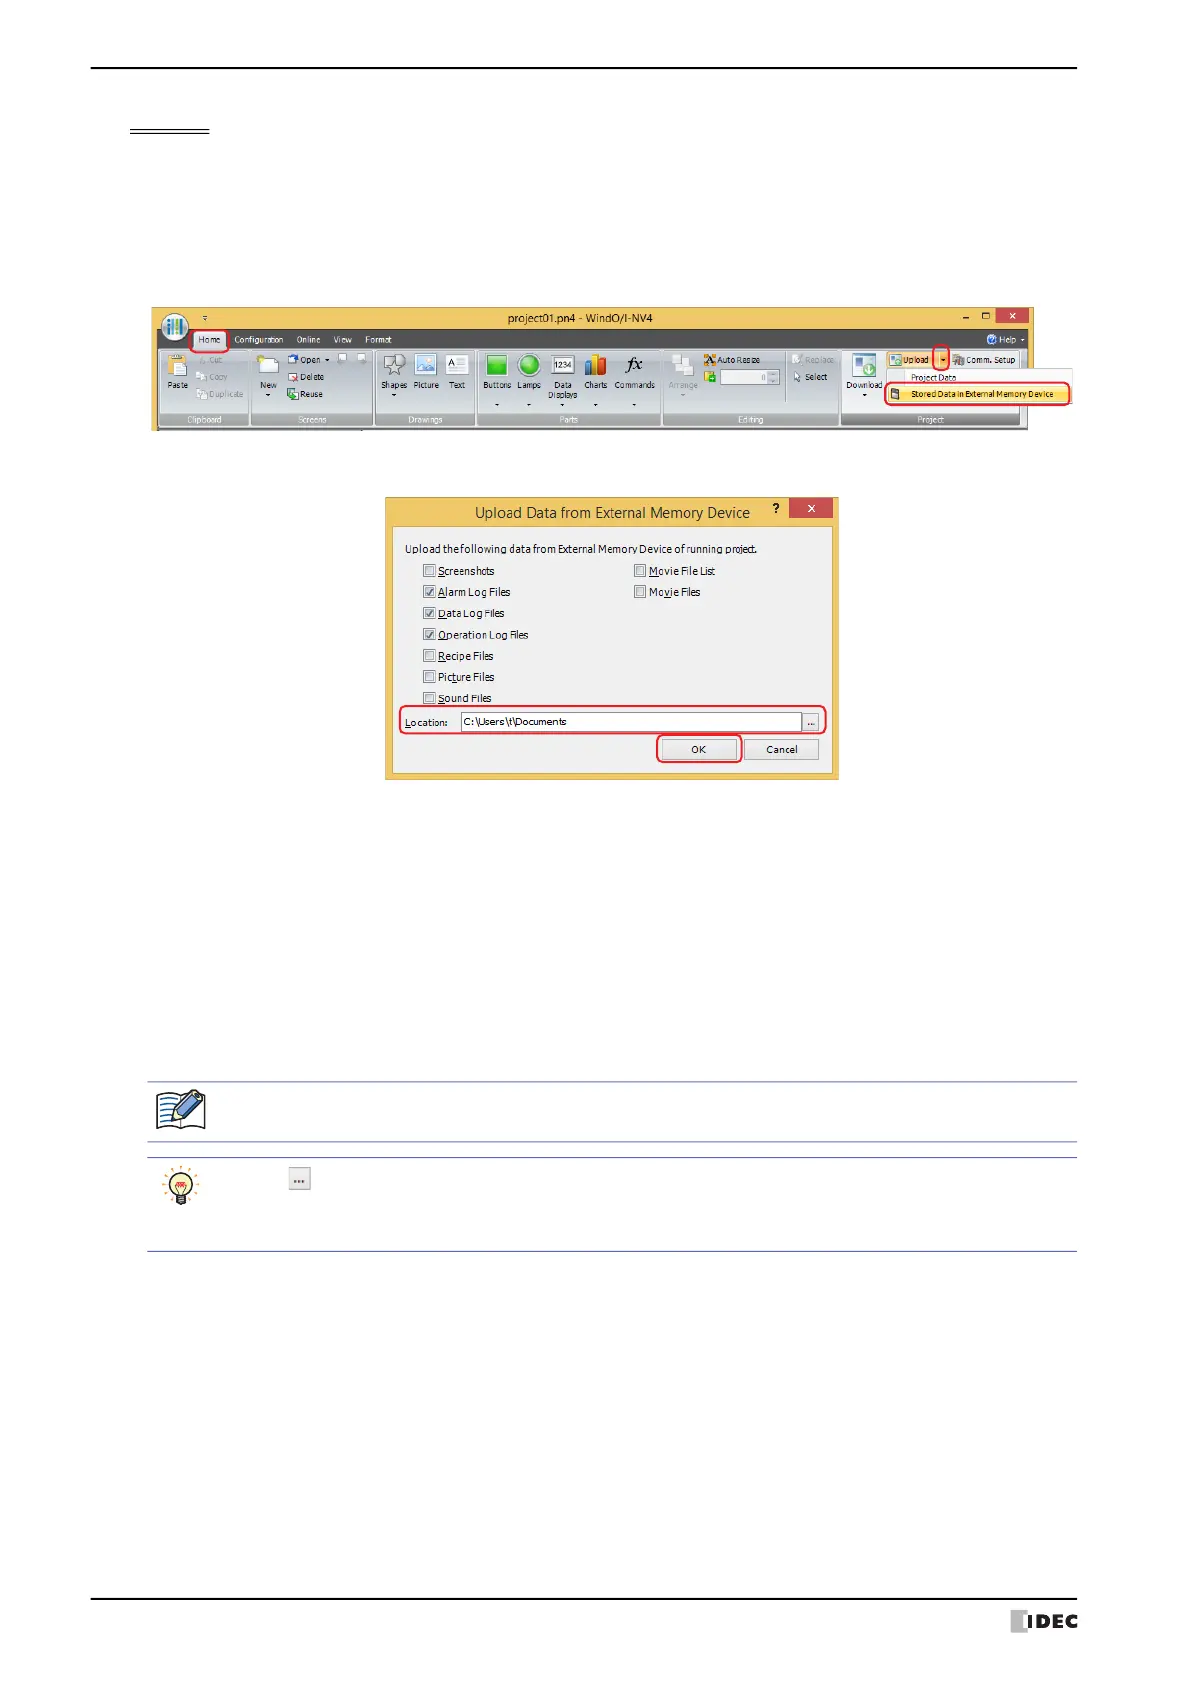
1 On the Home tab, in the Project group, click the arrow next to Upload.
2 Click Stored Data in External Memory Device.
The Upload Data from External Memory Device dialog box appears.
3 Select the items to be uploaded, and then specify the destination folder in the Location box.
Uploadable data is as follows.
• Screenshots
• Alarm Log Files
• Data Log Files
• Operation Log Files
• Recipe Files
• Picture Files
• Sound Files
*1
• Movie File List
*2
• Movie Files
*2
4 Click OK.
The External Memory Device Maintenance dialog box appears and the data upload begins.
A message box appears when the data upload is complete.
5 Click OK.
6 Click Close on the External Memory Device Maintenance dialog box.
*1 This is applicable for HG2J-7U and models with an audio interface only.
*2 This is applicable for models with a video interface only.
If security is enabled for the project on MICRO/I, a dialog appears for you to enter a user name and
password. For details, refer to Chapter 23 “User Accounts and the Security Function” on page 23-1.
• Click to call up the Select a Folder dialog box and specify the destination folder for uploading.
• After starting WindO/I-NV4, screen shots, alarm log data, data log data, and recipe files can be uploaded
from an External Memory Device folder without opening project data.
 Loading...