4-4 Service Manual
7510
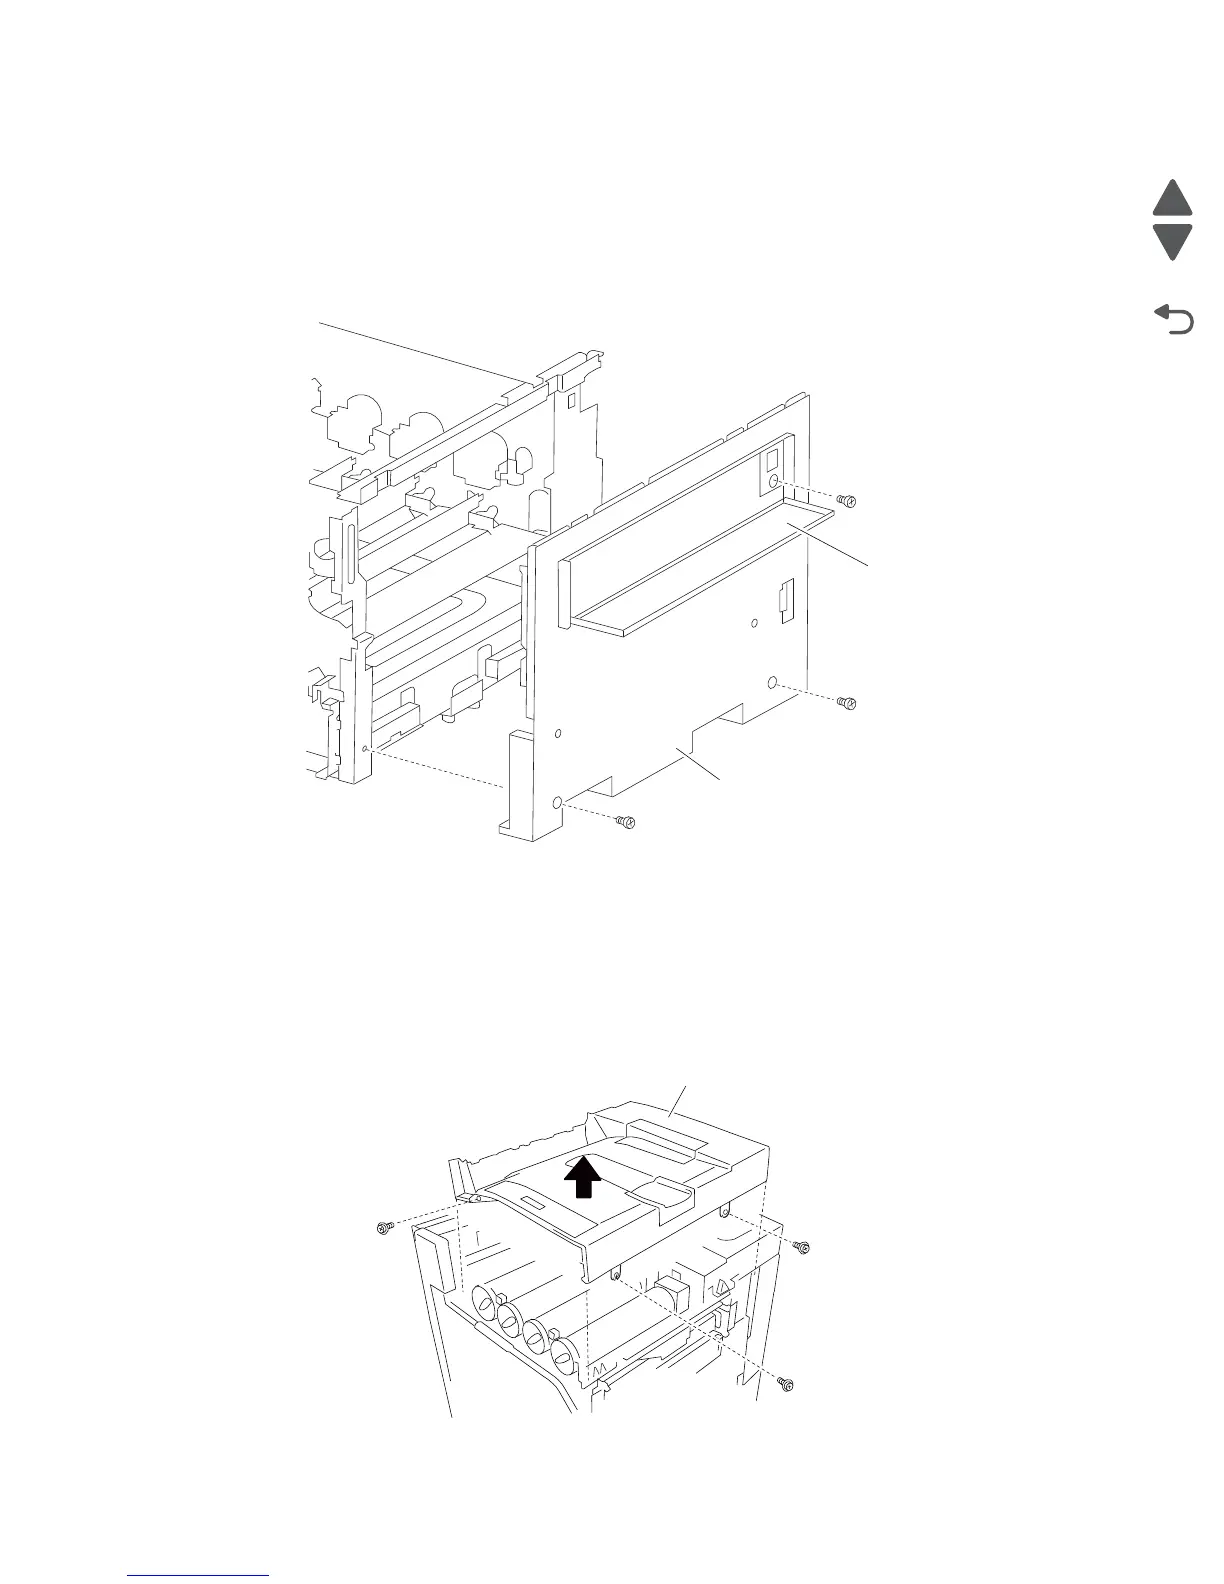
Right cover assembly removal
Note: Detach the finisher if equipped. Refer to the MFP or Printer Finisher Service Manual.
1. Open the transfer belt unit access door (A).
2. Remove the three screws securing the right cover assembly (B) to the machine.
3. Move the right cover assembly (B) down, and pull out.
4. Remove the right cover assembly (B).
Top cover assembly removal
1. Remove the base machine from the scanner/ADF stand assembly.
2. Open the printer front door assembly.
3. Remove the rear cover assembly. See “Rear cover assembly removal” on page 4-5.
4. Remove the right cover assembly. See “Right cover assembly removal” on page 4-4.
5. Remove the three screws securing the top cover assembly (A) to the machine.
6. Remove the top cover assembly (A).

 Loading...


