4-122 Service Manual
7510
Scanner removals
Scanner unit assembly removal
1. Remove the platen cushion assembly. See “Platen cushion removal” on page 4-137.
2. Remove the ADF unit assembly. See “ADF unit assembly removal” on page 4-136.
3. Remove the operator panel assembly. See “Operator panel assembly removal” on page 4-126.
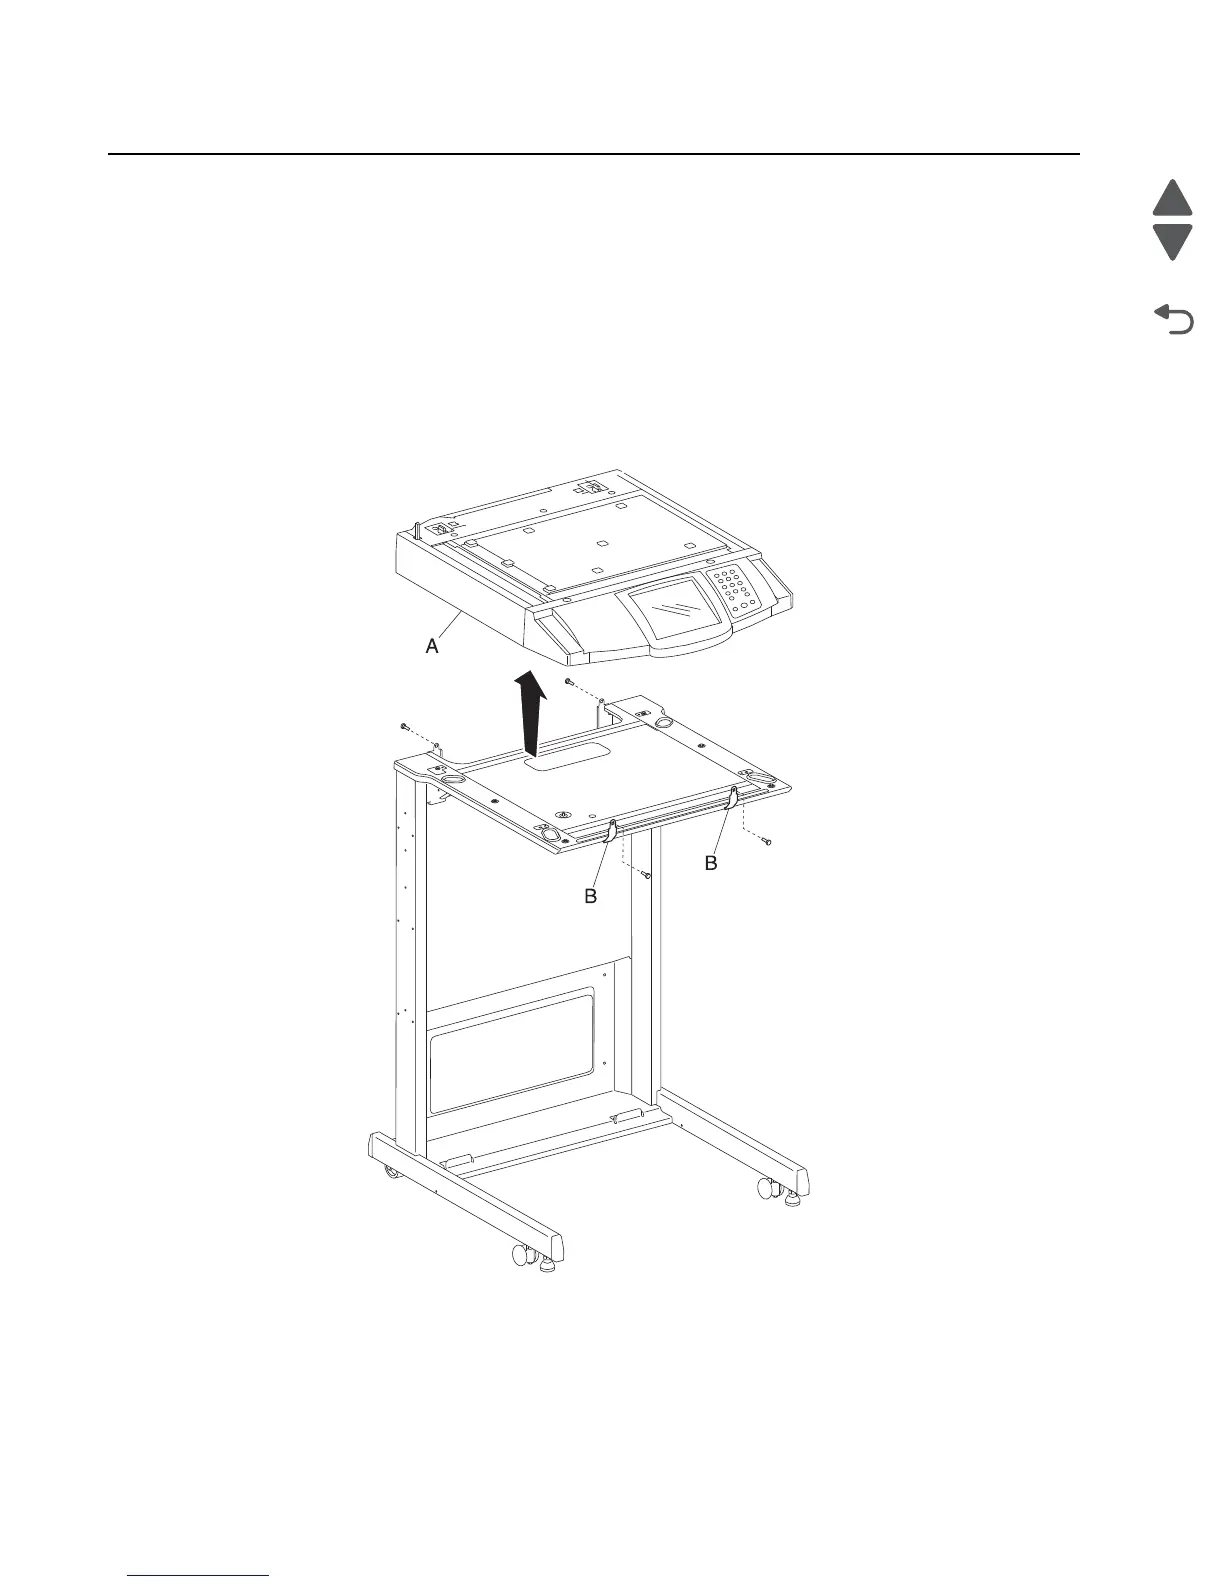
4. Disconnect all connections from the scanner unit assembly (A).
5. Remove the two rear screws securing the scanner unit assembly (A) to the machine.
6. Remove the two screws securing the two brackets (B) to the machine.
7. Remove the two brackets (B).
8. Remove the scanner unit assembly (A).

 Loading...


