4-140 Service Manual
7510
ADF left cover handle removal
1. Open the ADF left cover assembly.
2. Remove the ADF left cover media guide. See “ADF left cover media guide removal” on page 4-151.
3. Remove the ADF left cover media guide. See “ADF left cover media guide removal” on page 4-151.
4. Remove the ADF feed/pick assembly. See “ADF feed/pick roll assembly removal” on page 4-149.
5. Remove the sheet through actuator. See “Sheet through actuator removal” on page 4-147.
6. Remove the document set actuator. See “Document set actuator removal” on page 4-150.
7. Remove the pick roll position motor assembly. See “Pick roll position motor assembly removal” on
page 4-151.
Note: The pick roll position motor assembly does not need to be completely removed; it can be allowed to
hand loosely out of the way.
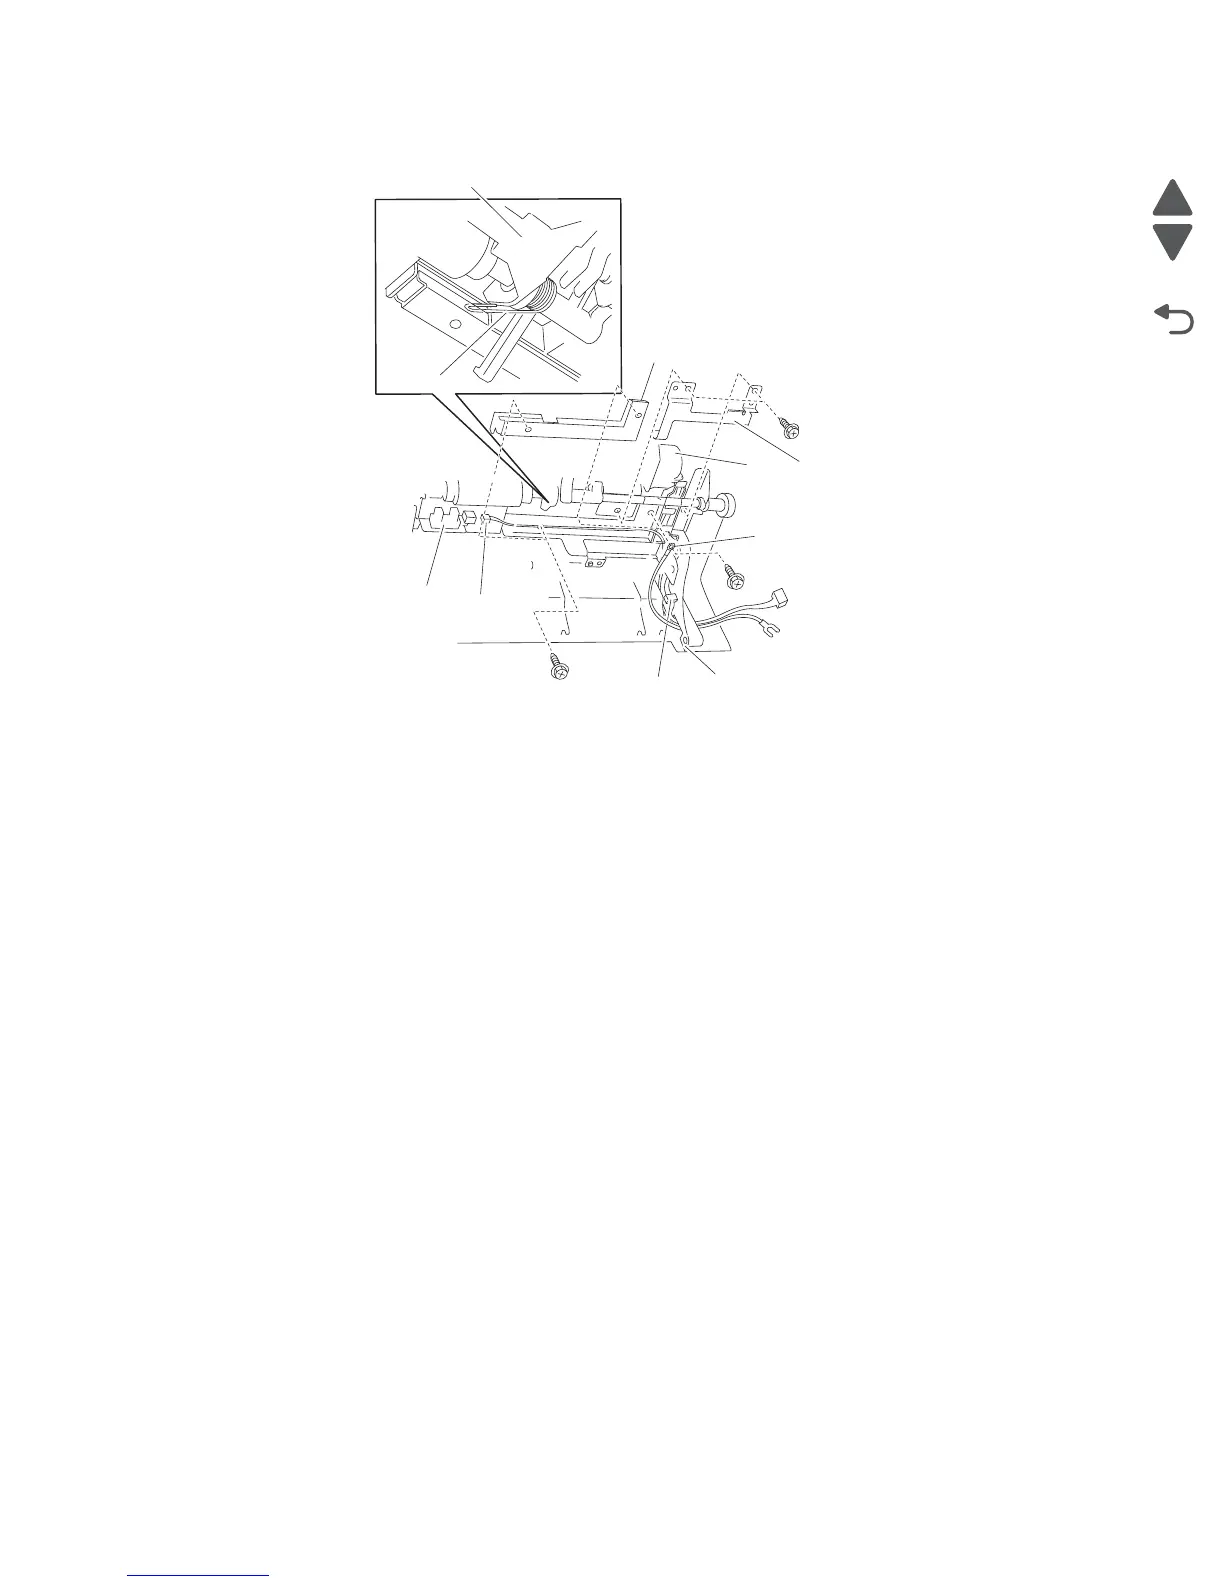
8. Remove the two screws securing the plastic harness guide (A) to the assembly.
Note: The plastic harness guide (A) does not need to be completely removed; it can be allowed to hand
loosely out of the way.
9. Remove the spring (B) from the ADF left cover handle (C).
10. Remove the two screws securing the front bracket (D) to the assembly.
11. Remove the front bracket (D).
12. Remove the two screws securing the rear bracket (E) to the assembly.
13. Remove the rear bracket (E).
Note: The grounding plate (F) will become detached.
14. Gently pry or push the ADF left cover handle (C) from the front and rear mounting points in the assembly.
15. Remove the ADF left cover handle (C).
J
I
E
C
onnector
G
Connector
F
K
L
H

 Loading...


