Repair information 4-181
7510
2000-sheet dual input (TTM)—tray 3 front cable assembly removal
1. Remove the tray module left cover. See “2000-sheet dual input (TTM)— tray module left cover removal”
on page 4-174.
2. Remove the TTM media tray 3 assembly. See “2000-sheet dual input (TTM)—TTM media tray 3
assembly removal” on page 4-178.
3. Remove the tray 3 front cover. See “2000-sheet dual input (TTM)—tray 3 front cover removal” on
page 4-178.
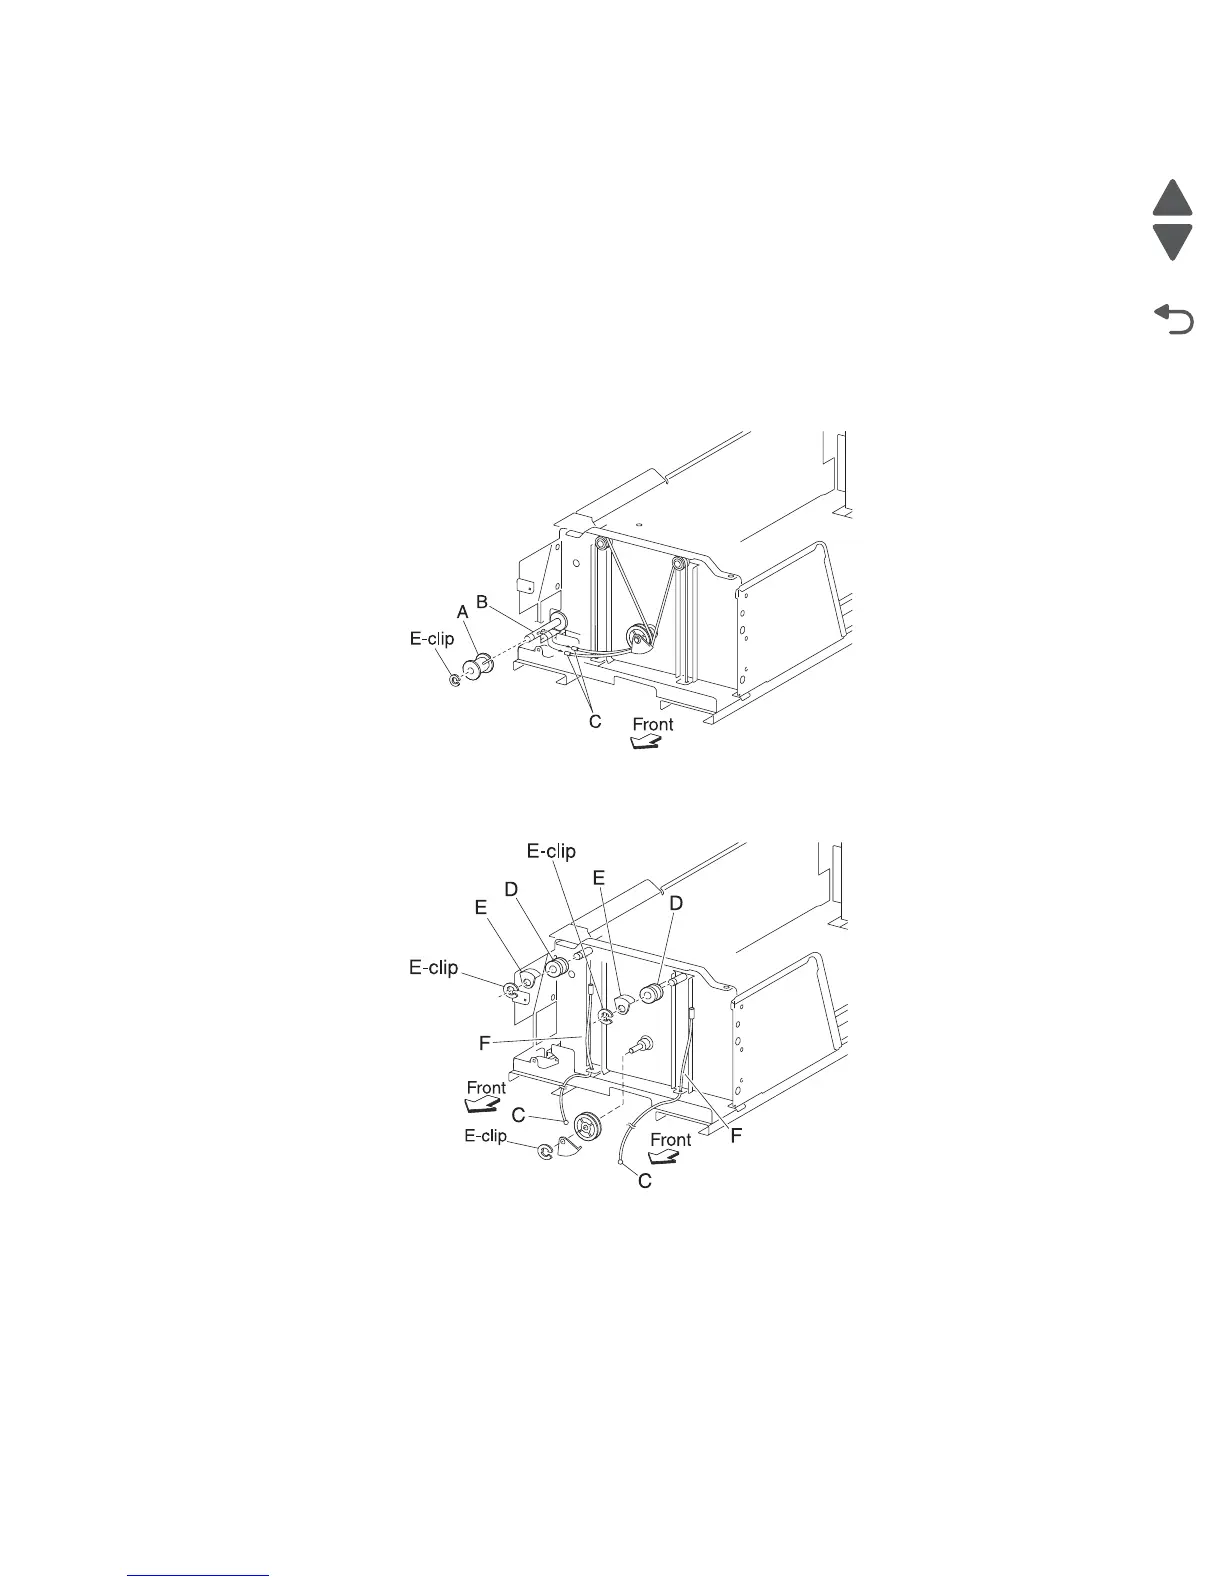
4. Remove the E-clip with a prying tool securing the tray lift pulley (A) to the tray lift shaft assembly (B).
5. Remove the lift cable pulley (A).
Note: The tray 3 front cables (C) become detached.
6. Remove the tray 3 front cables (C) from the tray lift shaft assembly (B).
7. Remove two E-clips with a prying tool securing the two small pulleys (D) on the front of the frame assembly.
8. Remove two small guides (E) and the two small pulleys (D).
9. Remove the tray 3 front cables (C) from the bottom plate (F).
Replacement note: Before re-installing:
– It is recommended that all four cables be replaced.
– Ensure tray 3 front cables (C) are not twisted or kinked.
– Route the cables properly as shown in the figure.
– Replace the cables by setting the frame assembly (B) on its side as shown in the figure.

 Loading...