4-48 Service Manual
7510
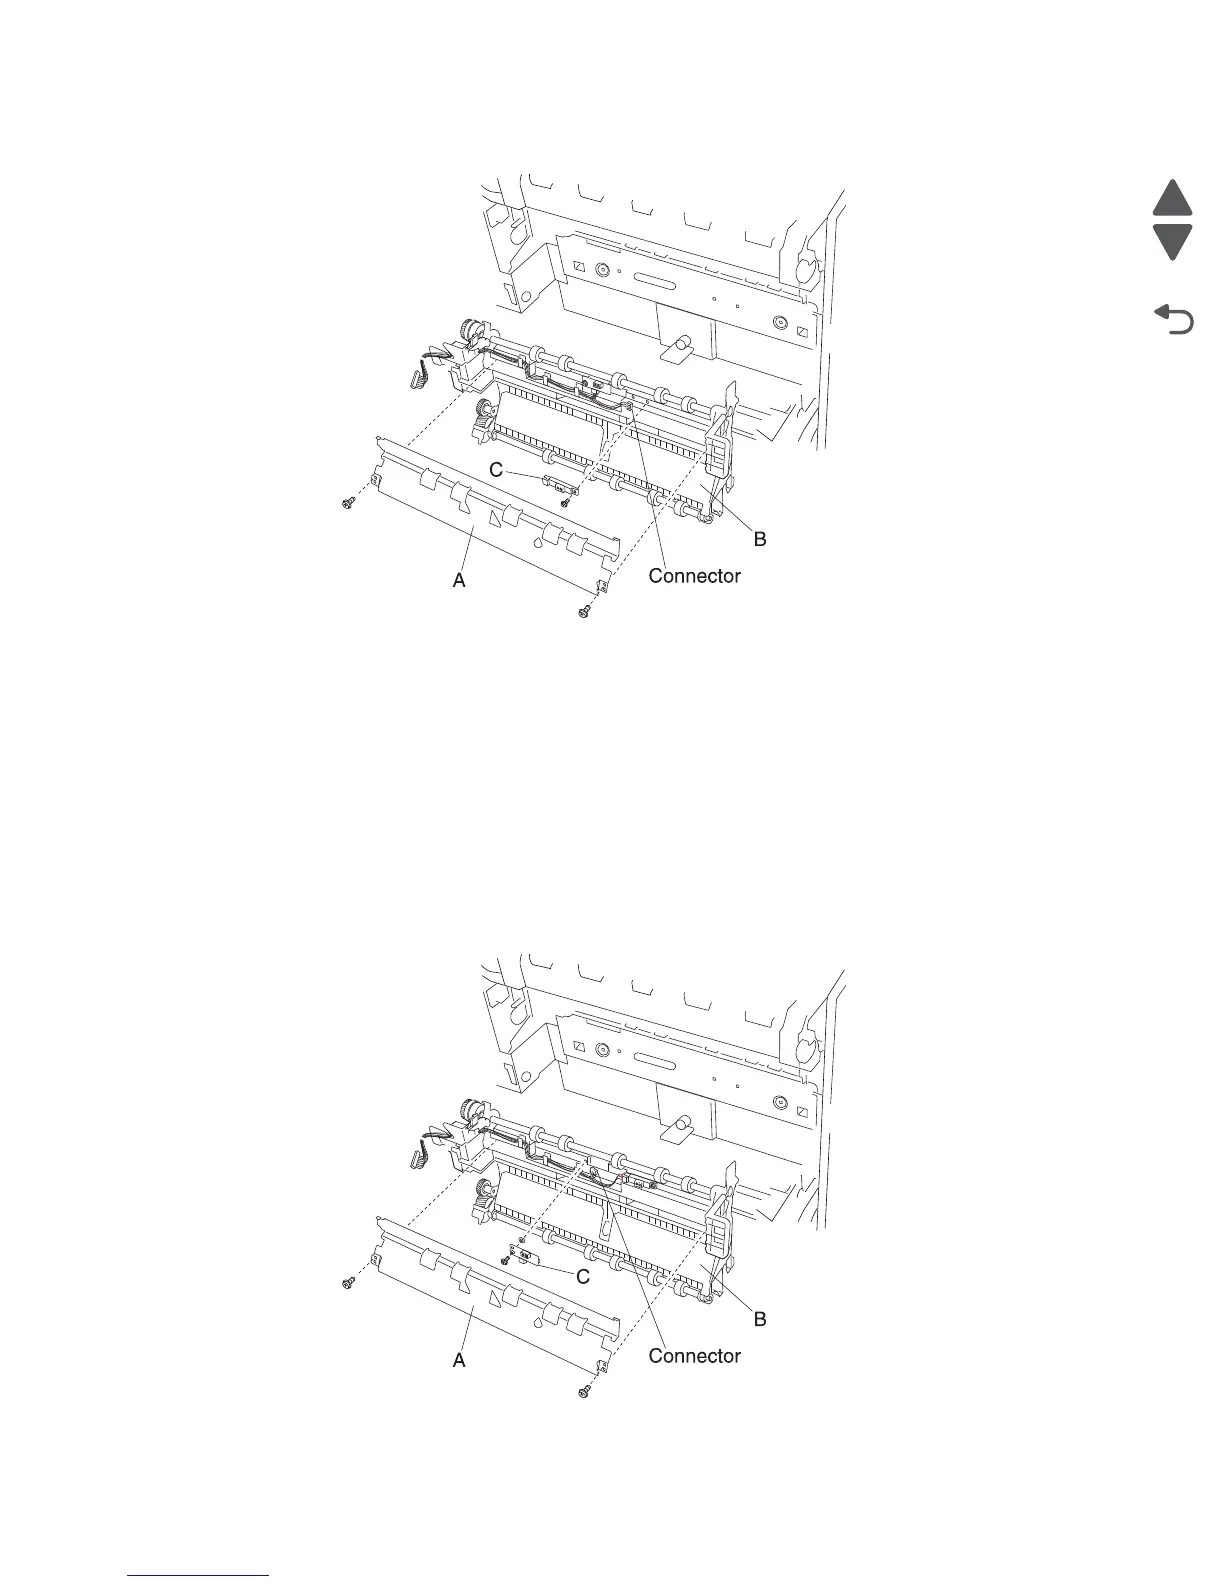
9. Disconnect the connector from the sensor (registration) (C).
Sensor (transparency detect) removal
1. Remove the rear cover assembly. See “Rear cover assembly removal” on page 4-5.
2. Remove the rear left middle cover. See “Rear left middle cover removal” on page 4-6.
3. Remove the MPF feed unit assembly. See “MPF feed unit assembly removal” on page 4-8.
4. Remove the printer left door assembly. See “Printer left door assembly removal” on page 4-36.
5. Remove the two screws securing the plate (A) to the registration transport roll assembly (B).
6. Remove the plate (A).
7. Remove the screw securing the sensor (transparency detect) (C) to the registration transport roll assembly
(B).
8. Remove the sensor (transparency detect) (C).
9. Disconnect the connector from the sensor (transparency detect) (C).

 Loading...


