4-76 Service Manual
7510
12. Gently raise the rear of the appropriate CMY erase lamp assembly (B) to detach the mounting hook from the
machine.
13. Remove the appropriate CMY erase lamp assembly (B).
K erase lamp assembly removal
Warning: Ensure the transfer belt assembly unit is removed, or damage will occur.
1. Remove the front left cover. See “Front left cover removal” on page 4-9.
2. Remove the waste toner cartridge cover. See “Waste toner cartridge cover removal” on page 4-49.
3. Remove the waste toner cartridge sensor assembly. See “Waste toner cartridge sensor assembly
removal” on page 4-49.
4. Remove the sensor (waste toner cartridge full). See “Sensor (waste toner cartridge full) removal” on
page 4-50.
5. Remove the transfer belt unit assembly. See “Transfer belt unit assembly removal” on page 4-16.
6. Remove the inner cover. See “Inner cover removal” on page 4-53.
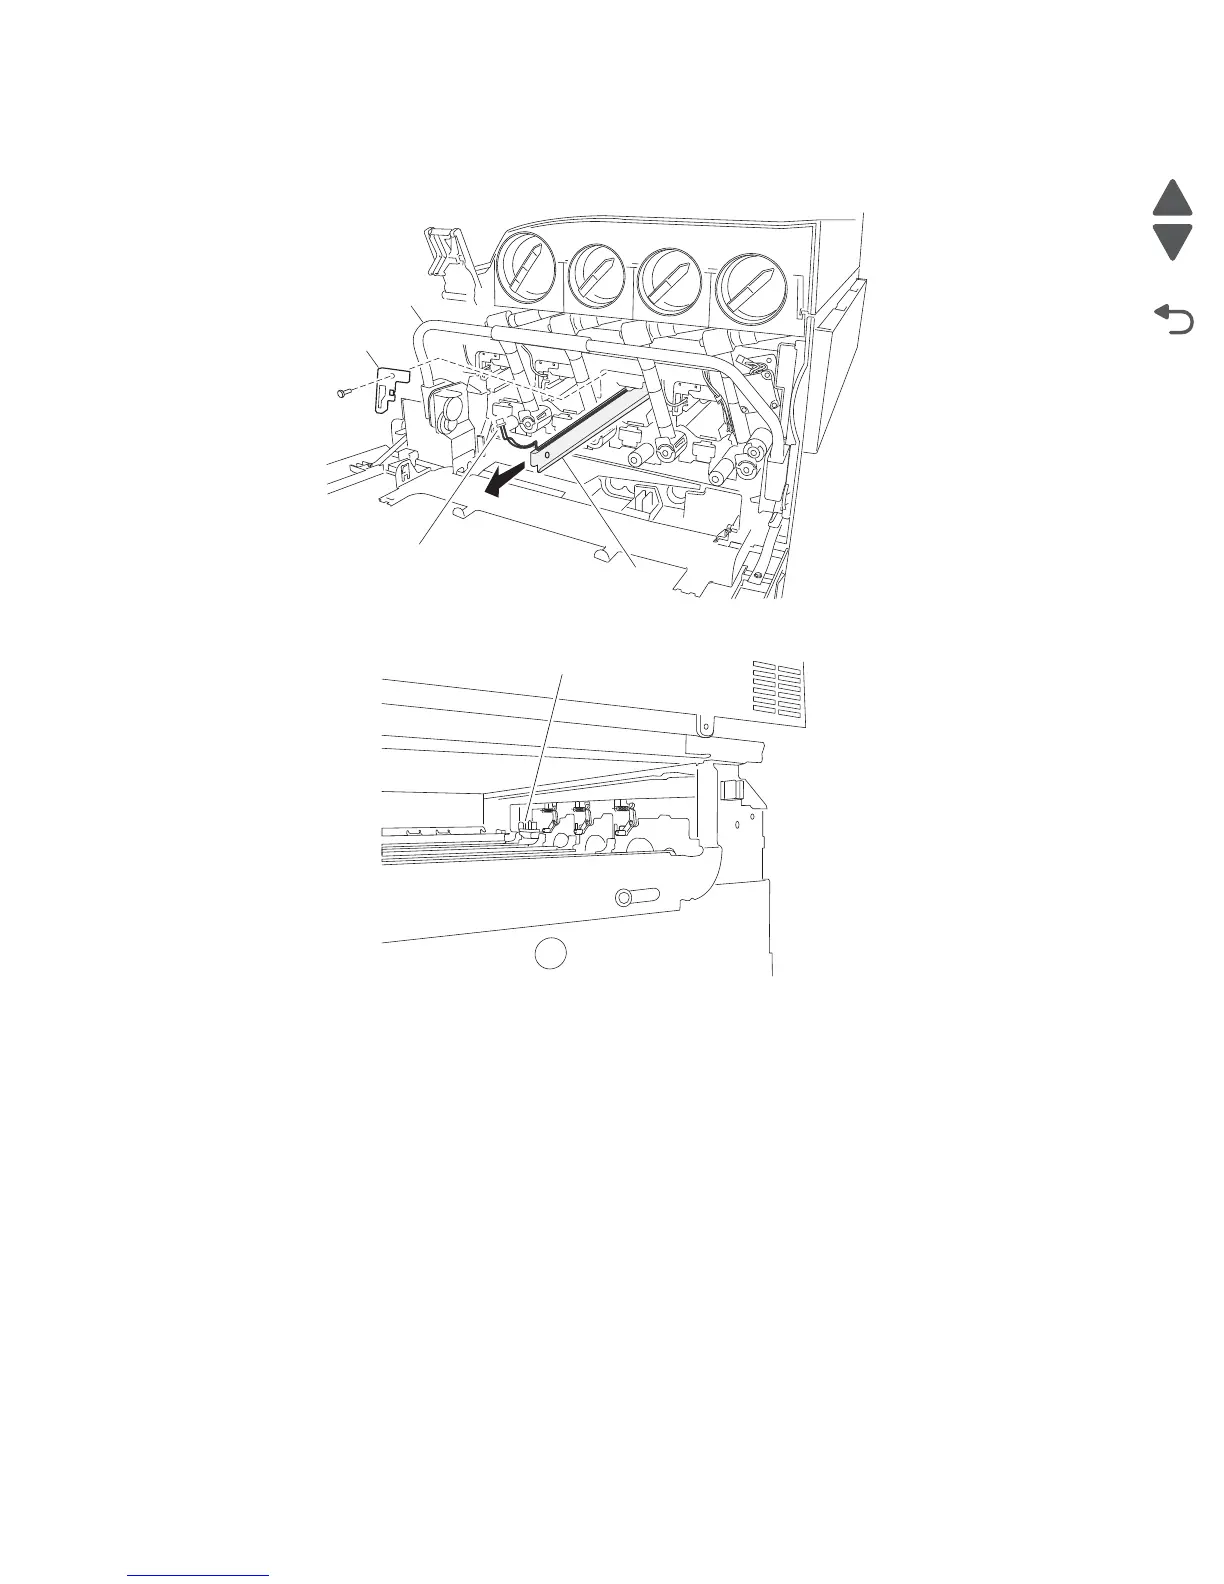
7. Raise the transfer belt lift handle (A) to its upper-most position.
8. Disconnect the connector from the K erase lamp assembly (B).
9. Release the harness from the clamp.
10. Remove the screw securing the bracket (C) to the machine.
11. Lower the transfer belt lift handle (A) to its lower-most position.
12. Access to the rear mounting hook on the K erase lamp (B) can be gained by reaching into the transfer belt
unit opening from the right side of the machine.

 Loading...


