6-4 Phaser 7500 Printer Service Manual
Adjustments and Calibrations
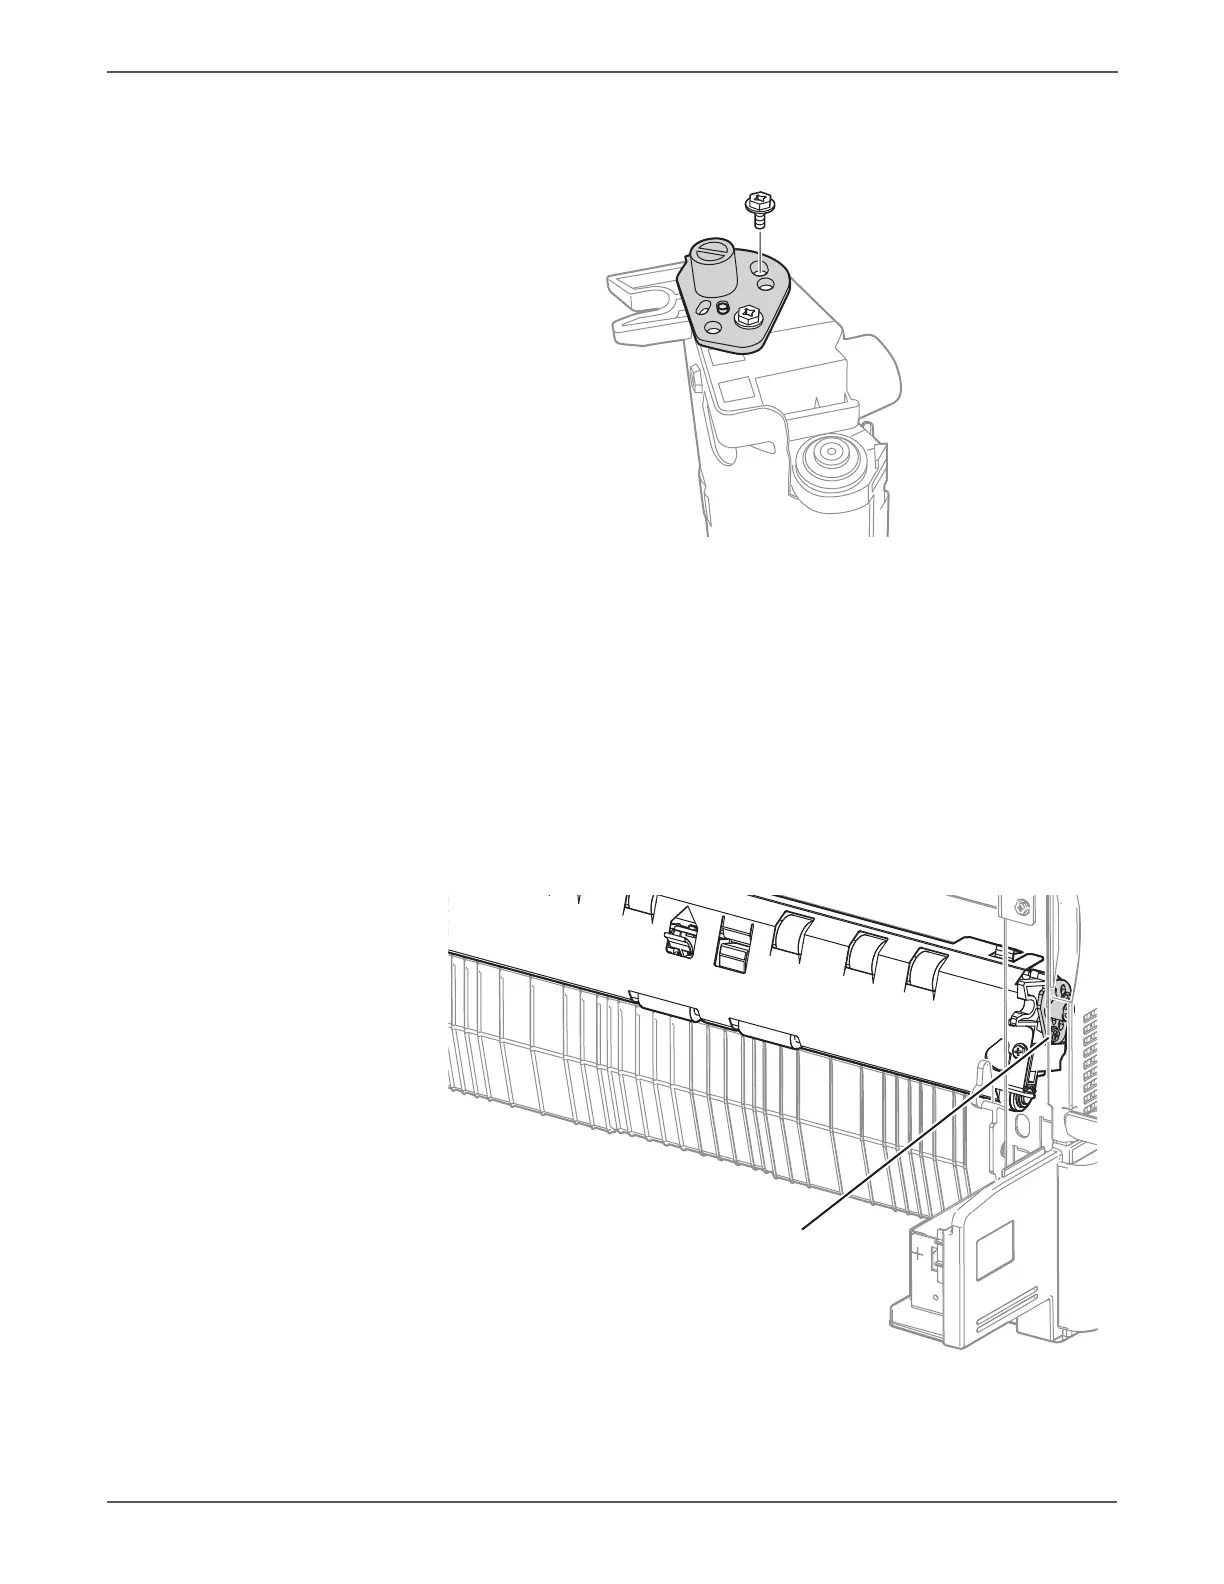
6. Center the Skew Adjusting Block in its range of travel and tighten the bottom
screw. Leave the top screw just loose enough so as to not impede the up and
down movement of the block.
7. Re-install the Registration Assembly in the printer.
8. Make test prints on the printer.
9. Loosen the bottom screw holding the Skew Adjusting Block and move the
front end of the Registration Assembly up or down a small amount at a time
to correct skew. Tighten the bottom screw and make test prints to determine
the effects of each incremental adjustment. Continue making the adjustment
until skew is acceptable.
a. Moving the Registration Assembly up in the front will move the image
counter clockwise on the paper.
b. Moving the Registration Assembly down in the front will move the image
clockwise on the paper.
c. The range of adjustment is approximately +/- 0.25% of the process
length of the media.
10. Remove the Registration Transport Assembly and tighten the top screw, then
reinstall the Registration Assembly.
 Loading...


