Phaser 7500 Printer Service Manual 4-13
General Troubleshooting
AC Power Troubleshooting
Troubleshooting Reference Table
Applicable Parts Wiring and Plug/Jack Map References
■ GFI, PL18.1.15
■ Power Cord, PL18.1.23
■ Main LVPS, PL18.1.11
■ Main Power Switch kit, PL18.1.24
■ “Map 5 - Back Plane, GFI, TM Relay,
Fuser Fan” on page 10-21
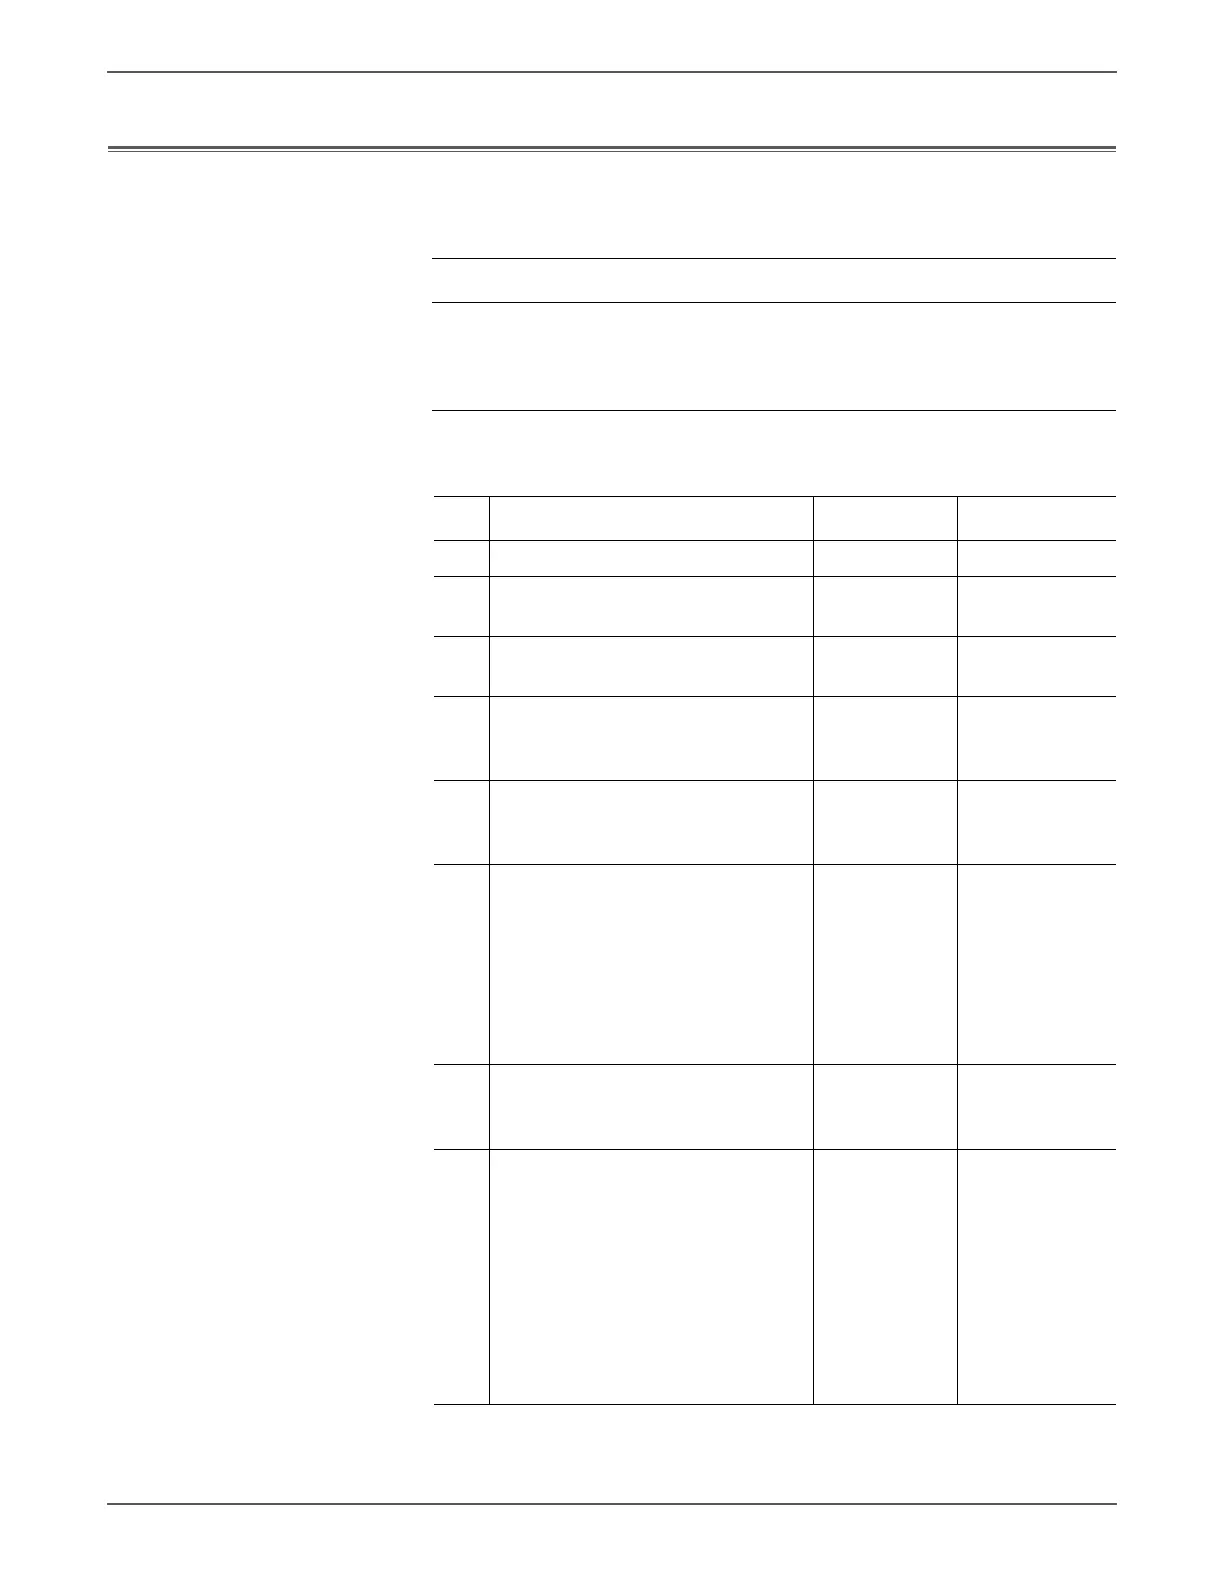
Troubleshooting Procedure Table
Step Action and Questions Yes No
1 Does the GFI Breaker trip? Go to step 3. Go to step 2.
2 Reset the GFI Breaker.
Does the Breaker trip again?
Check AC for a
short circuit.
Troubleshooting
complete.
3 Is line voltage available at GFI
Breaker terminals 1 and 2?
Go to step 6. Go to step 4.
4 Disconnect the Power Cord.
Is line voltage available at the wall
outlet?
Go to step 5. Advise the
customer.
5 Check the Power Cord.
Is the Power Cord undamaged?
Replace the
GFI (REP 18.9,
page 8-196).
Replace the
Power Cord.
6 Unplug the Power Cord and
disconnect J1 on the Main LVPS.
Check these connections.
■ GFI Breaker J10 <=> Main LVPS J1-
1
■ GFI Breaker J11 <=> Main LVPS J1-
3
Are the circuits secure?
Go to step 7. Repair the
wiring.
7 Turn the power On.
Is the voltage between the Main
LVPS J4-1 and J4-3 110V/220V?
Check the AC
circuit to each
component.
Go to step 8.
8 Is the voltage between the Main
Power Switch P57 110V/220V?
Repair
connections in
these circuits:
■ Power Switch
P57 <=>
Main LVPS
J4-1
■ Power Switch
P61 <=>
Main LVPS
J4-3
Go to step 9.
 Loading...


