EasyManuals Logo

Xerox PHASER 7500 Service Manual

Xerox PHASER 7500
992 pages
To Next Page IconTo Next Page
To Previous Page IconTo Previous Page
Page #645 background imageLoading...
Page #645 background image
Phaser 7500 Printer Service Manual 8-83
Service Parts Disassembly
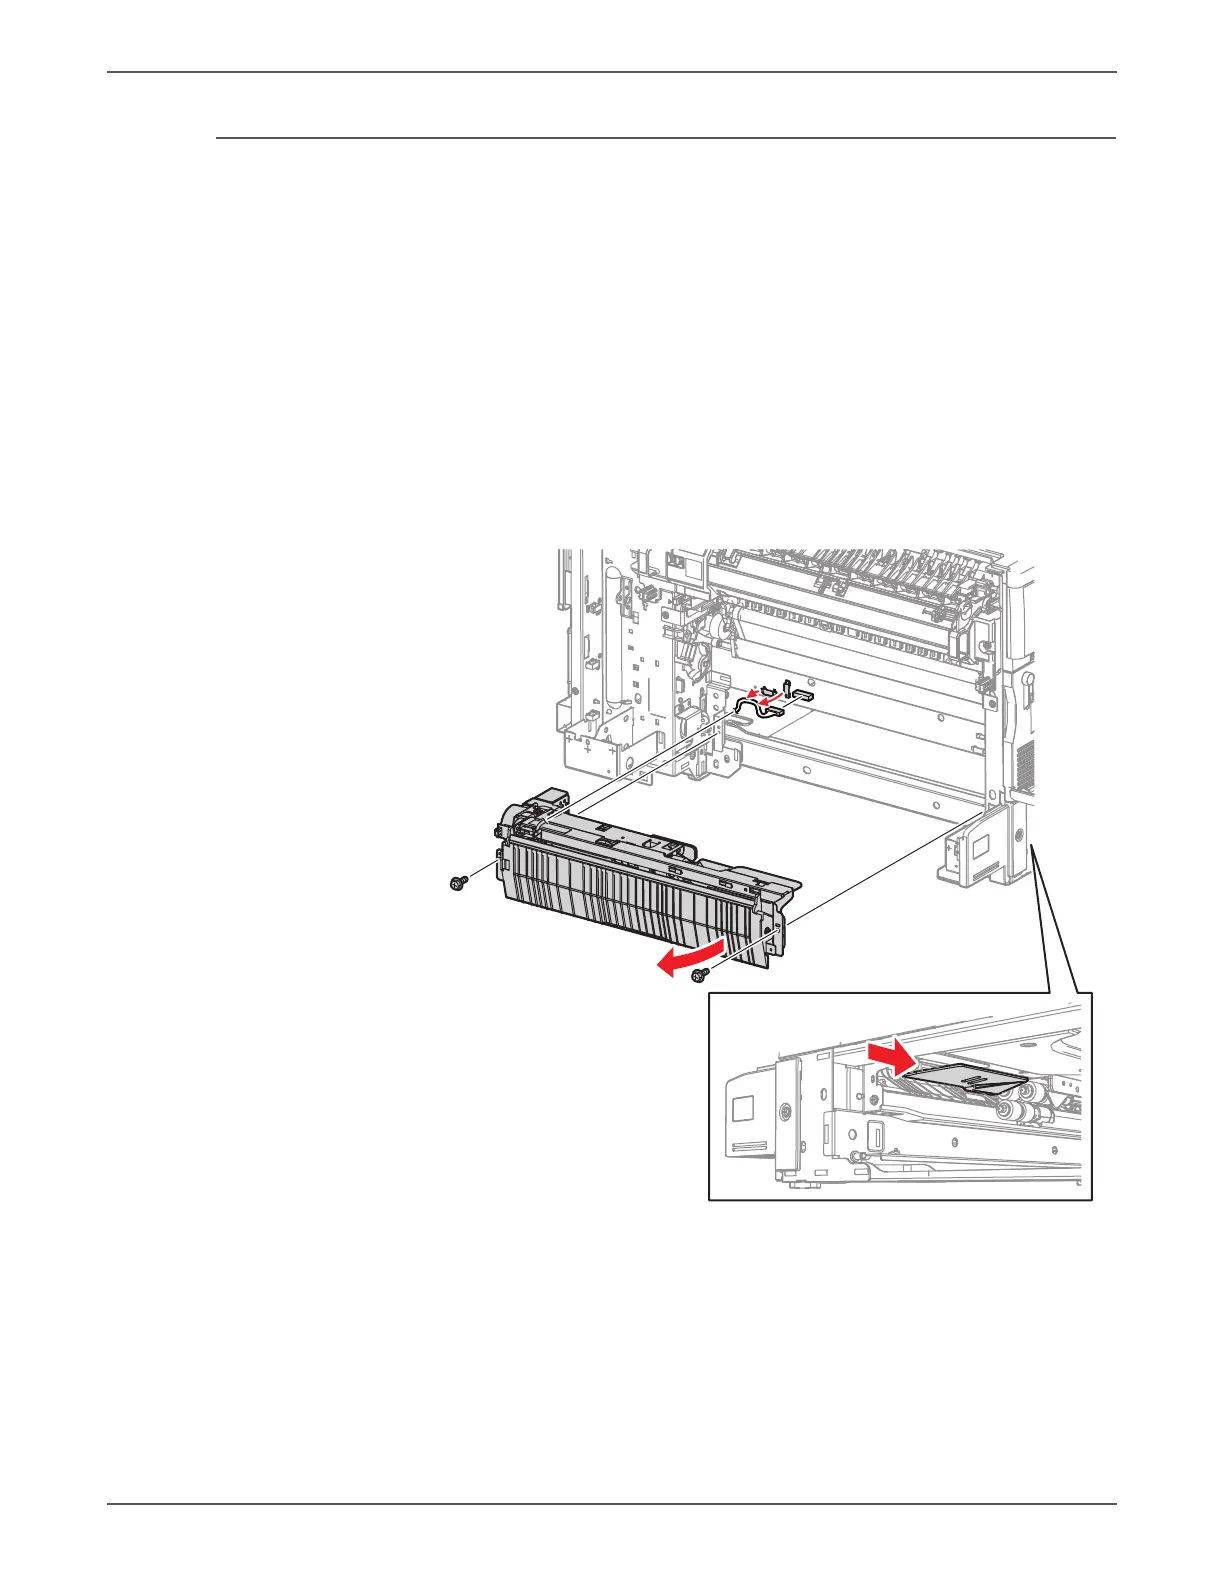
REP 9.9 Tray 2 Feeder Assembly/ Chute Assembly
PL9.3.1/ PL9.3.2
1. Remove the Regi Transport Assembly (REP 15.2, page 8-174).
Note
In the following step, if the Chute cannot be moved towards the rear, do not
force it to move because that is already the correct position.
2. Pull the tray out a few inches.
3. Slide the inner upper (when seen from the Tray Assembly insertion opening)
Chute towards the rear until it stops.
4. Release the 2 clamps that secure the harness that is connected to the Tray 2
Feeder Assembly and disconnect the wiring harness connectors.
5. Remove the 2 screws (silver, 8mm) that secure the Tray 1 Feeder Assembly to
the printer.
s7500-144

Table of Contents

Other manuals for Xerox PHASER 7500

Questions and Answers:

Question and Answer IconNeed help?

Do you have a question about the Xerox PHASER 7500 and is the answer not in the manual?

Xerox PHASER 7500 Specifications

General IconGeneral
Max Print Resolution1200 x 1200 dpi
Monthly Duty Cycle150, 000 pages
Standard Paper Capacity550 sheets
Duplex PrintingOptional
Standard Memory256 MB
Network Connectivity10/100/1000Base-T Ethernet
Supported Operating SystemsWindows, Mac OS, Linux
Max Paper Capacity2, 100 sheets
ConnectivityUSB 2.0, Ethernet
PDLPostScript 3, PCL 6, PDF
Print SpeedUp to 35 ppm

Related product manuals