Phaser 7500 Printer Service Manual 8-71
Service Parts Disassembly
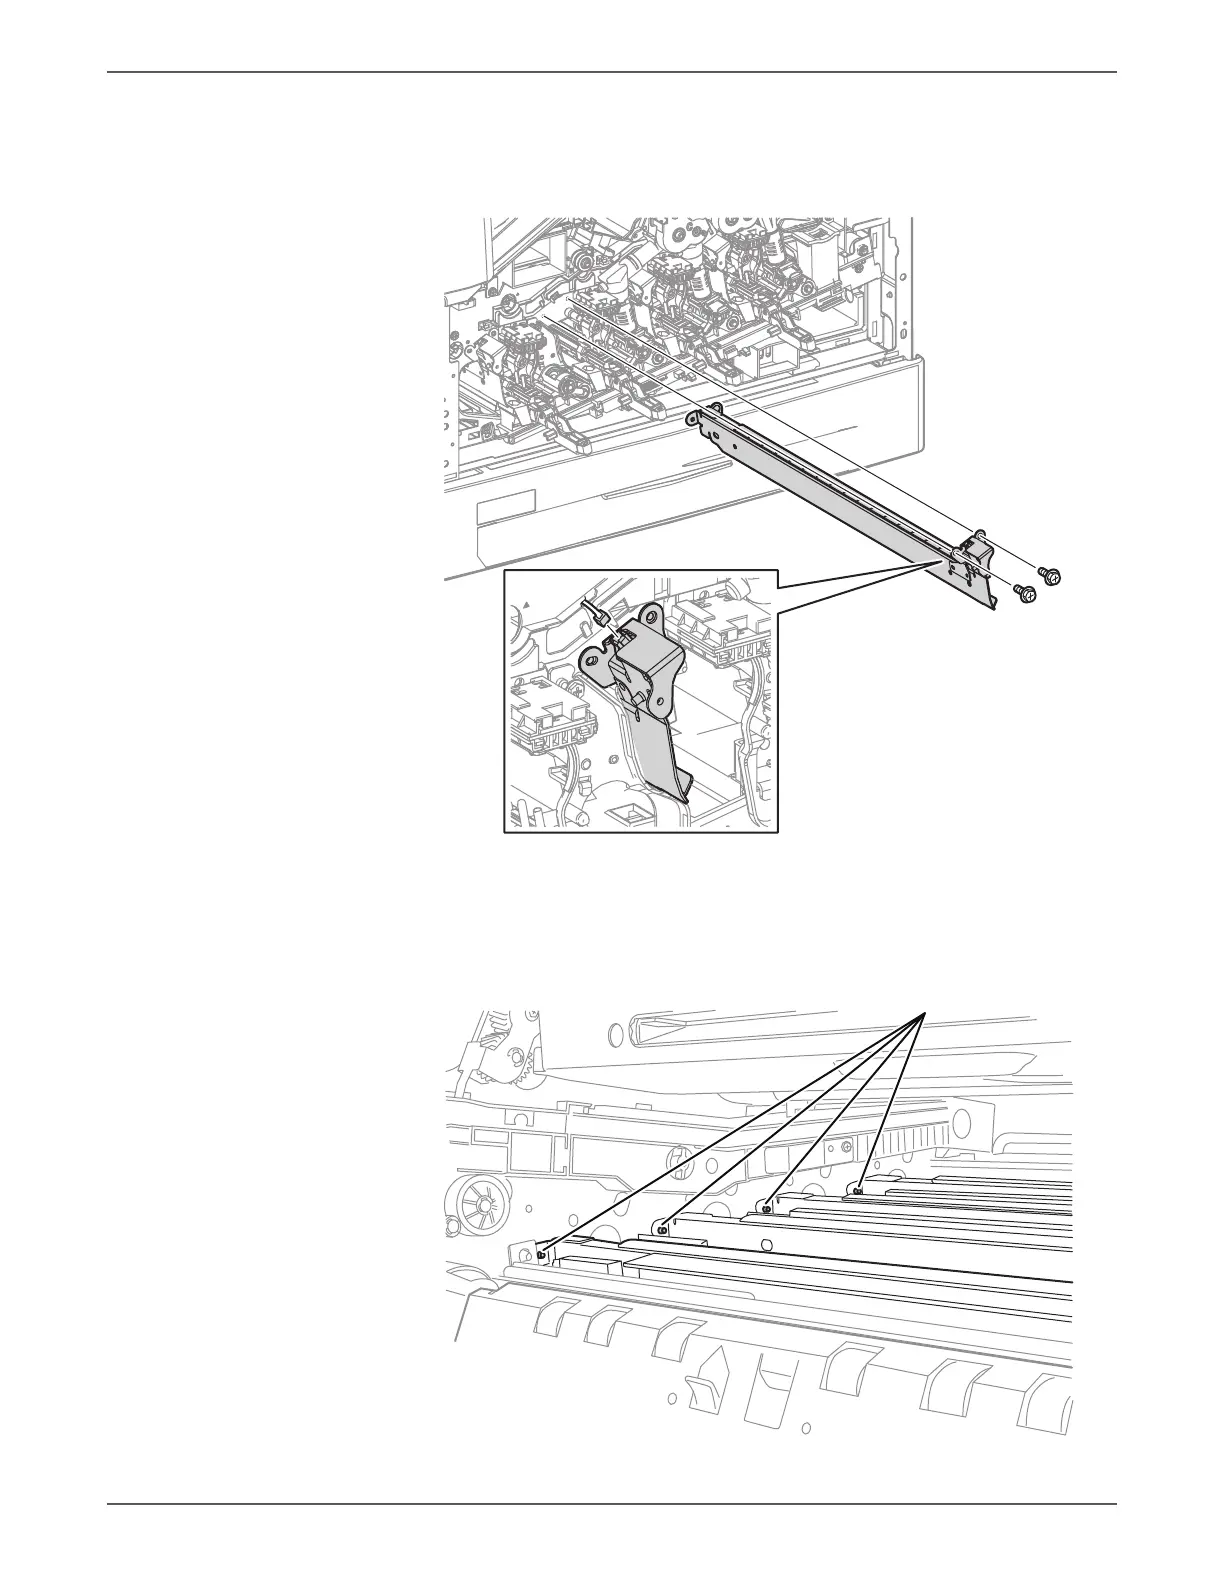
7. Disconnect the wiring harness connector that is connected to the Erase Lamp
Unit (Y/M/C).
8. Remove 2 screws (silver, 6mm) that secure the Erase Lamp Unit (Y/M/C) and
remove the Erase Lamp Unit (Y/M/C).
Be sure to align the rear of the Erase Lamp Unit with the pin. Slightly move the
Erase Lamp Unit left and right to sit the pin unit in place.
 Loading...


