Phaser 7500 Printer Service Manual 8-69
Service Parts Disassembly
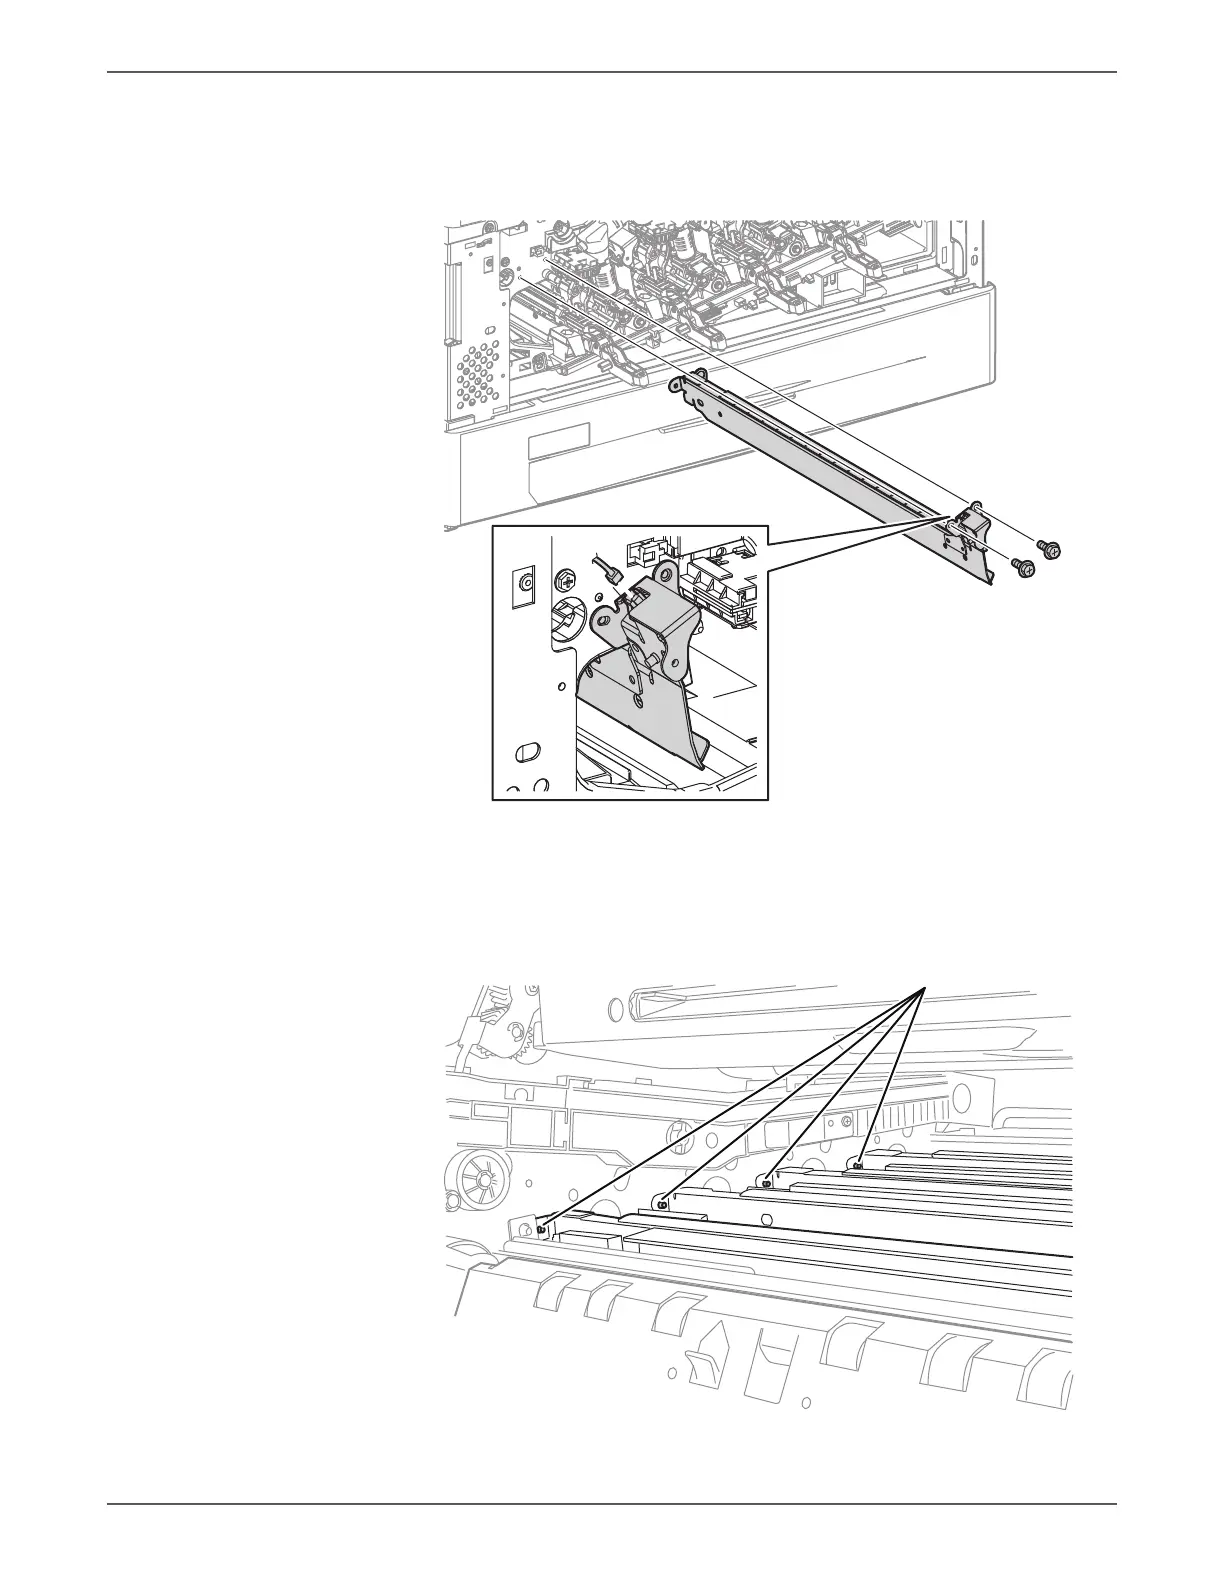
6. Disconnect the wiring harness connector that are connected to the Erase
Lamp Unit (K).
7. Remove 2 screws (silver, 6mm) that secure the Erase Lamp Unit (K) and
remove the Erase Lamp Unit (K).
Be sure to align the rear of the Erase Lamp Unit with the pin. Slightly move the
Erase Lamp Unit left and right to sit the pin unit in place.

 Loading...


