Inspection Mode
3-10 Manual # 42-02-7223
Installing the Floor Leveling Magnets
1. On Inspection mode, position the elevator car so that it is level with a landing. Inspec-
tion speed may be reduced to help stop the car precisely at floor level (iView > Controller
> View > Configuration > Pattern > Modes tab).
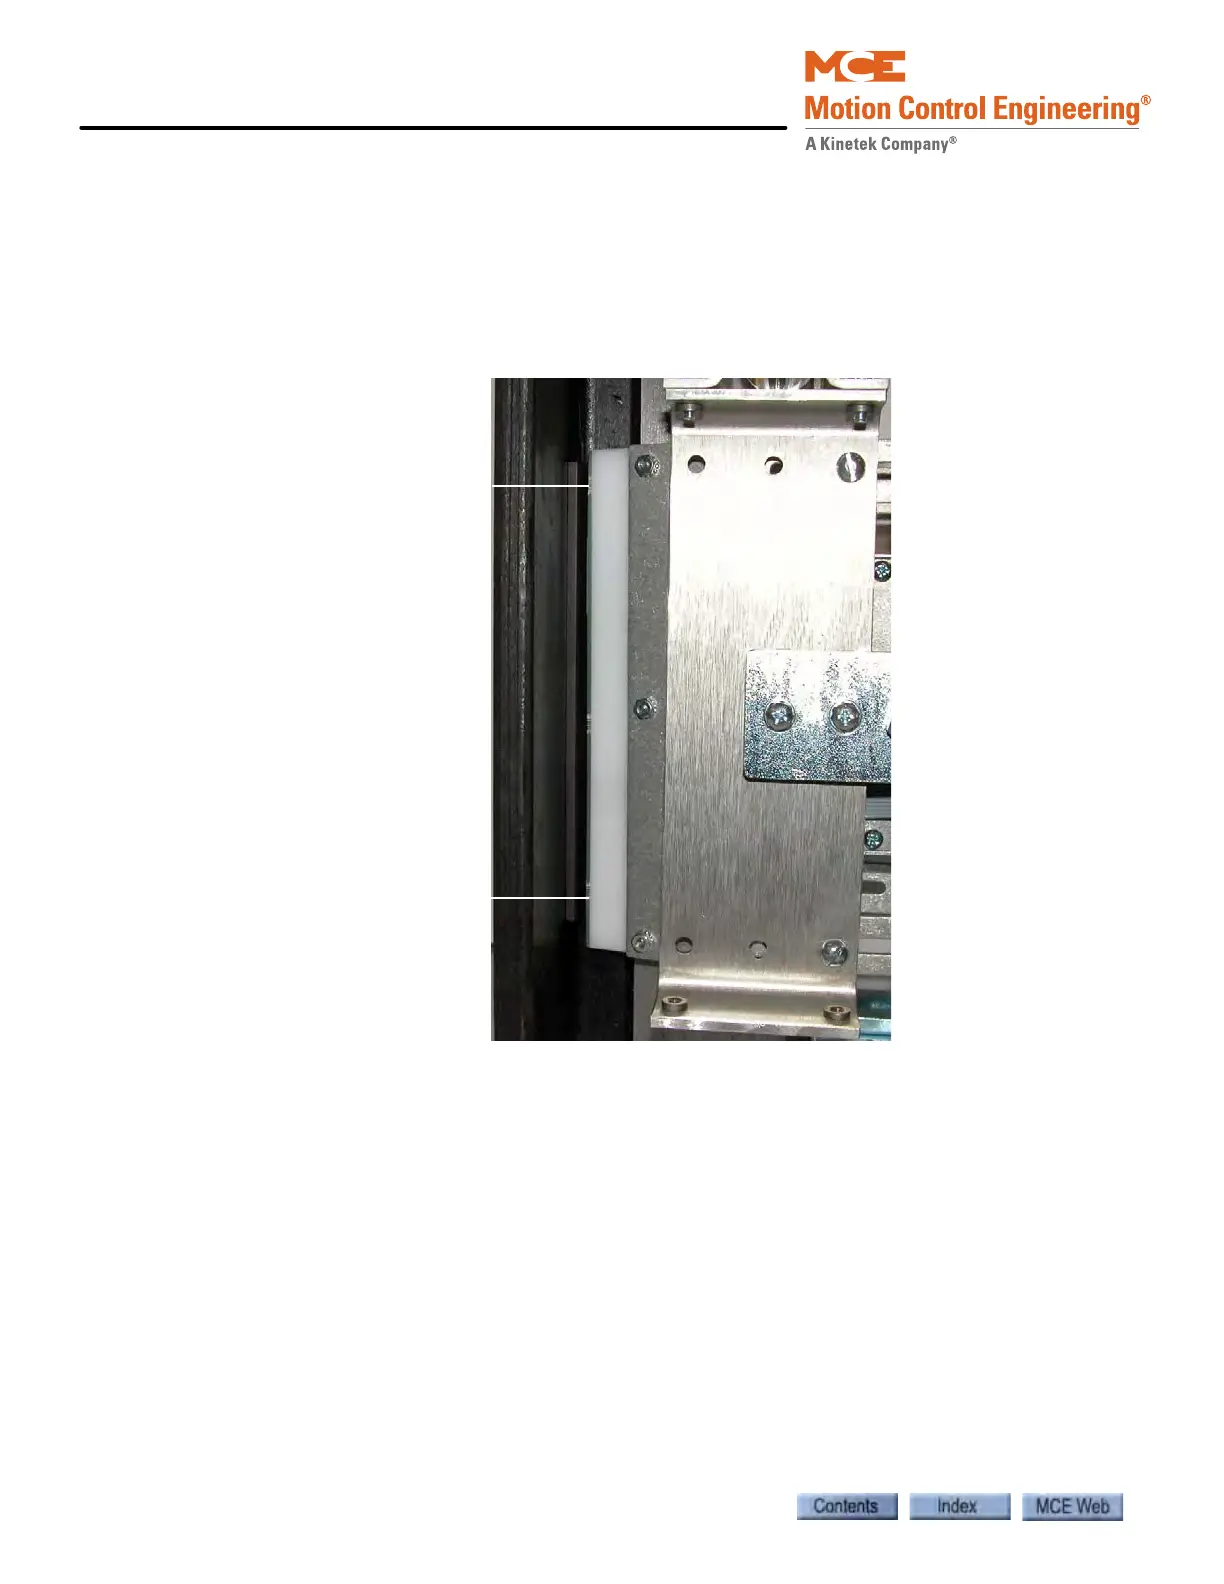
2. Mark the position of the top and bottom leveling sensors as shown below. Note that the
sensors are slightly in from the edges of the circuit board. Accurate magnet position
assures the best possible position tracking.
3. Move the car down one to two feet. Clean the hollow of the rail where the magnet will be
attached to remove all grease and dirt. (Use acetone, alcohol, or other industrial solvent)
4. Center the magnet vertically between the marks with the South pole facing outwards.
(Magnets supplied by MCE have an adhesive strip and paper on the North face. If neces-
sary, use a compass to check North/South polarity.)
5. Move the car back into position and verify that the face of the sensor board is within 1/4”
(6 mm) K 1/16” (1.5 mm) from the face of the magnet and the sensors are centered on
the magnet. If the iLand Landing System is powered (connected to a working iLink), the
ULM, DLM, and DZ LEDs will all be lighted if the magnet is positioned properly. If not,
adjust the magnet and re-test. Note: If the magnet is less than six inches long, only the
DZ sensor may be lighted when the magnet is positioned properly.
6. When ready, attach the magnet to the rail using a good quality construction glue. Then
move to the next landing, etc. (Some installers prefer to temporarily attach the magnets
and, after adjusting the sensors and learning the hoistway, test their placement. Then go
back and make adjustments before using a permanent glue.)
Mark the location of
the top sensor
Mark the location of
the bottom sensor