Installing iLand
3-5
3
iControl DC
Installing iLand
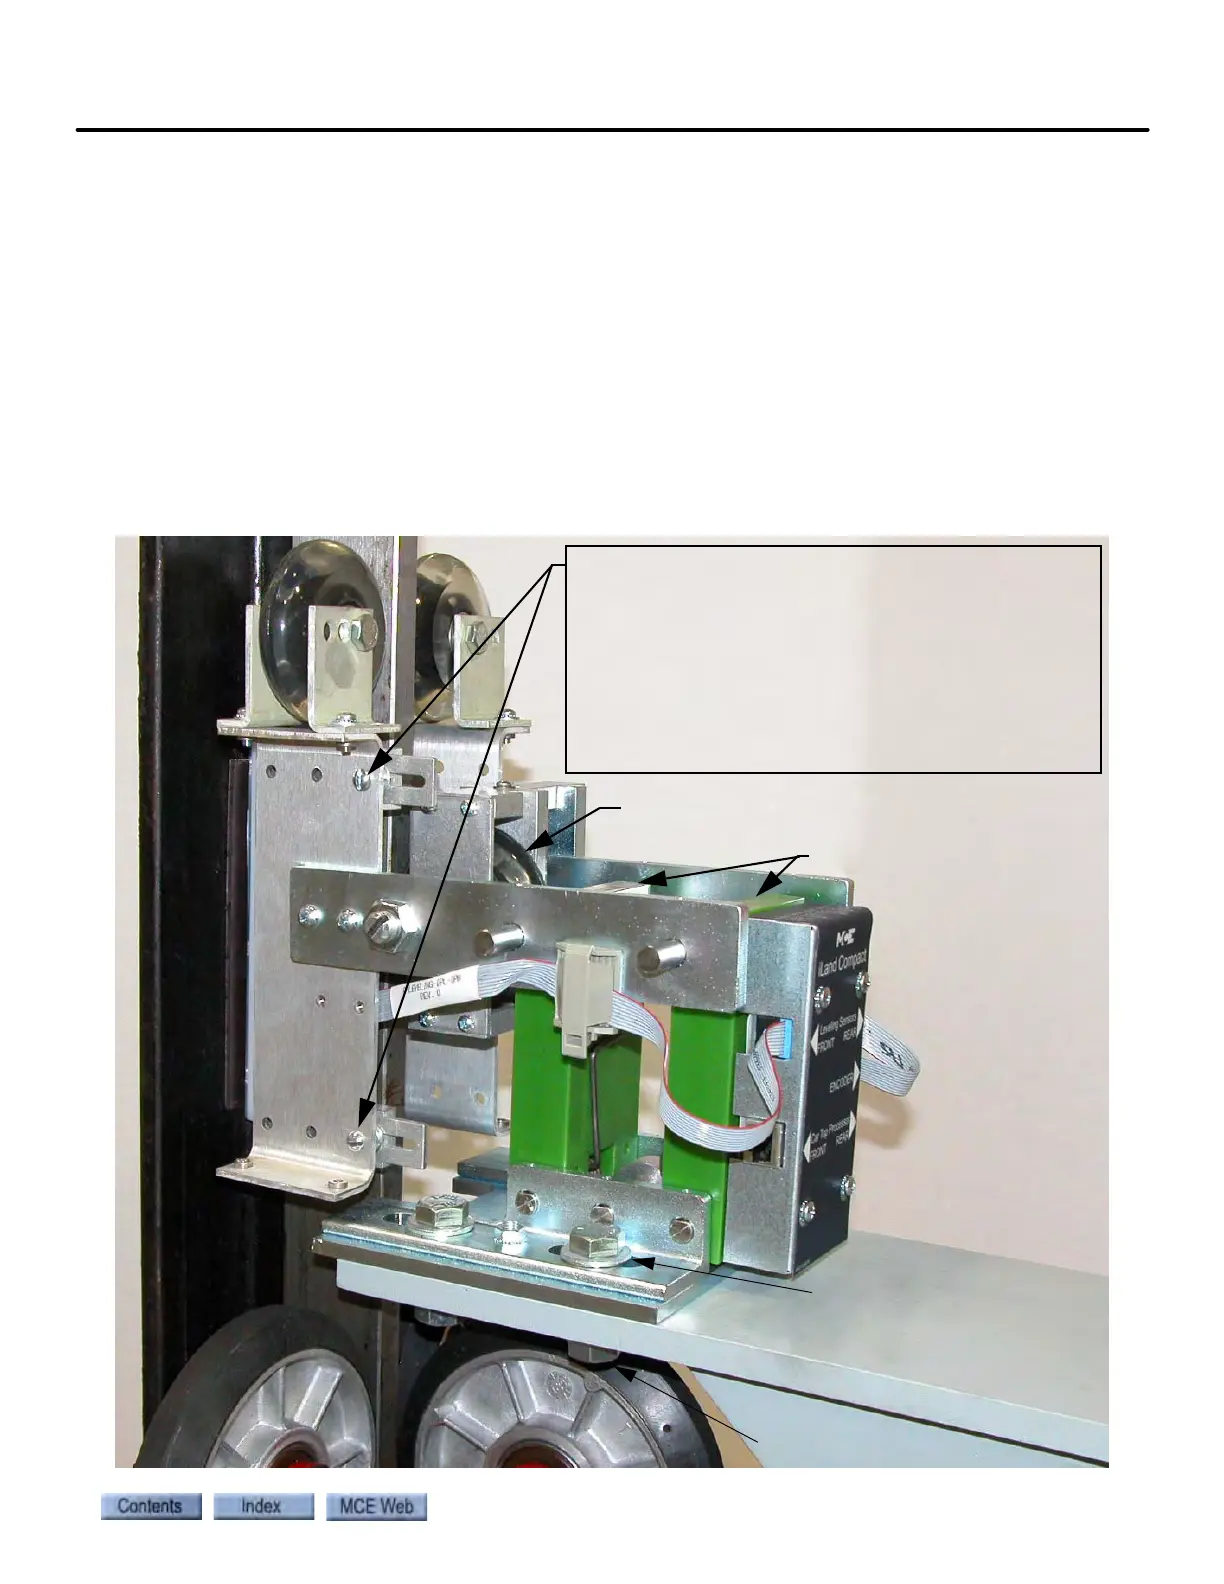
1. Attach the mounting pedestal securely to the elevator crosshead beam.
2. Place the iLand Compact on the mounting pedestal and slide it into position so that the
Position Encoder Wheel is touching the front face of the rail. If necessary, loosen the
screws that adjust the position of the Leveling Sensor Bracket(s) and slide the brackets
back away from the rail.
3. Move the base of the iLand Compact forward until the Parallel Arms are approximately
vertical and fasten it to the pedestal using four 1/2” (or 3/8”) bolts, flat washers, lock
washers, and nuts.
4. Caution! Leveling sensors can be damaged by collision with rail clamps and bolts, etc.
Move the car cautiously until adequate clearance is verified. Damage due to mechan-
ical contact is NOT covered by warranty! See Caution below.
Figure 3.1
Caution: Loosen screws and slide the Leveling Sensor
Bracket(s) back away from the rail. At points where the
rails are attached or where rail sections meet, the
clearance may be reduced by clamps, bolts and other
hardware. Check initial floor leveling sensor adjustments
at the worst of these points to make certain the sensors
or other landing system hardware will not be damaged
when the car runs past these points. Check along the
entire rail to ensure adequate clearance. Damage due to
mechanical contact is NOT covered by warranty!
Position Encoder Wheel against the
front face of the rail
Parallel Arms are vertical
Bolts and flat washers
Nuts and lock washers