System 12 SCR Drive
6-133
6
iControl DC
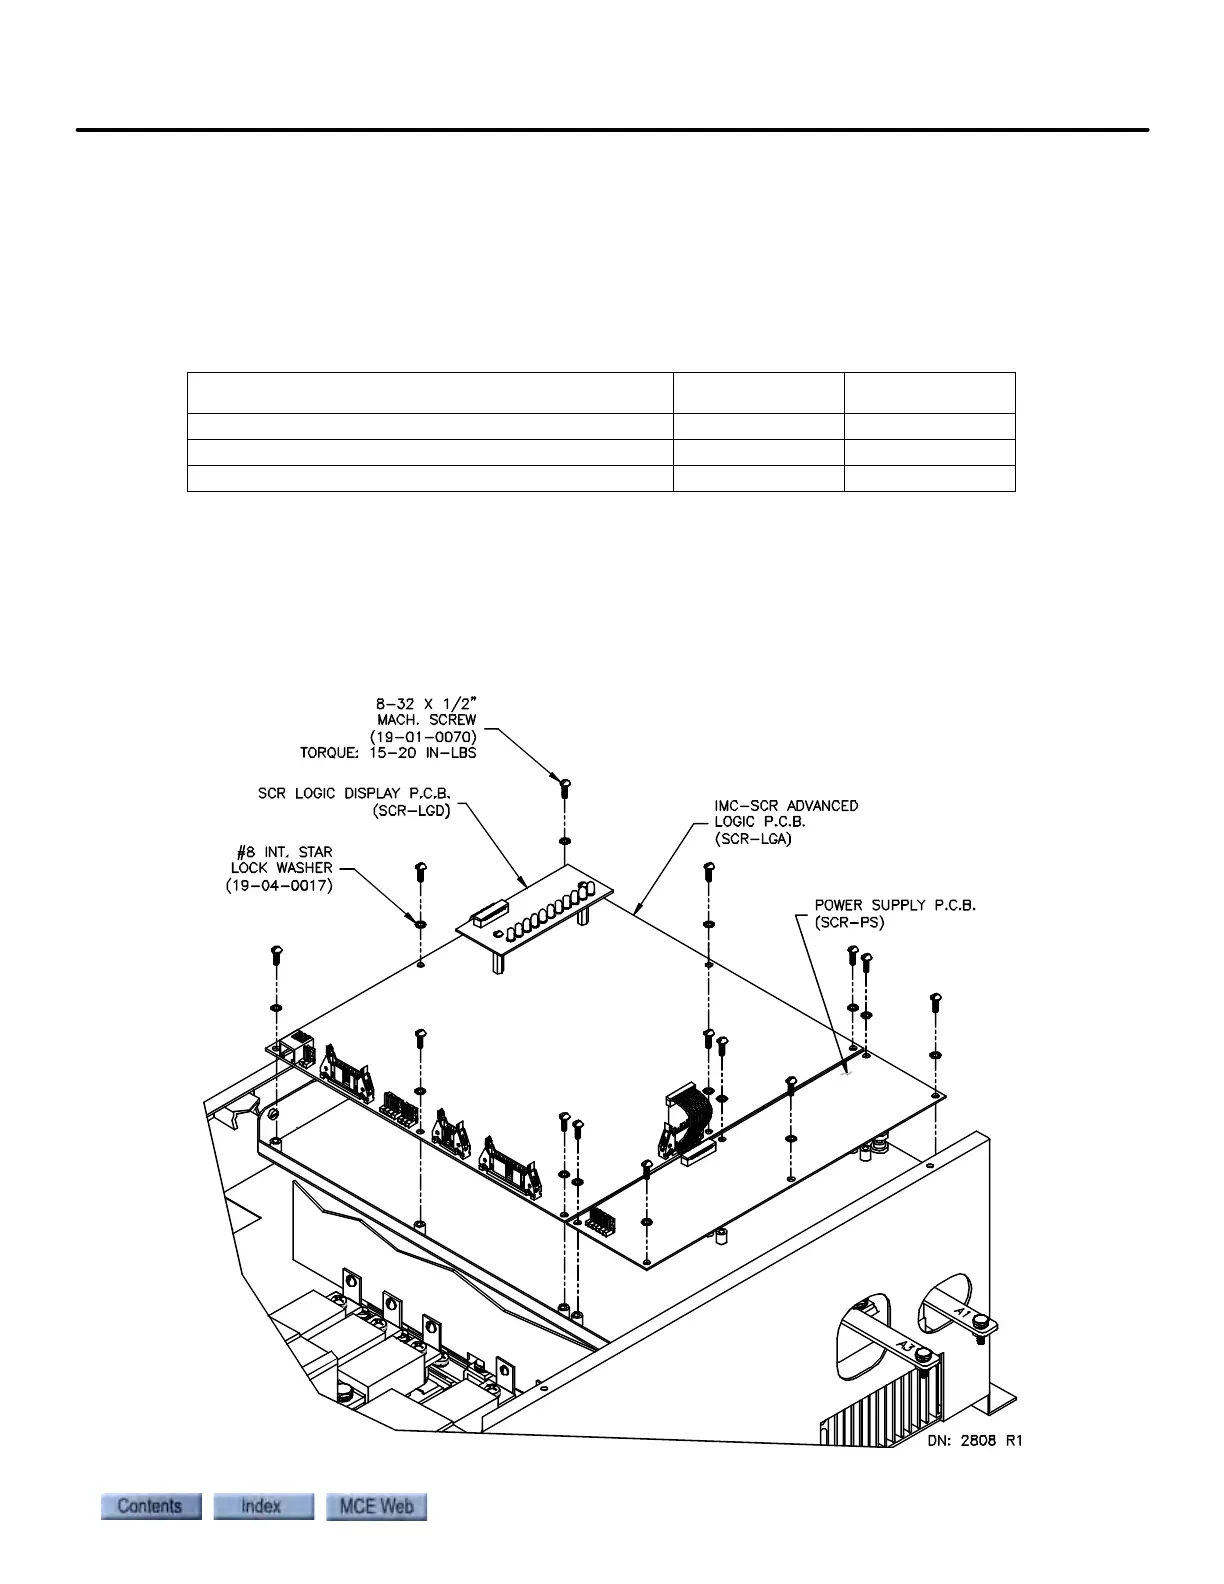
1. Remove the two mounting screws from the SCR-LGD board.
2. Disconnect the ribbon cable from J10 on the SCR-LGA board and remove the SCR-LGD
board.
3. Install the new SCR-LGD board and torque the mounting screws to 15-20 inch pounds.
4. Connect the SCR-LGD board ribbon cable to J10 on the SCR-LGA board.
Replacing the SCR-LGA SCR Drive Logic Board When replacing the SCR-LGA
board, the SCR-LGD board must be transferred from the old SCR-LGA board to the new board.
This is best done when both boards are detached from the drive. The transfer includes installing
the standoffs needed to hold the SCR-LGD. The standoffs are loaded from the back of the SCR-
LGA board.
Figure 6.30 Replacing the SCR-LGA Board
Table 6.39 Replacement Parts for SCR-LGD
ITEM (DESCRIPTION) MCE PART # UNIT
SCR-LGD (SCR Drive Display Board) SCR-LGD Each
Standoff (8-32 x 3/8" F/F Standoff) 41-04-0037 Each
Kep Screw (8-32 x 3/8 Kep Screw) 19-01-0012 Each