Table 7
INSTALLATION TORQUE FOR ALUMINUM TERMINALS
Stud Size Hardware
Torque
(inch-pound)
Minimum Maximum
10-()
Nut, Plain With Lockwasher 28 35
Nut, Self-Locking 33 40
1/4-()
Nut, Plain With Lockwasher 70 85
Nut, Self-Locking 75 90
5/16-()
Nut, Plain With Lockwasher 125 155
Nut, Self-Locking 135 165
3/8-()
Nut, Plain With Lockwasher 180 210
Nut, Self-Locking 220 250
1/2-()
Nut, Plain With Lockwasher 380 440
Nut, Self-Locking 430 490
(1) Make a selection of a flat washer from Table 6.
NOTE: 2 washers are necessary.
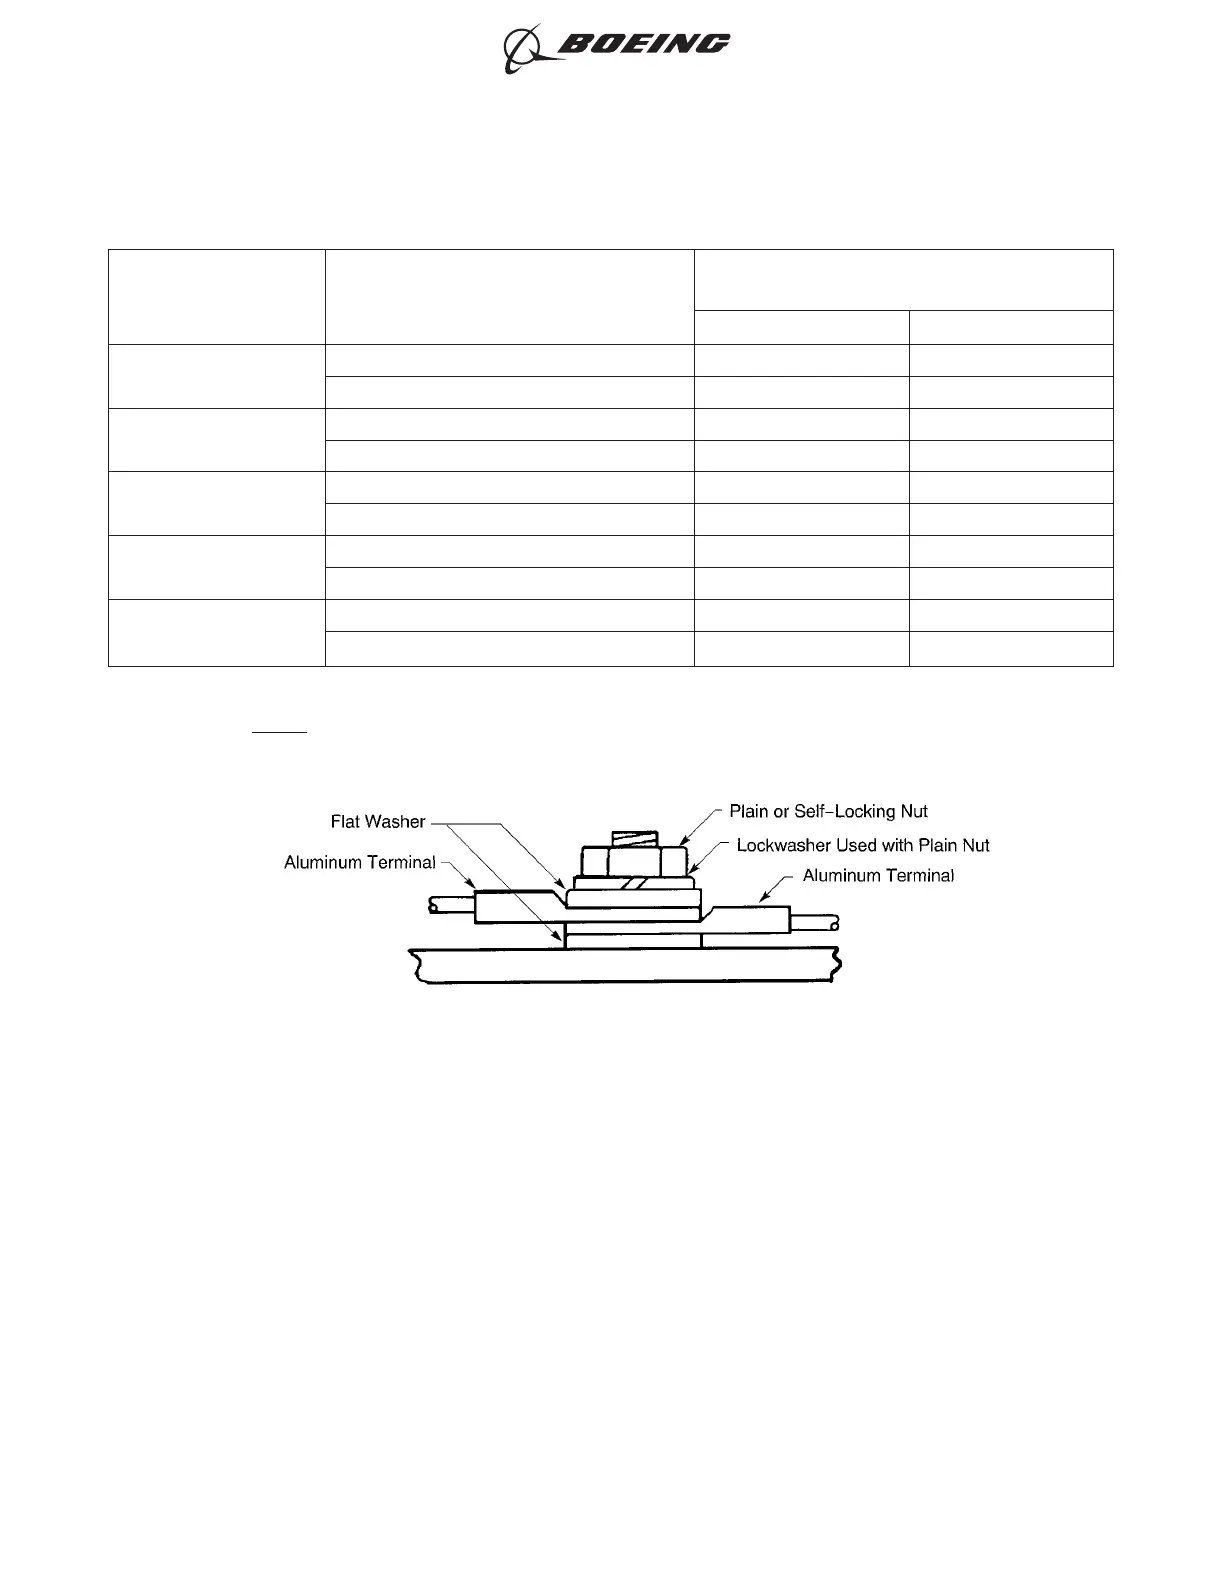
(2) Install one or more terminals. Refer to Figure 11.
(a) Put a flat washer on the stud against the terminal board or equipment.
(b) Put the terminal or terminals on the stud.
(c) Put the other flat washer on the stud against the top terminal.
(d) If a plain nut is used, put a lock washer on the stud against the last flat washer.
(e) Put the nut on the stud.
(f) Torque the nut. Refer to Table 7.
If the torque value is not specified in Table 7 for the terminal hardware, make sure that:
• The lock washer is fully compressed
• The terminal does not move on the stud.
POSITION OF THE WASHERS WITH ALUMINUM TERMINALS
Figure 11
ELECTRICAL CONNECTION OF EQUIPMENT AND INSTALLATION OF TERMINAL LUGS
707, 727-787
STANDARD WIRING PRACTICES MANUAL
20-30-00
Page 16
Feb 15/2017D6-54446
ECCN 9E991 BOEING PROPRIETARY - See title page for details