(e) Put the crimp tool and the Shield-Kon on the shield sleeve material.
Make sure that the rear end of the Shield-Kon is aligned with the ends of the shield and the
shield sleeve material.
(f) Crimp the Shield-Kon.
(g) Put the other Shield-Kon into the die of the crimp tool.
Make sure that the center of the Shield-Kon is aligned with the center of the die.
(h) Make the shield sleeve material smooth and tight.
(i) Put the crimp tool and the Shield-Kon on the other end of the shield sleeve material.
Make sure that the rear end of the Shield-Kon is aligned with the ends of the shield and the
shield sleeve material.
(j) Crimp the Shield-Kon.
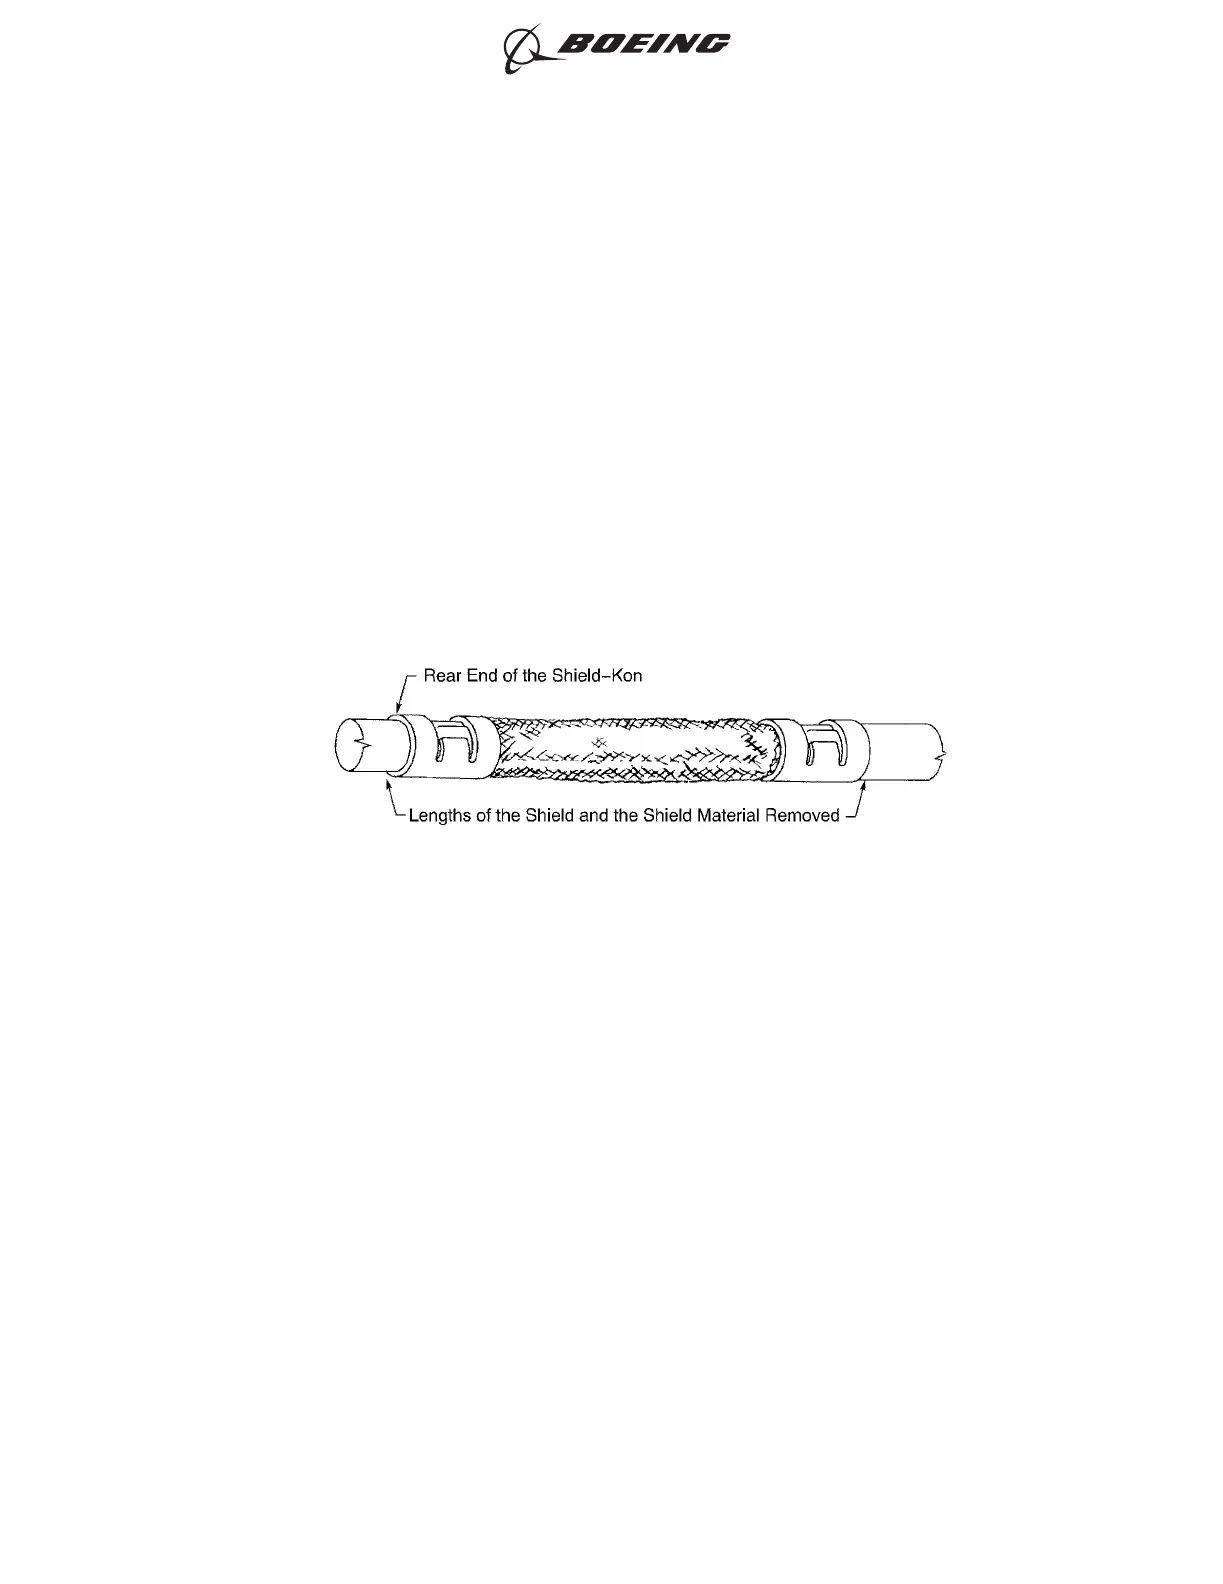
(k) Remove the shield and the shield sleeve material that extend farther than the rear end of
the Shield-Kon on each end of the shield splice. Refer to Figure 198.
(17) Tightly wind a layer of the tape on the splice assembly.
Make sure that the layer of tape:
• Starts 0.50 inch ±0.25 inch farther than the rear end of the Shield-Kon at one end of the
splice
• Stops 0.50 inch ±0.25 inch farther than the rear end of the Shield-Kon at the other end of
the splice
• Makes a 50 percent overlap.
(18) Tightly wind a second layer of the tape on the splice assembly.
Make sure that the layer of tape:
• Starts where the first layer of tape stops
• Stops where the first layer of tape starts
• Makes a 50 percent overlap.
(19) Align the center of the sleeve with the center of the splice assembly.
(20) Shrink the sleeve into position. Refer to Subject 20-10-14.
SHIELD SPLICE ASSEMBLY
Figure 198
ASSEMBLY OF SPLICES
707, 727-787
STANDARD WIRING PRACTICES MANUAL
20-30-12
Page 240
Jun 15/2021D6-54446
ECCN 9E991 BOEING PROPRIETARY - See title page for details