■
Spectral calibration troubleshooting ................................................... 523
■
Thermo Fisher
™
Connect troubleshooting ............................................. 524
■
Voice command troubleshooting ...................................................... 525
Troubleshooting workflow
Follow this general workflow when you are troubleshooting.
Troubleshooting workflow
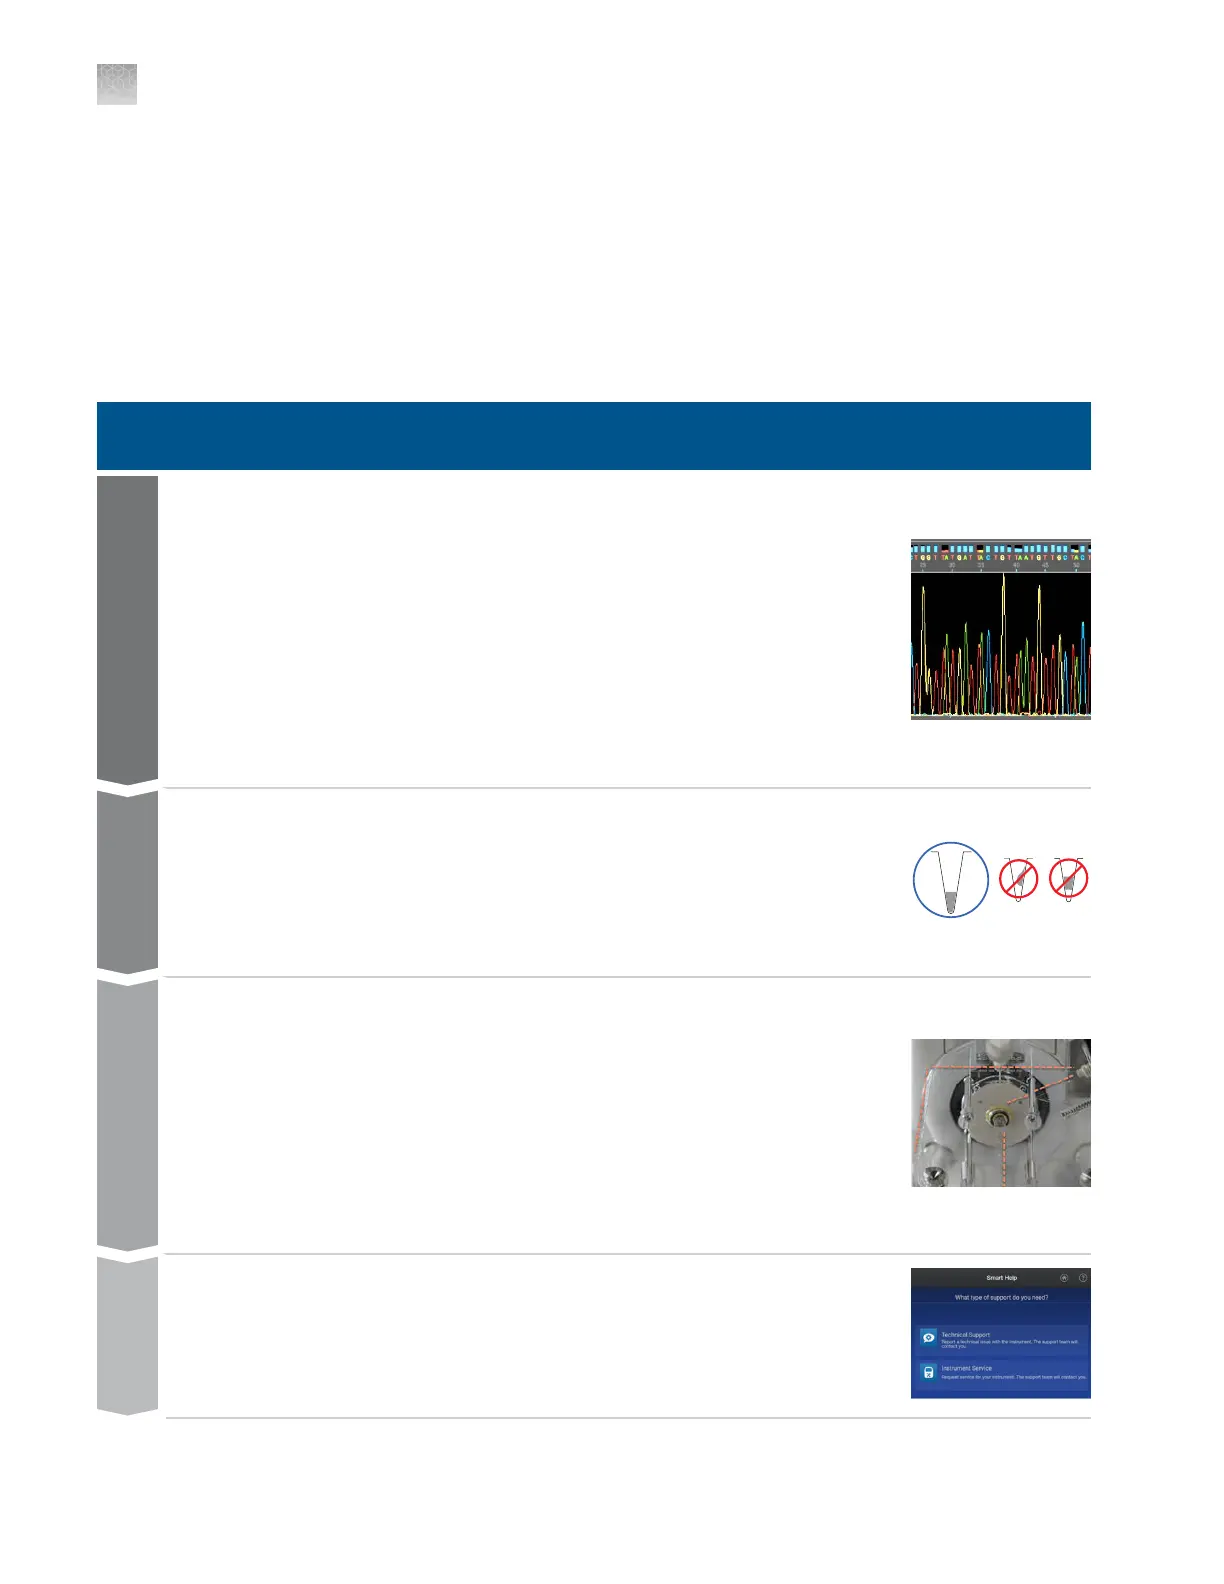
Inspect the data
1.
Review the analyzed data
2.
Review the raw data, then review the EPT plot (page 476).
3.
(Fragment analysis) Check size standard quality (page 476).
4.
Confirm that the correct injection settings were used to generate the data
(run module, dye set, analysis settings, and size standard definition (fragment
analysis)). See the following sections:
•
“Sequencing results and well details” on page 176
•
“Fragment analysis results and well details” on page 180
Data
Inspect the samples
1.
Confirm that the correct samples are present in the wells that are specified in
the plate file.
2.
Ensure that the samples are at the bottom of wells and that no bubbles are
present.
Samples
Inspect the instrument
1.
Check that capillary tips are not bent or damaged.
2.
Check the pump for bubbles or debris (page 480).
3.
Check consumables status (see “Check consumables status” on page 66).
4.
Follow any troubleshooting instructions displayed in the instrument error
messages or plate alerts.
5.
Perform any pending maintenance tasks (see “Review upcoming maintenance”
on page 64).
Instrument
Request assistance
1.
Expor
t the log files generated by the instrument (page 482).
2.
Request assistance (page 473).
3.
If instructed to do so, start a remote support session (page 475).
Help
Appendix A Troubleshooting
Troubleshooting workflow
A
472
SeqStudio
™
Flex Series Genetic Analyzer with Instrument Software v1.0 User Guide