138 Library Installation and CRU Replacement
1 Access the back of the expansion module.
2 Remove the cover plate from the bay to the right of the bay that holds the FC I/O blade.
3 Press up and out to open the latch hooks on each side of the fan blade. The LED must be at the bottom
of the blade.
4 Evenly apply pressure to both sides of the fan blade, and slide it into the expansion module until the
latch hooks begin to move the middle of the blade. Push the latch hooks the middle of the blade and
into the locked position. You will feel the blade pins connect with the expansion module’s backplane as
the blade locks into place.
5 Save the library configuration. See Saving and Restoring the Configuration
on page 12.
The recommended order of installing the FC I/O blade and fan blade in an
expansion module is starting from the bottom two bays and moving up.
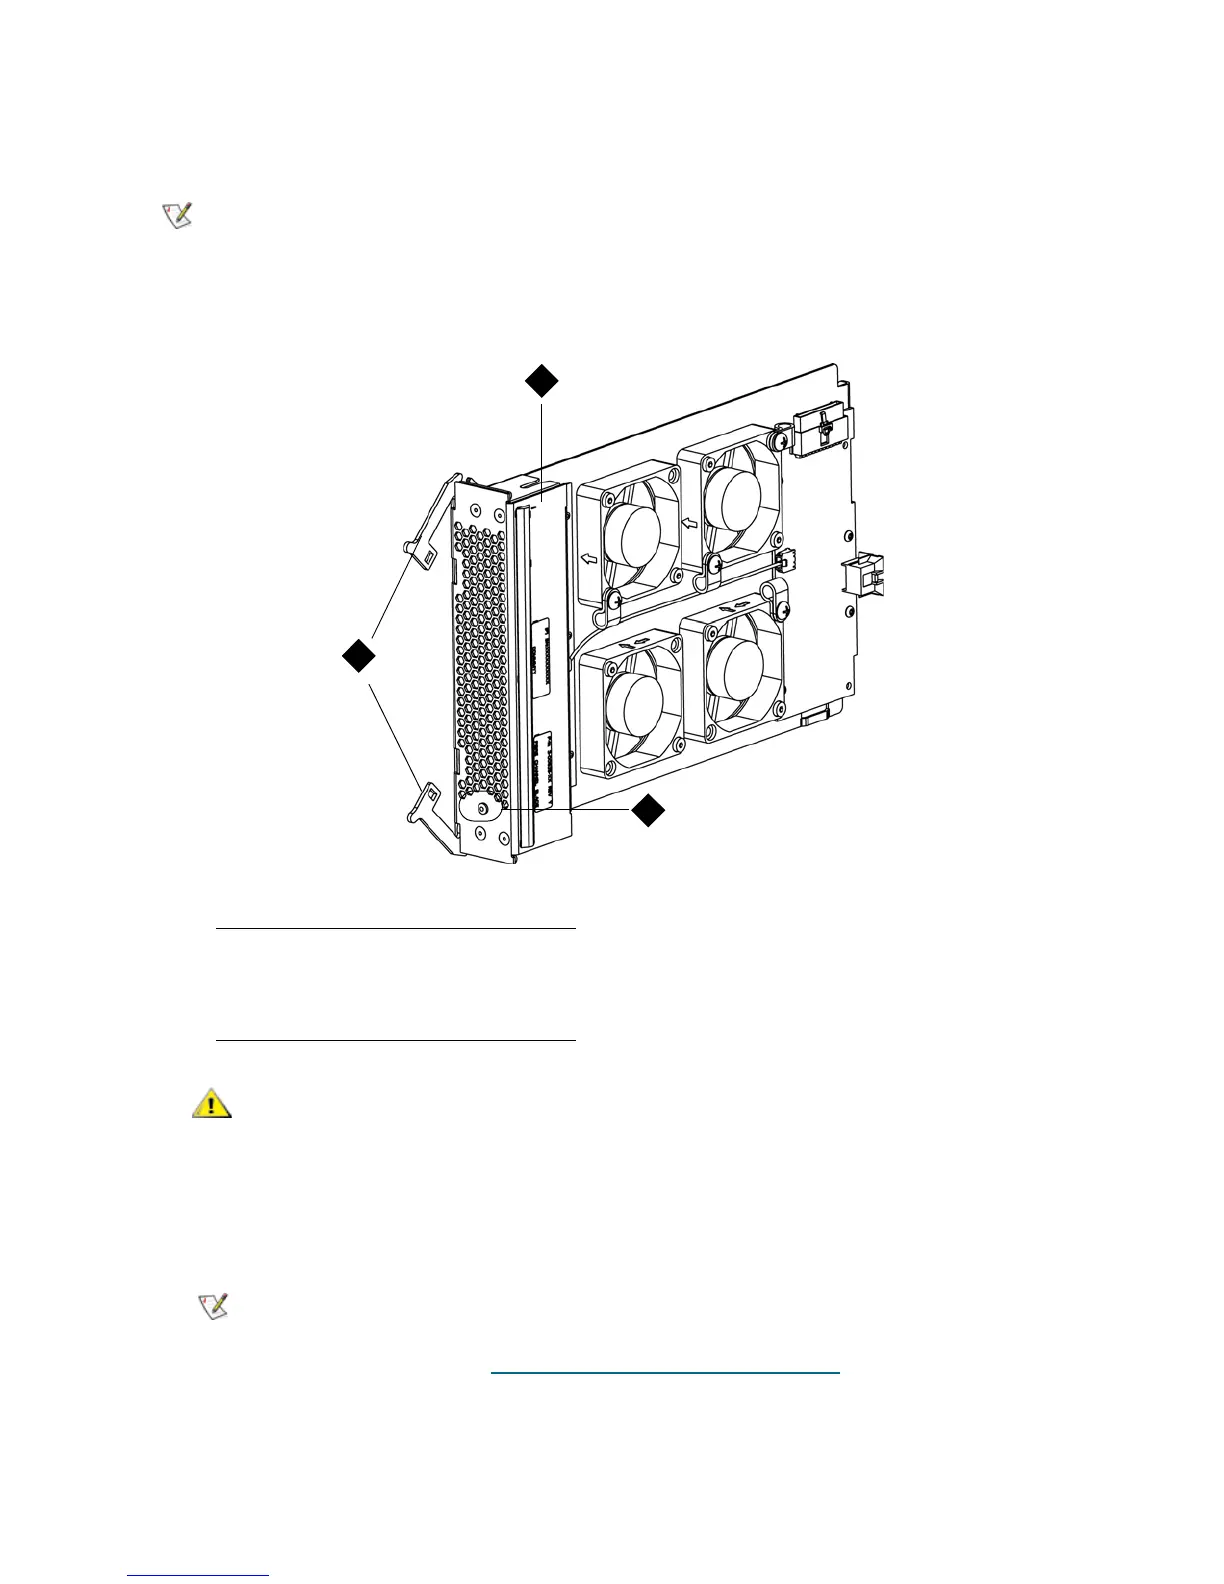
1 Fan blade
2 LED
3 Latch hooks, open
Forcing the blade into the bay can cause the pins to bend.
The LED for the fan blade is on the bottom of the blade when the blade is
correctly installed in the expansion module.

 Loading...


