PowerVault ML6000 Maintenance Guide 151
1 Take all affected partitions offline. For details about taking partitions offline, see Taking the Library
Online/Offline on page 13.
2 Open the I/E station and access doors of the modules.
3 Remove the I/E station slide assembly. See Removing and Replacing the
I/E Station Slide Assembly
on page 151.
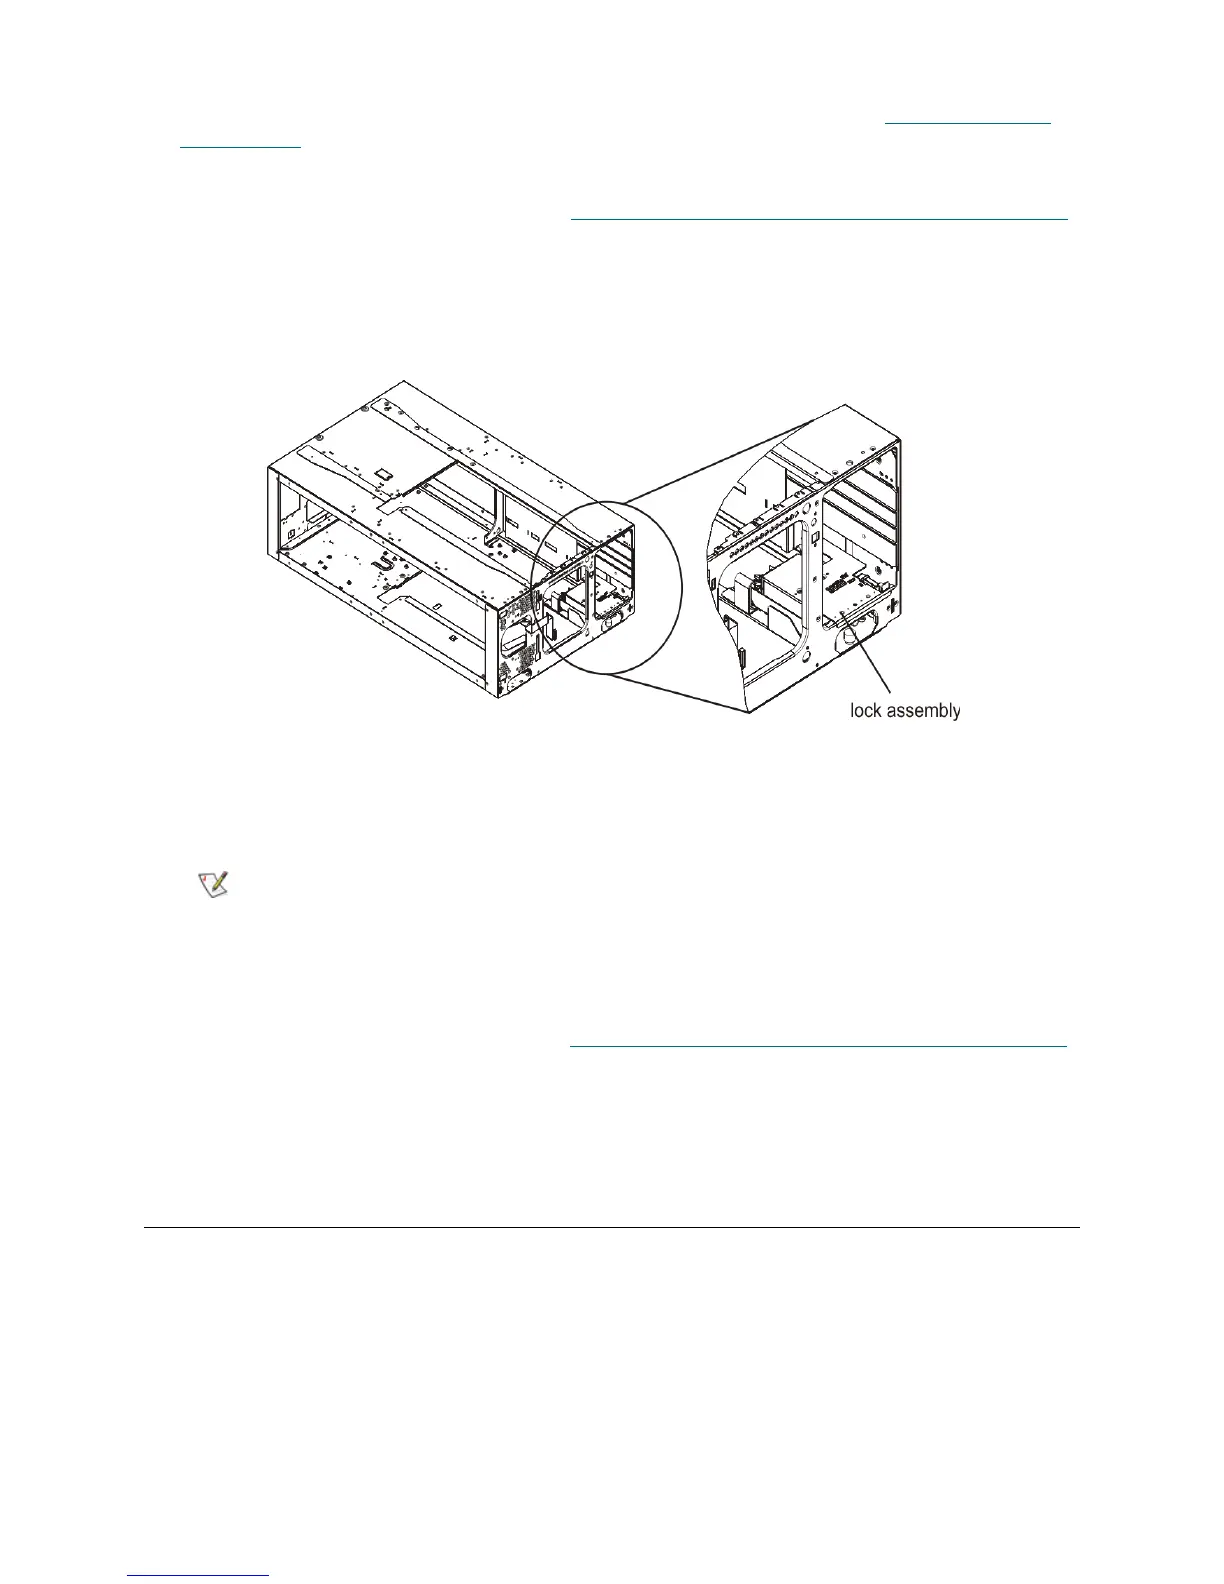
4 Remove the mounting screw that attaches the lock assembly to the I/E station, and set it aside. The
mounting screw is located at the front of the module, near the I/E station door.
5 Disconnect the I/E station cable from the lock assembly.
6 Remove the lock assembly and replace it with the new one.
7 Connect the I/E station cable to the new lock assembly.
8 Insert the back end of the lock assembly into the appropriate slot at the bottom of the module and align
its front screw hole with the screw hole at the front of the I/E station door.
9 Secure the lock assembly into place, using the screw that you removed earlier.
10 Replace the I/E station slide assembly. See Removing and Replacing the
I/E Station Slide Assembly
on page 151.
11 Close the access and I/E station doors.
12 Take the affected partitions back online.
Removing and Replacing the I/E Station Slide Assembly
The I/E station slide assembly enables you to open and close the I/E station door, and to slide the I/E station
in and out of its module.
When installing the lock assembly, be careful not to damage any of the
cables or connector pins.

 Loading...


