60 Library Installation and CRU Replacement
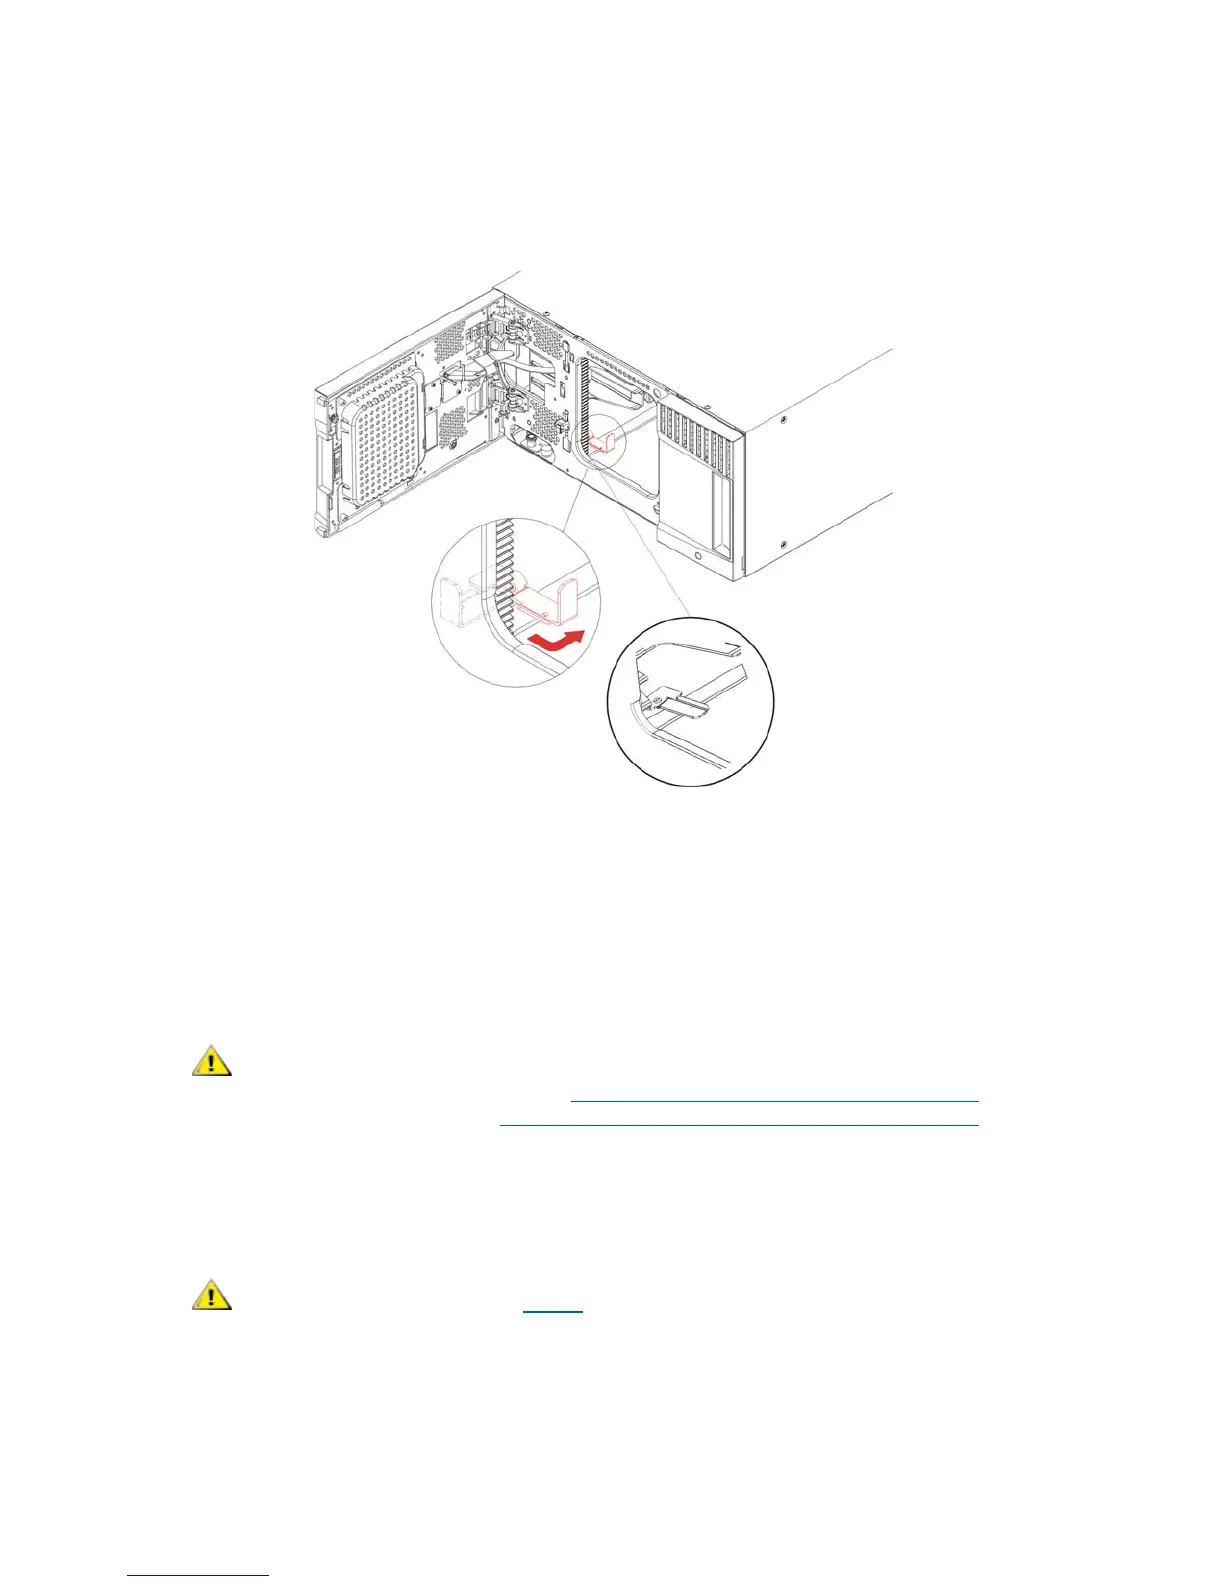
c. After raising the robot assembly to the approximate middle of the 5U Library Control Module,
hold it in place with one hand, and using your other hand, move the parking tab to the "parked"
position (Model 1 parking tab: swivel toward you; Model 2 parking tab: move in a counter-
clockwise direction). The metal parking tab is located at the bottom of column 1.
d. Gently release the robot assembly to rest on the parking tab.
7 Remove all power supplies from each module.
8 Remove all tape drives from each module.
9 Remove the tape blockers (if present) from the bottom row of the lowest module in the library. Set the
tape blockers aside to be installed in the new library configuration.
Unstacking the Existing Modules
1 Starting with the topmost module of your library, open the I/E station and access doors.
Libraries that have a Model 2 robot installed no longer use tape blockers. If
your library contains a Model 2 robot, do NOT install tape blockers. For
more information, see Removing and Replacing the Robot Assembly
on
page 164 and How to Determine Which Robot Your Library Contains
on
page 165.
Before unstacking the modules, the robot assembly must be parked
as described in Step 6
on page 59.

 Loading...


