PowerVault ML6000 Maintenance Guide 61
2 If your current configuration already uses a 9U Expansion Module, disengage the Y-rails so the modules
can be safely unstacked.
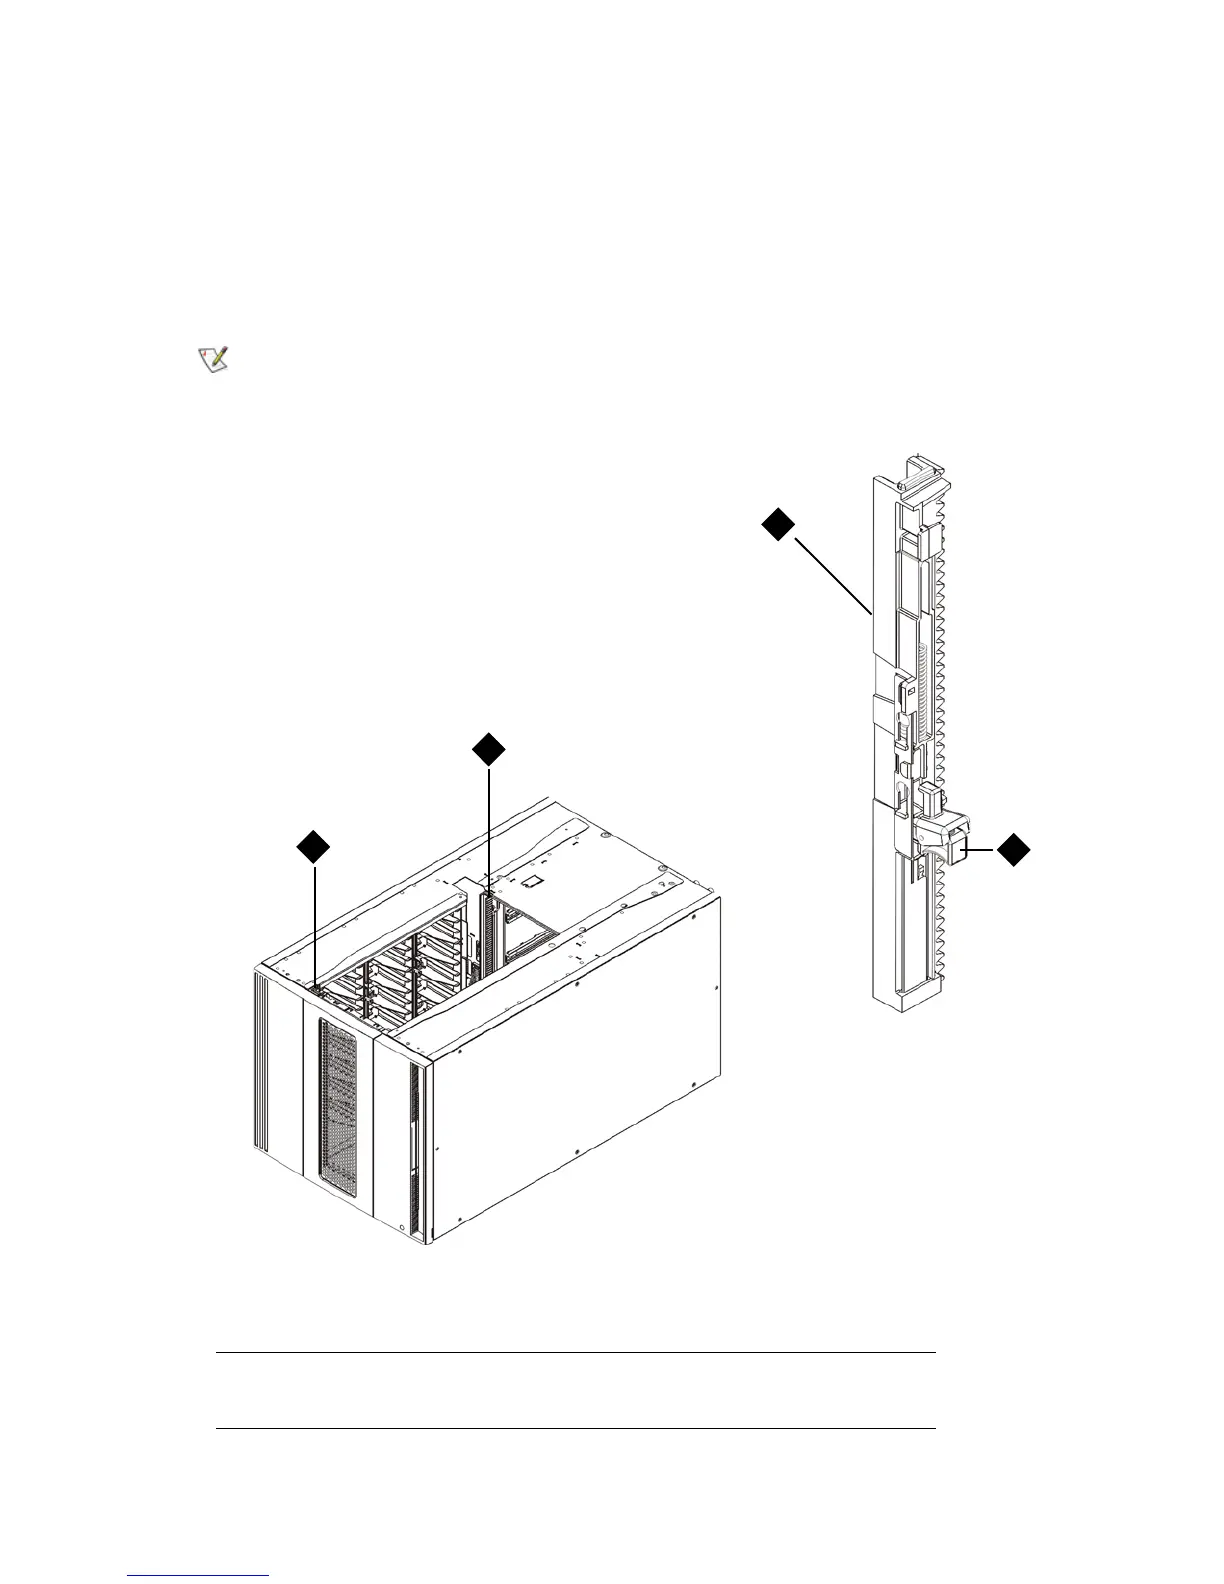
a. From the front of the library, find the Y-rail release mechanism, which is located on the left side
of the module. Squeeze the handle of the Y-rail release mechanism, lift it, and release it so that
it locks into place.
b. From the rear of the library, find the rear Y-rail release mechanism located in the interior of the
right side of the module. Squeeze the handle of the Y-rail release mechanism, lift it, and release
it so that it locks into place.
The rear Y-rail is impossible to lift up with the tape drives installed.
1 Front Y-rail
2 Rear Y-rail
3 Y-rail (this end up)
4 Squeeze here to release

 Loading...


