186 General Service and Replacing FRUs
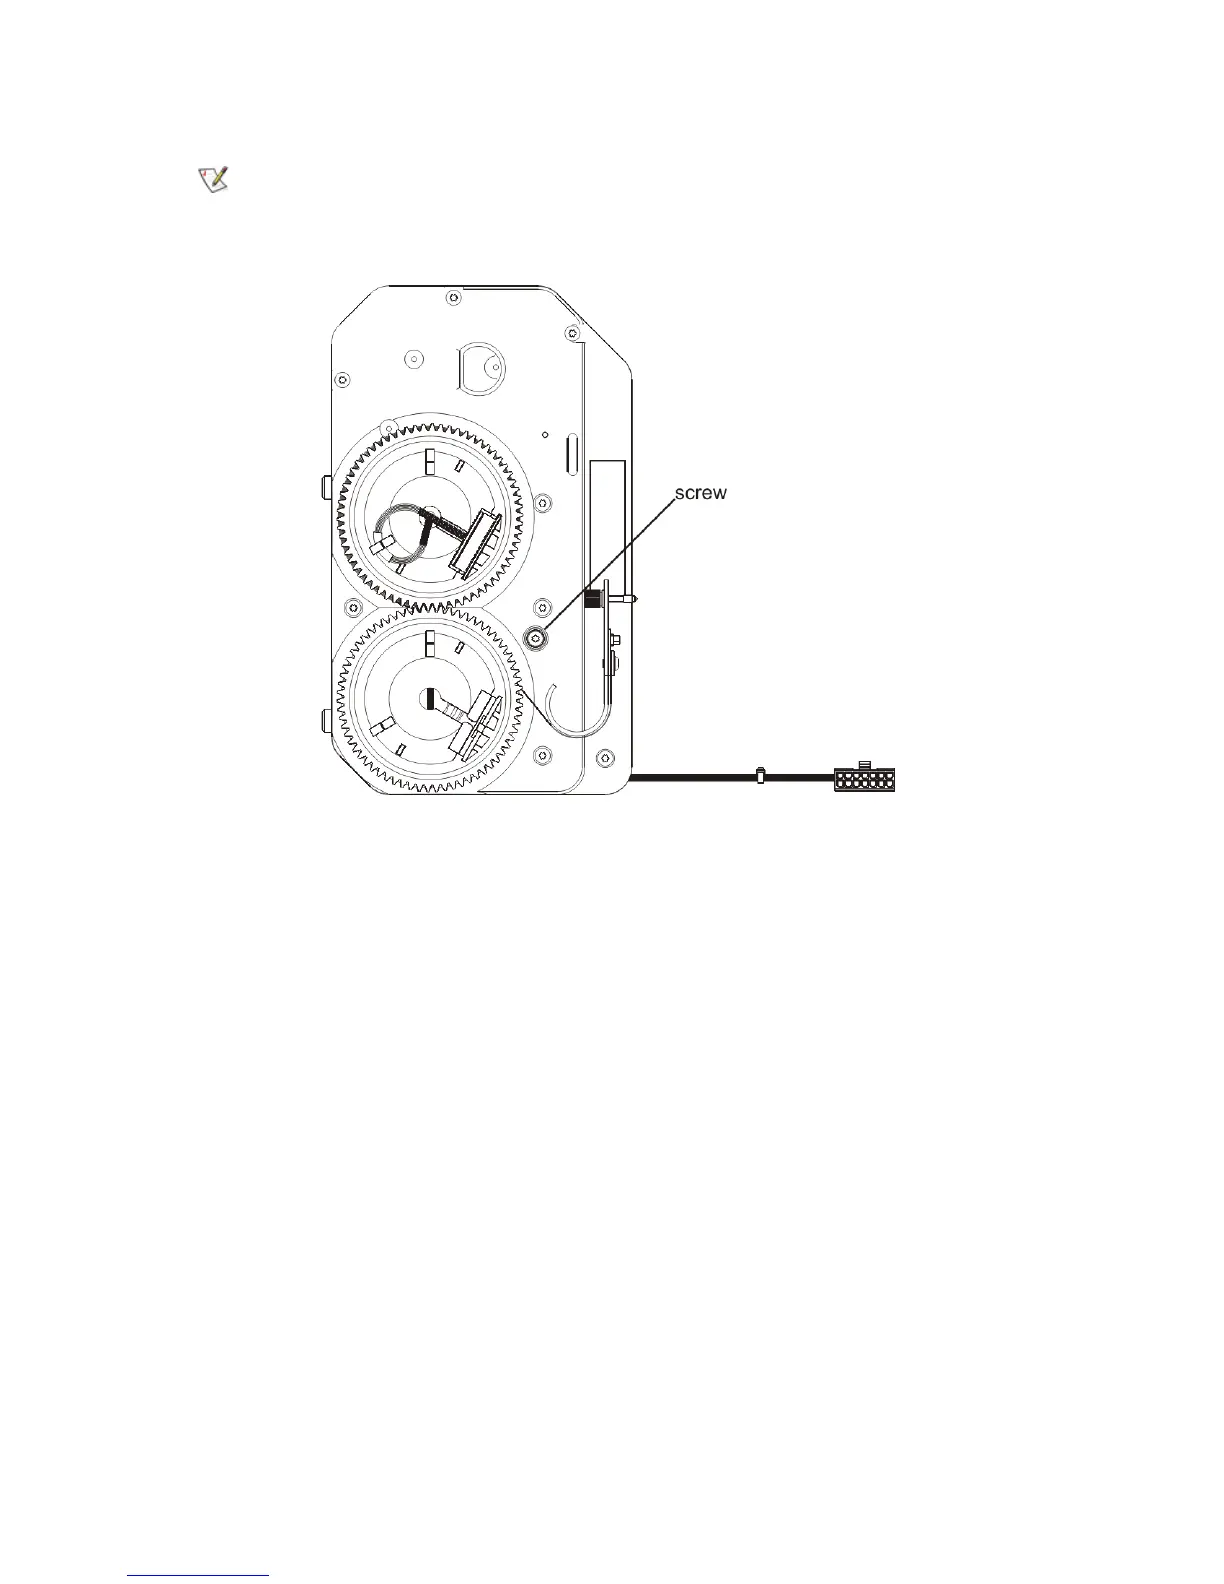
4 Using the T10 TORX screwdriver, loosen the screw that secures the cable spool to the chassis.
5 Remove the cable spool.
a. Disengage the cable spool from the side of the module.
b. Remove the zip tie that secures the cable spool’s cables to the chassis.
c. Reach through the drive bay to disconnect the cable spool cable that is attached to the rear of
the module, behind the area where the picker assembly is usually positioned.
d. Remove the cable spool from the module.
The external appearance of the cable spool on your library may differ
slightly from the one shown in the figure below. However, the fit, function,
and location of the screw and cable are the same.

 Loading...


