Prepare the standard plate
IMPORTANT! Do not use warped or damaged plates.
1.
L
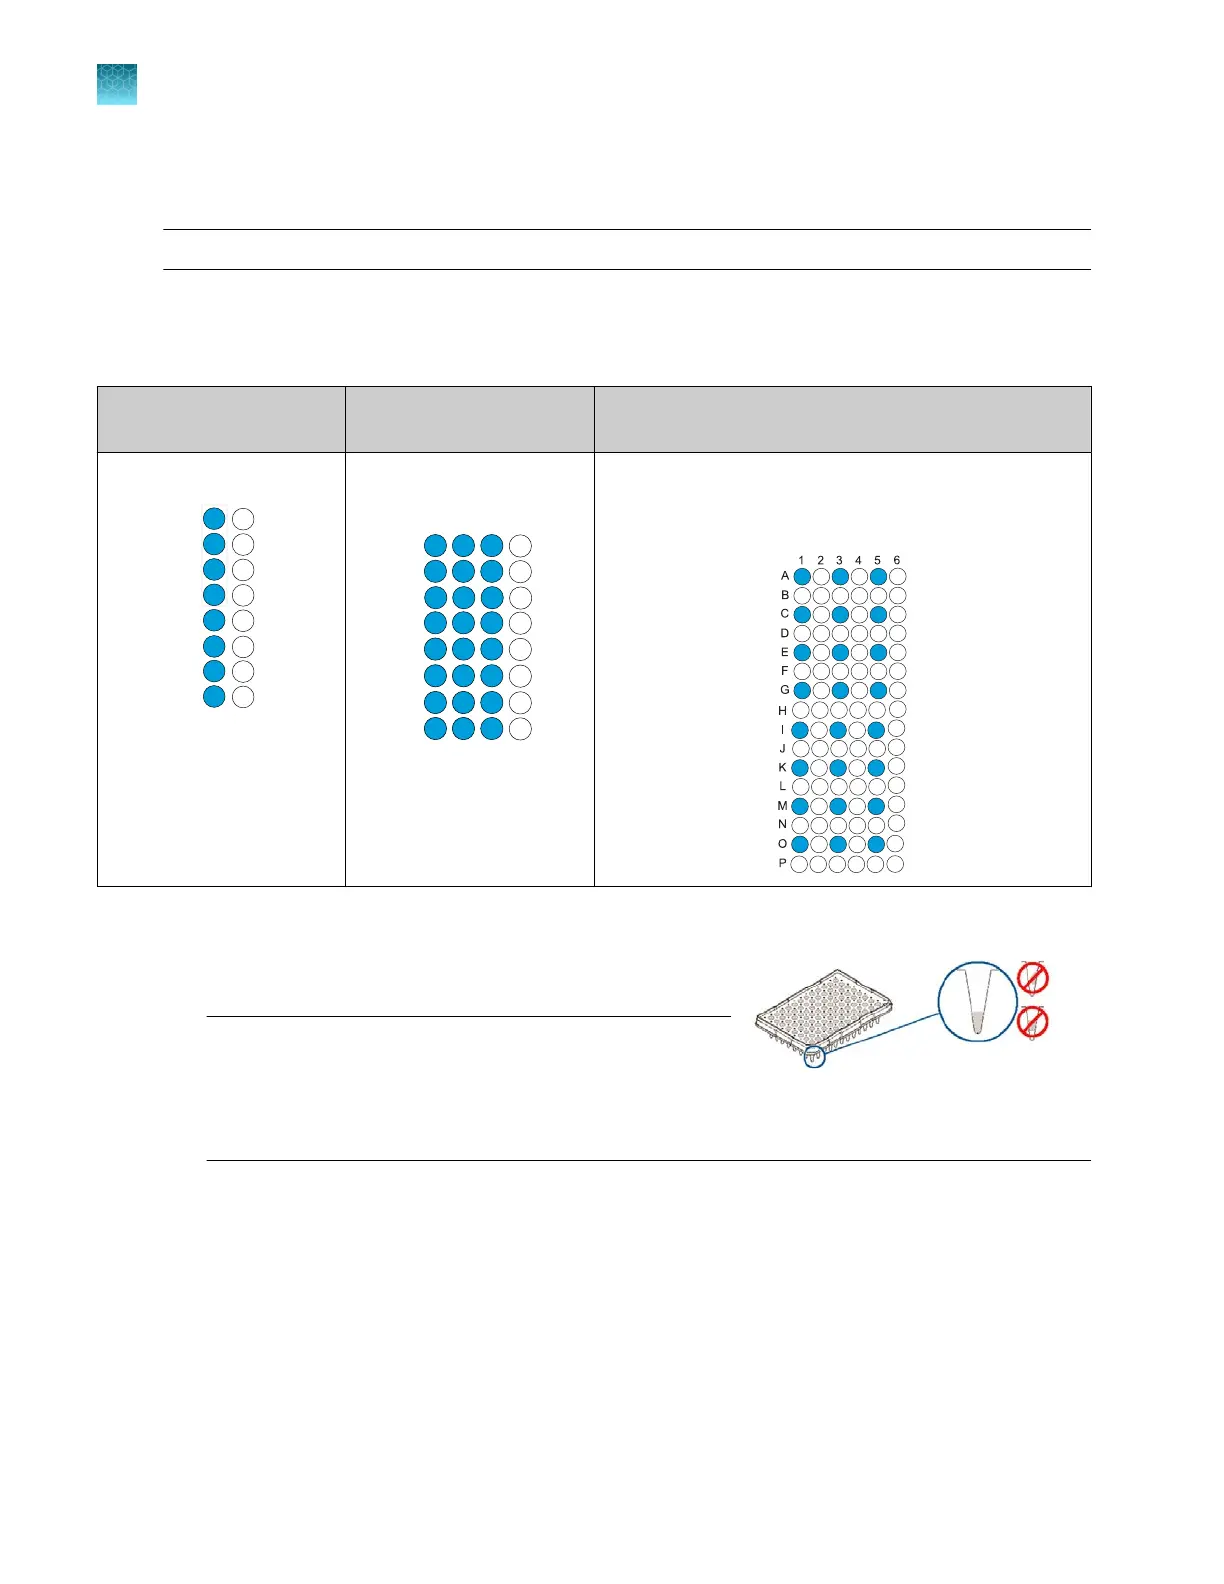
oad the standards in any injection position in the plate.
The example below shows injection position 1, but you can specify the starting well for an injection
position. For information on other injection positions, see “Plate and strip-tube layout” on page 75.
8-capillary
96-well plat
e
24-capillary
96-well plate
24-capillary
384-well plate
A1 through H1
A1 through H1, A2 through
H2, and A3 thr
ough H3
1 2 3 4
A
B
C
D
E
F
G
H
1
4
7
10
13
16
19
22
2
5
8
11
14
17
20
23
3
6
9
12
15
18
21
24
Note: 384-well plat
es are not supported on 8‑capillary
instruments.
Columns 1, 3, and 5 in rows A, C, E, G, I, K, M, O
1
4
7
10
2
5
8
11
3
6
9
12
13
16
19
22
14
17
20
23
12
15
18
21
24
12
12
12
12
2.
Briefly centrifuge the plat
e that contains the standards.
3.
Verify that each standard is positioned correctly in the
bottom of its well.
IMPORTANT! If the cont
ents of any well contain
bubbles or are not located at the bottom of the well,
briefly centrifuge the plate, remove the plate from the
centrifuge, and verify that each standard is positioned
correctly in the bottom of its well.
4.
S
tore the plate on ice until you prepare the plate assembly and load the plate in the instrument.
5.
Prepare the plate assembly as described in “Prepare the plate assembly” on page 77.
Chapter 12 Run calibrations and install checks
Perform an install run
12
332
SeqStudio
™
Flex Series Genetic Analyzer with Instrument Software v1.0 User Guide