126 Library Installation and CRU Replacement
a. From the front of the library, open the I/E station and access doors of the 9U Expansion Module.
Squeeze the handle of the Y-rail release mechanism, lift it out of its locked position, and slide
it downward as far as it will go.
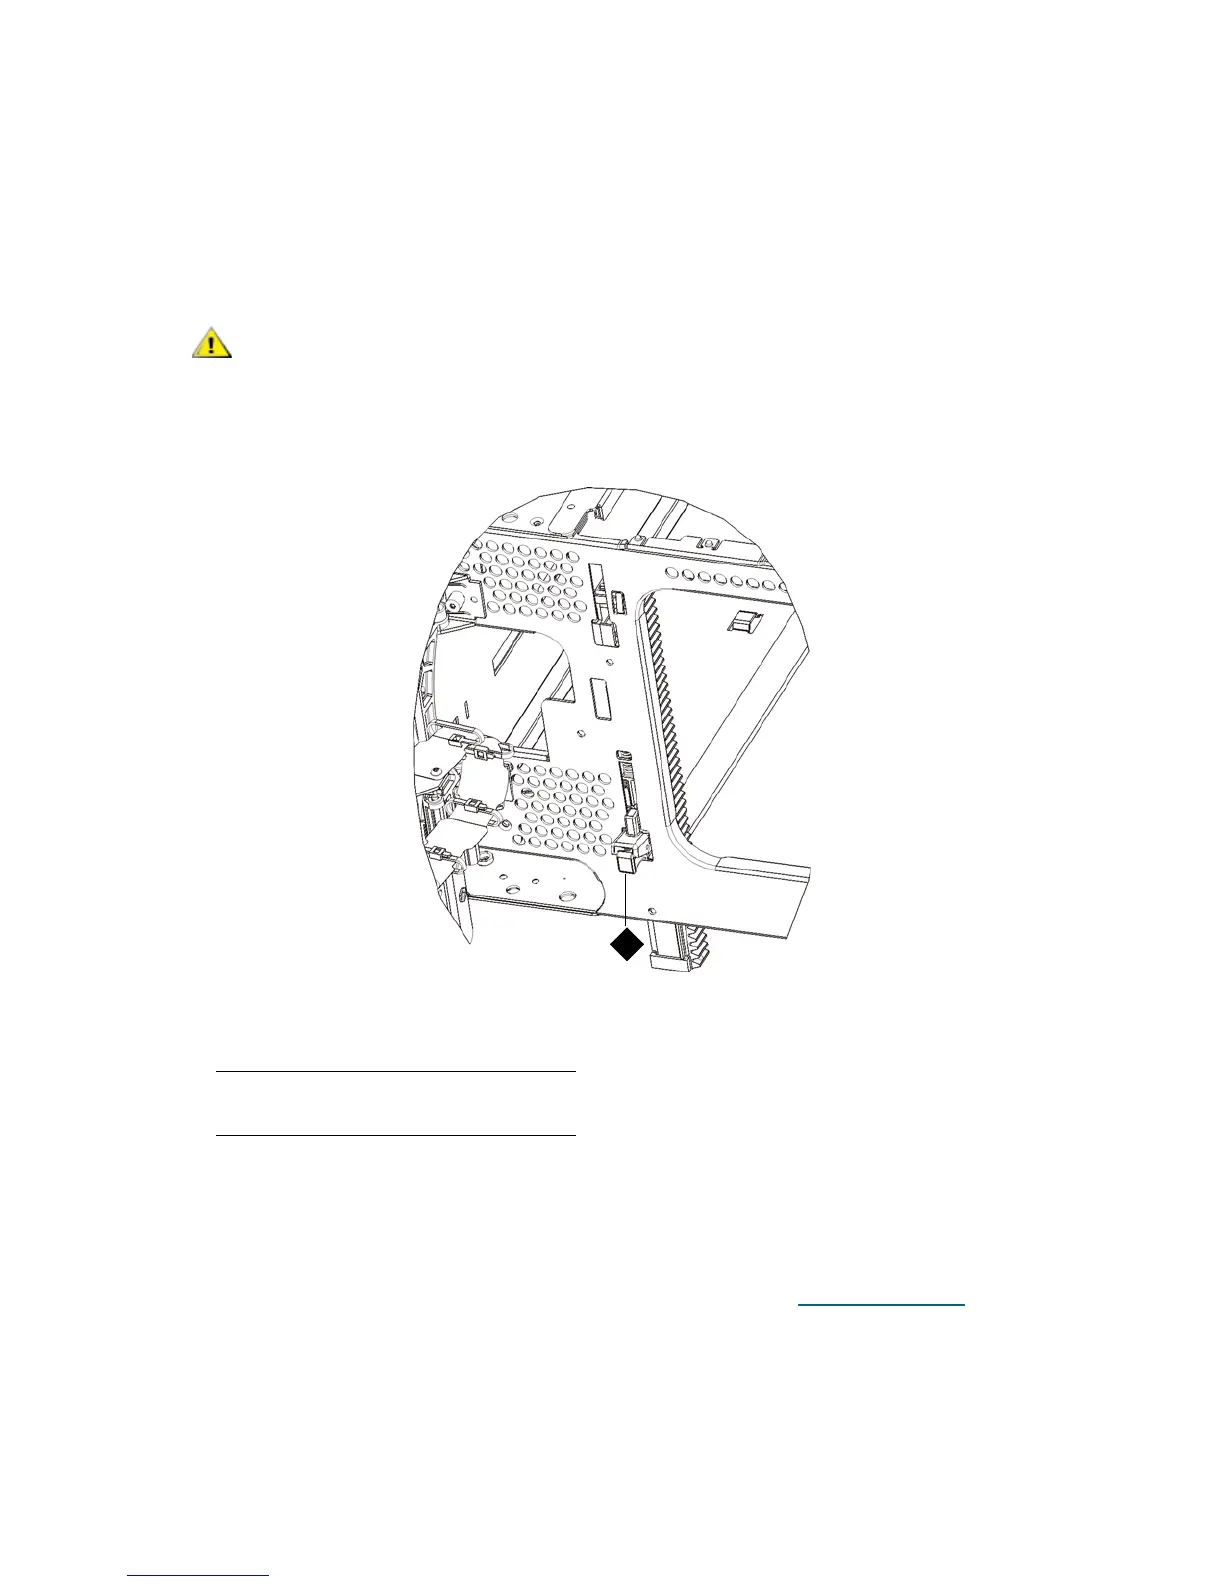
b. From the back of the library, find the rear Y-rail release mechanism, which is located in the
interior of the right side of the module. Squeeze the handle of the Y-rail release mechanism, lift
it out of its locked position, and slide it downward as far as it will go.
Doing this aligns the Y-rails with the Y-rails of the module beneath it.
11 Close the module’s doors.
12 Repeat the above steps as necessary for each module you are installing.
13 Reinstall the tape drives to the library.
14 Cable your library as necessary, following the instructions provided in Cabling the Library
on page 22.
15 Power on the library.
Check to make sure that there is no gap between the top and bottom
Y-rails on both the front and back of the library. If a gap exists, the
library cannot mechanically initialize.
1 Y-rail in unlocked, functional
position

 Loading...


