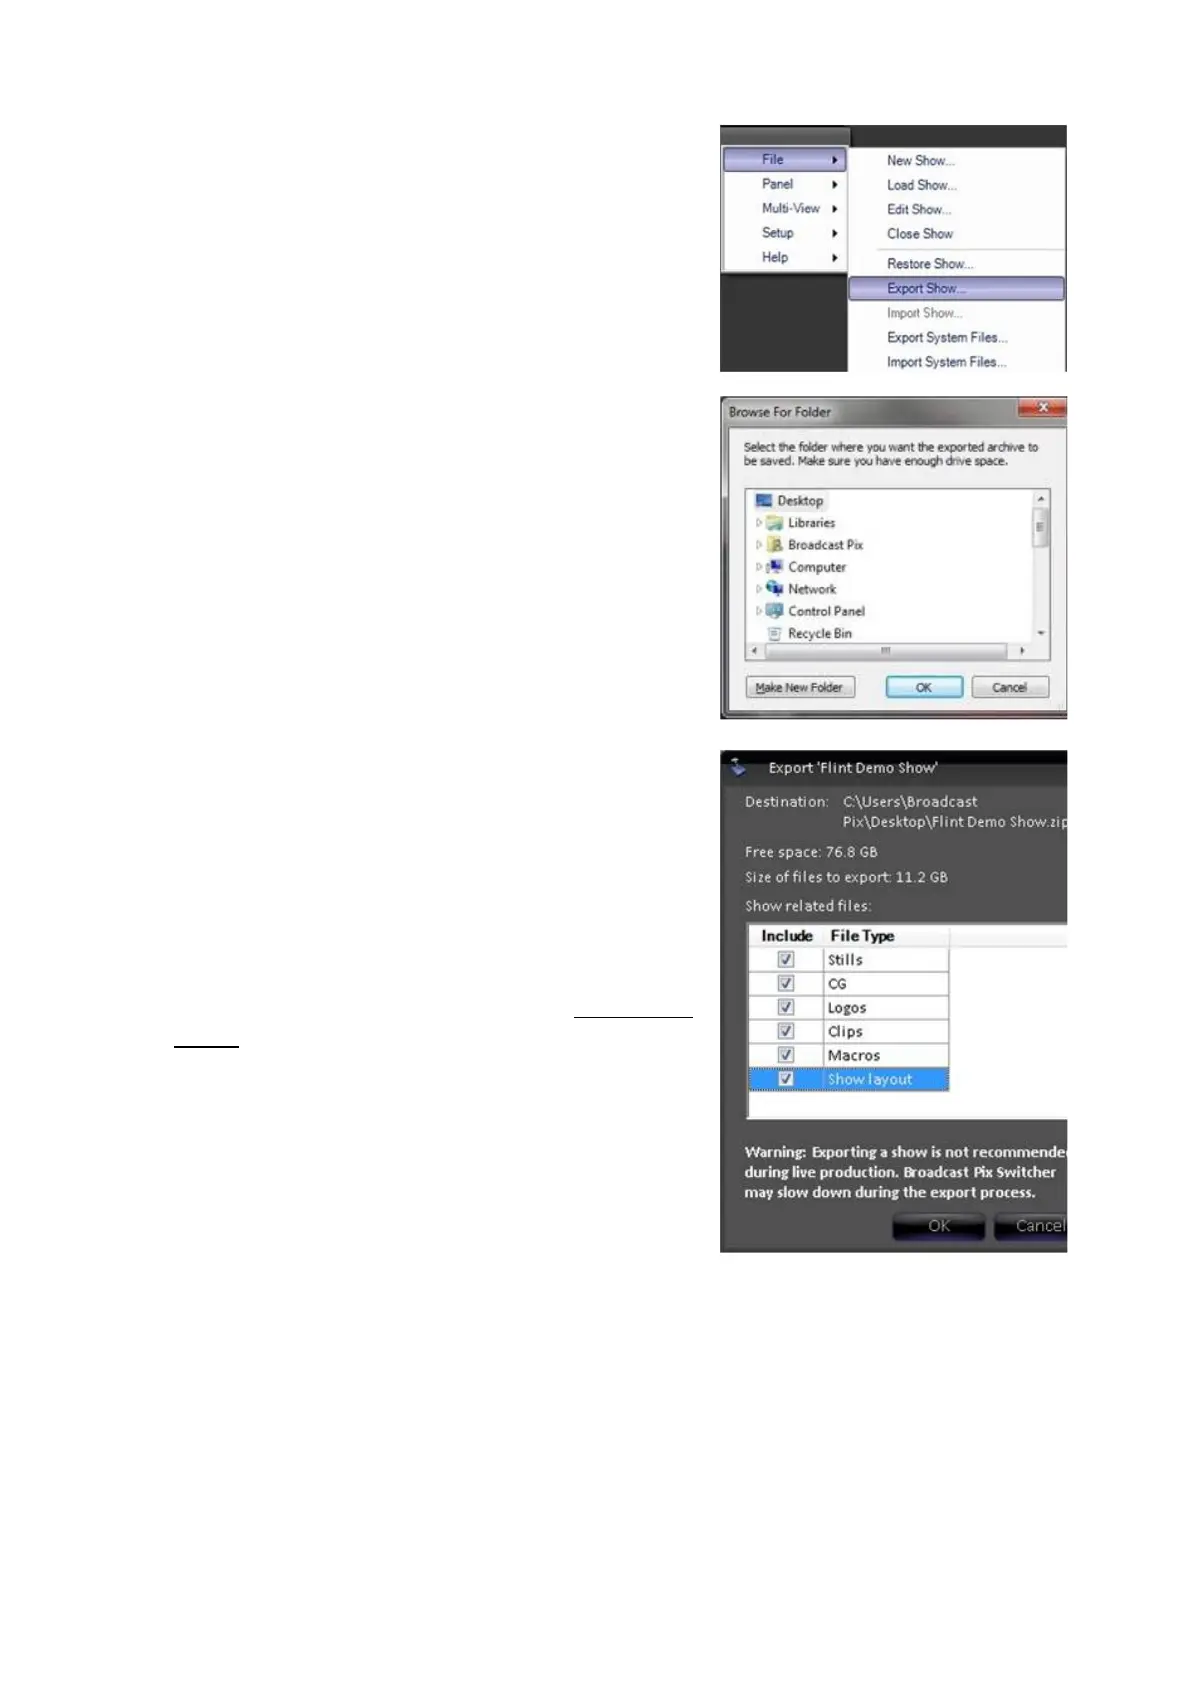
A browse window will appear to select the
destination of the exported files. The
destination can be anywhere locally on the
hard drive, like on the desktop, anywhere on a
network or anywhere on a connected external
hard drive through USB.
Select a destination and click on the OK
button, as shown on the right.
In the Export show window, select the desired
files. Place a check mark next to Stills, CG,
Logos, Clips, Macros, and/or Show Layout,
as shown on the right. The show file is
automatically expo
rted even if no file types are
selected.
Selecting any of these options will only export
content and settings for the currently loaded
show, to load a different show see Running a
Show.
As file types are included the Size of files to
export will increase, in this example 11.2 GB,
in addition a Free space indicator for the
specified location will be reported. If the file
size exceeds the amount of free space the
export will not be allowed to continue.
Click on the OK button.
A progress bar will appear, depending on how
big the content files are the export can take
several minutes to hours. In this example 11
GB took around 30 minutes, times will vary.