BPswitch Operators Manual
223 / 413
activated, as described in Floating PixPads.
To view clip motion controls:
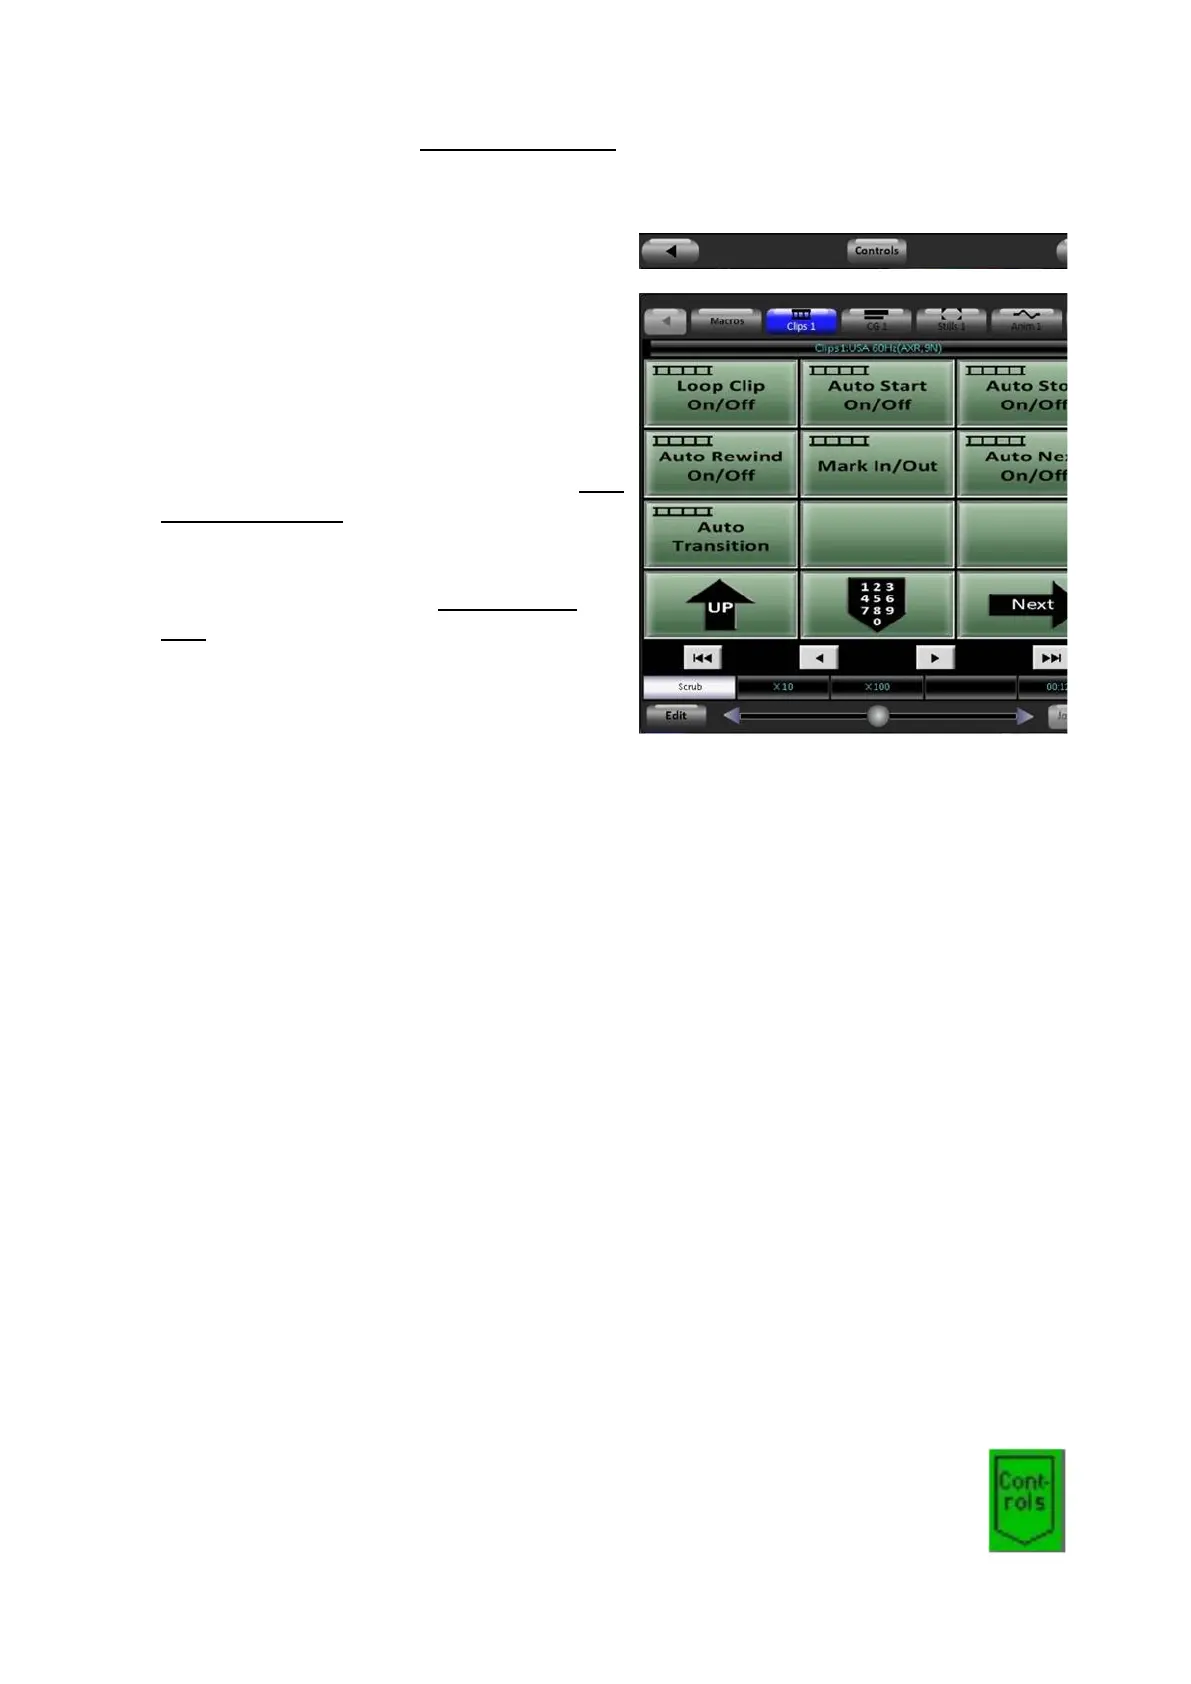
Select the [Controls] button on the
Multi-View PixPad, either using the
control panel or mouse.
This will bring up the Clip modifiers
PixPad, as shown on the right.
The motion control buttons work similar
to the control panel, as described in Clip
Motion Controls.
These scrub controls work in the same
manner as described in Scrubbing a
Clip.
However since there is only 1
knob/slider, a label above the knob
needs to be selected to activate the
desired control. By default the first knob
label (in this case ‘Scrub’) is selected.
In addition the knob/slider has 2 nudge
arrows at each end for finer control.
Clip Control Modifiers
Each individual clip can have its own set of modifiers. Modifiers include: Mark In,
Mark Out, Aspect Controls, Remove Mark In, Remove Mark Out, Loop Clip, Auto
Start, Auto Stop, Auto Rewind, Auto Transition and Auto Next. When a clip is
imported and added to a show the clip is set up by default to Auto Start, Auto Stop
and Auto Rewind (AXR).
Mark In and Out Points
Mark-in and Mark-out enable points to be set at the beginning and end of a
segment of a clip. Once set, the [l<<] button will bring the clip to its mark-in point,
and the clip will stop playing at its mark-out point. These are helpful for
temporarily trimming off unused portions of a clip when ingested.
To set mark points on a clip:
Select the [Clips 1] button, in the Device Select section of
the control panel or SoftPanel, the button will illuminate
orange.