BPswitch Operators Manual
273 / 413
Adding the Camera Control Option to an Existing System
If you purchased your system with the Camera Control option, the software was
installed at the factory, and so you can skip the following section. If you purchased
the camera control option after the fact, then you need to enter the System
Options Key Code, which was supplied once you ordered the Camera Control
Option.
See Installing System Options for more information.
Changing Camera Control Device Settings
It is possible to change various settings in the Camera Control Settings window.
For Sony Camera Control you may change the COM port assignment or IP
address for each camera, as well as where the camera is located on the daisy
chain, in addition to the input number for tally output on supported camera models.
Although the control supports up to 16 presets, each Sony camera has a fixed
number of presets, i.e. an EVI-HD1 has 6 available presets where as a BRC-H700
has 16. Depending on some IP camera models, you may store over 100 presets,
however if the camera power is lost those presets are also lost and need to be
resaved.
Sony Camera Control Settings
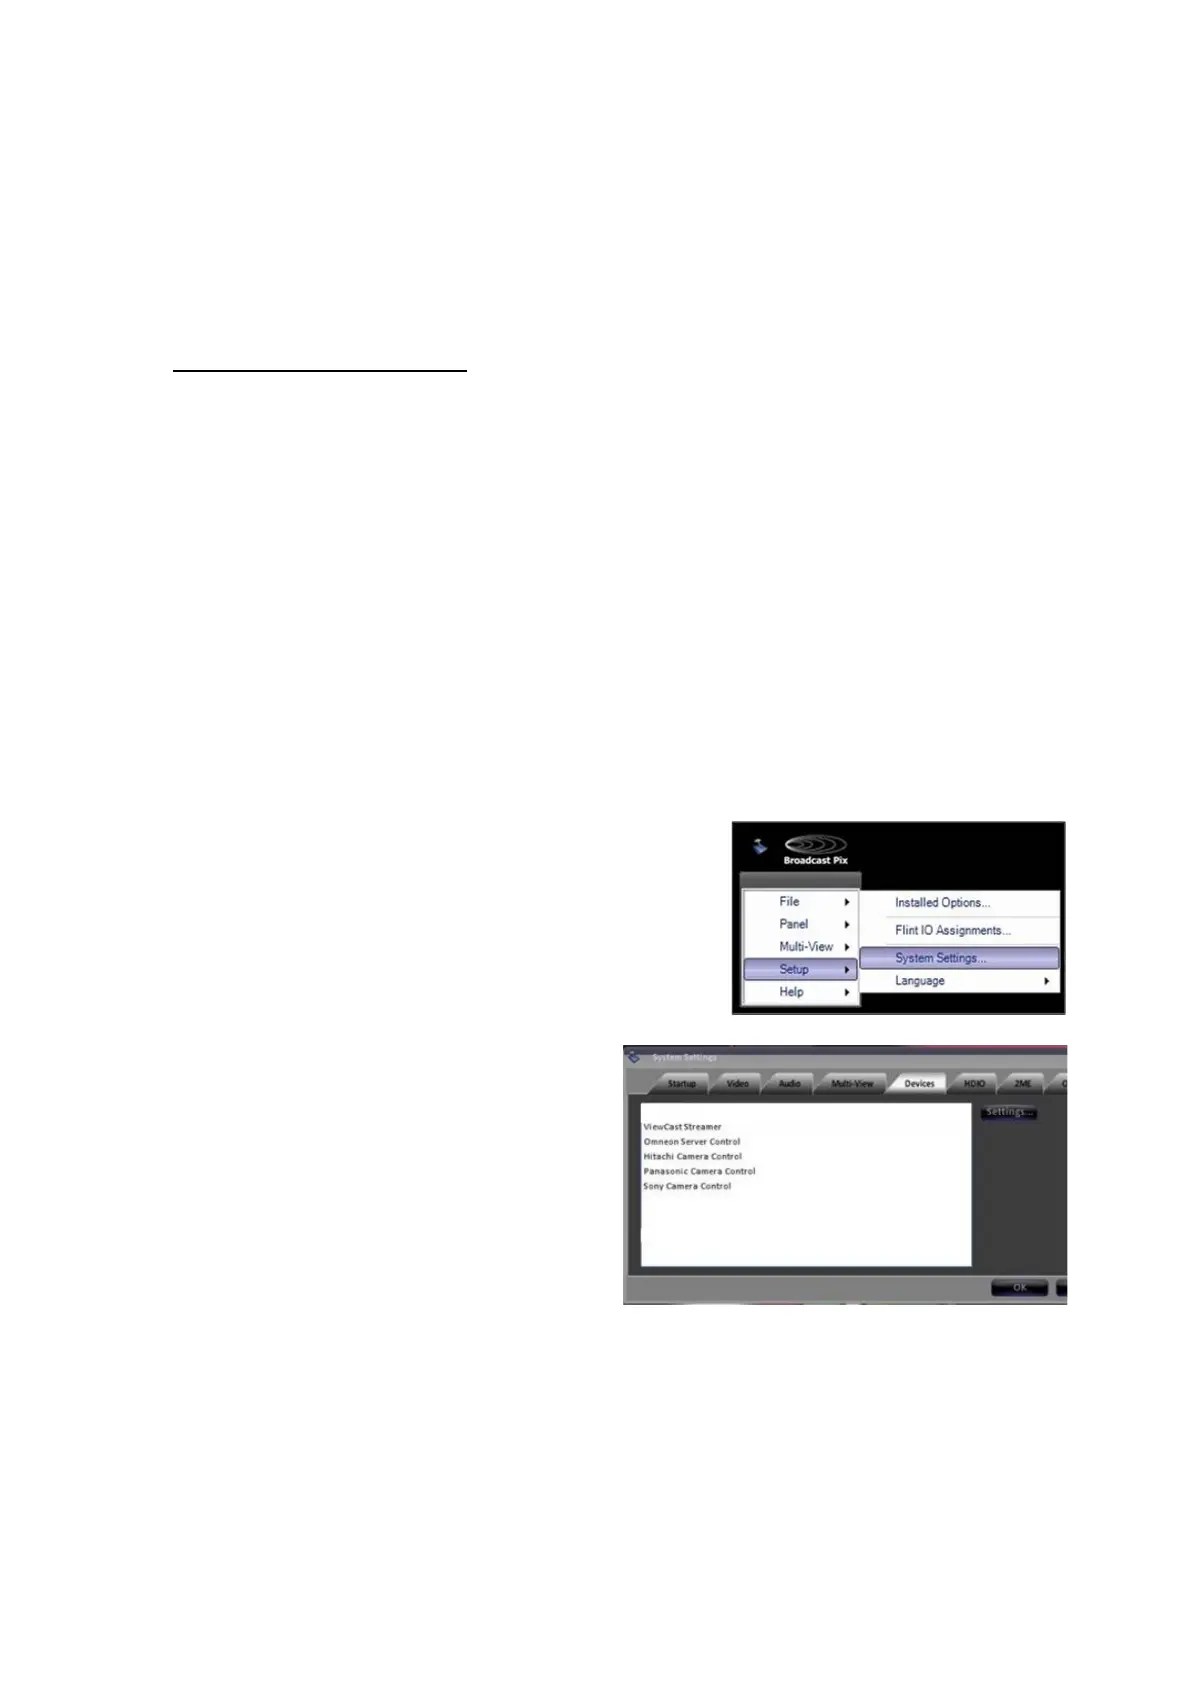
In BPswitcher go to the Setup menu
and select System Settings…, as
shown on the right.
In the System settings window,
select the Devices tab.
In the list of enabled devices select
Sony Camera Control and select
the Settings… button.
The Camera Control Settings window
will appear as shown on the right.
Click the Camera Number drop
down menu to select a camera 1-12
and change the Comm Port number
to the appropriate communications
port.
If the camera head has built-in tally,