BPswitch Operators Manual
14 / 413
3.
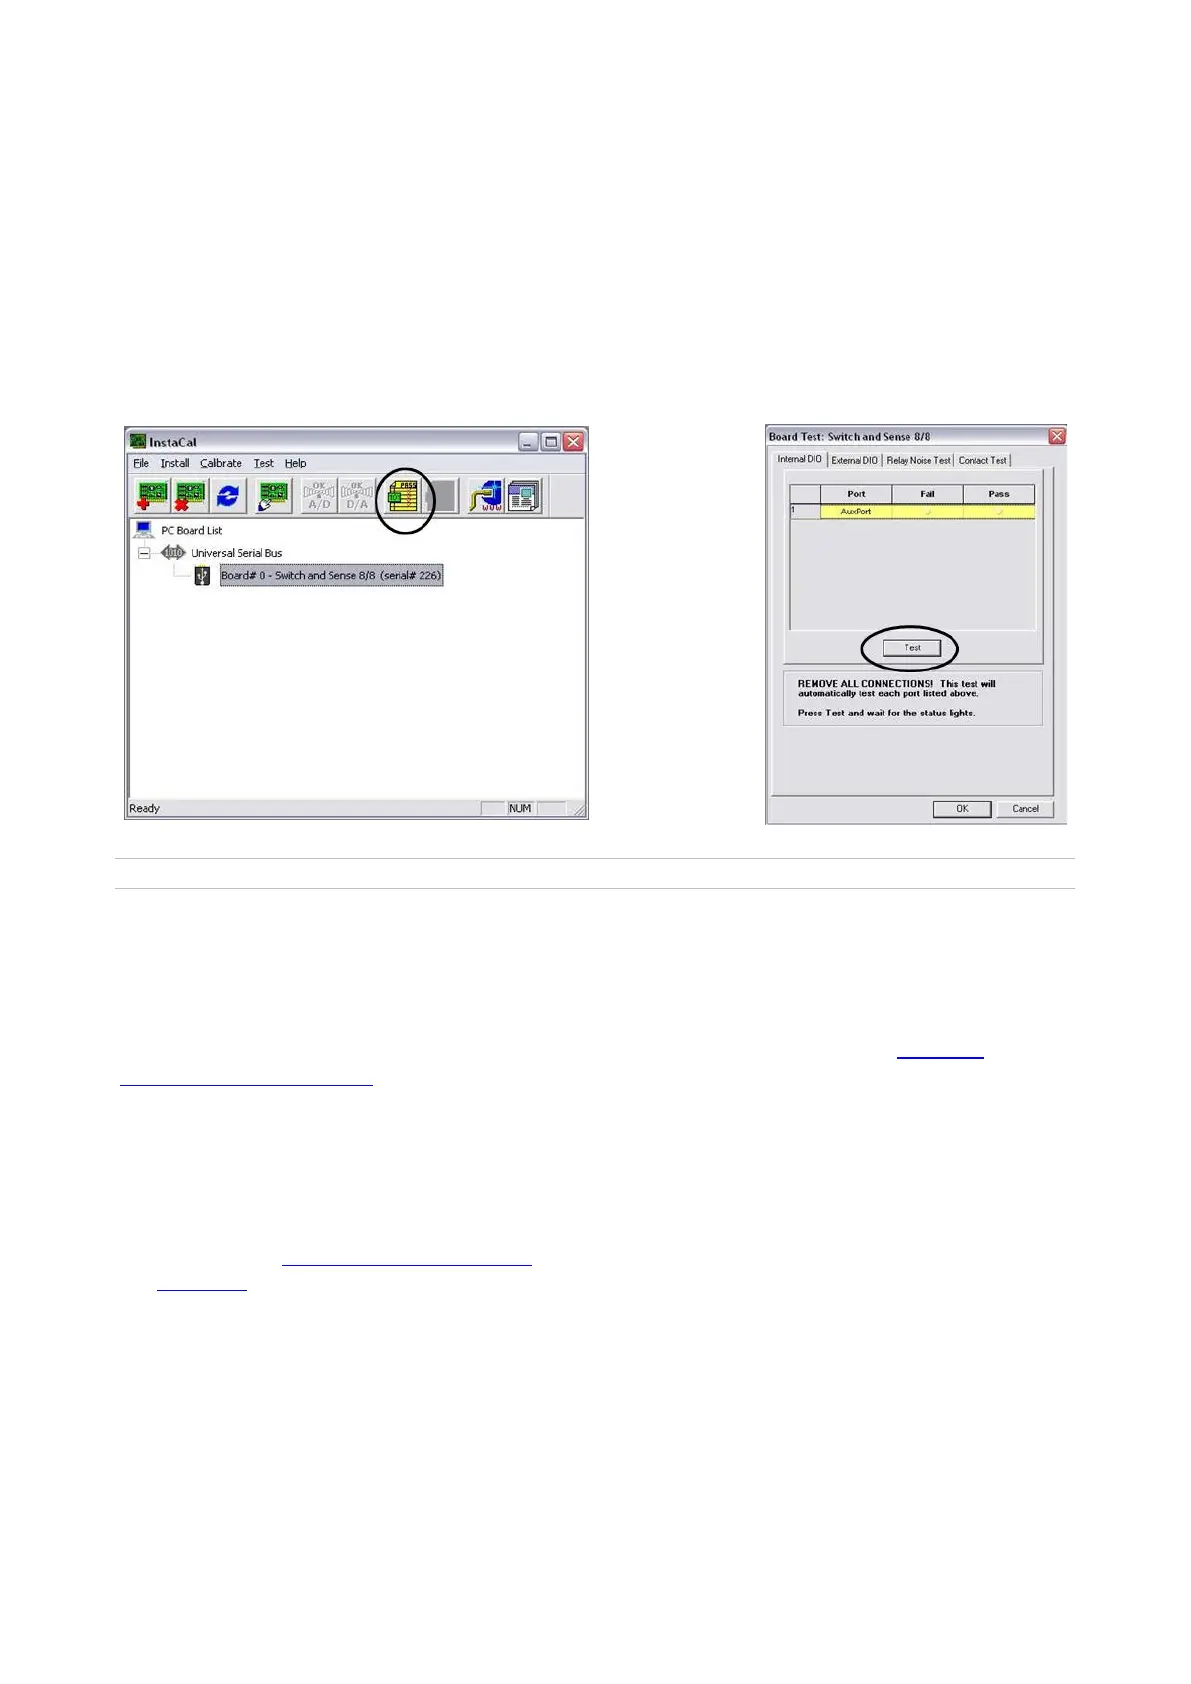
Your tally box device will appear under the Universal Serial Bus section. Click
on the yellow Digital Test button, to confirm communication to the tally box.
This will open up the Board Test window, as shown below right.
4.
Click on the Test button. You should hear the tally box click once, if the
installation was successful. If not, check your connections to the tally box and
to the workstation.
5.
Close all the windows in InstaCal, you are now ready to use the tally box.
Created with the Personal Edition of HelpNDoc: What is a Help Authoring tool?
Installing Multiple Tally Boxes
A standard system usually uses one tally box, however multiple tally boxes may be
installed on a Broadcast Pix system. Multiple tally boxes expands the number tally
outputs as well as the number of General Purpose Inputs and Outputs (GPIOs), which
can be used with Fluent Macros. Installation is the same, as described in Installing
Optional 24 port Tally Box, however each tally box must be assigned to a specific board
number.
To assign multiple tally boxes:
Ensure that the Measurement
Computing/InstaCalsoftware is installed, as
described in Installing Optional 24 port
Tally Box, and open the InstaCal software
by navigating to Start Menu, All Programs,
Measurement Computing, InstaCal.