BPswitch Operators Manual
112 / 413
Select Apply and the text will appear in the big green window, which
represents the PixButton.
If desired you may draw custom icons on the button by left-clicking with the
mouse and dragging. Custom icons may assist in remembering what the
memory is comprised of, in a graphical representation.
Erase any part of the button by right clicking. At any point you may revert to
older versions by clicking on an image in the Undo section.
When done press Save… button. It is recommended to save all your custom
icons in one folder on the C Drive.
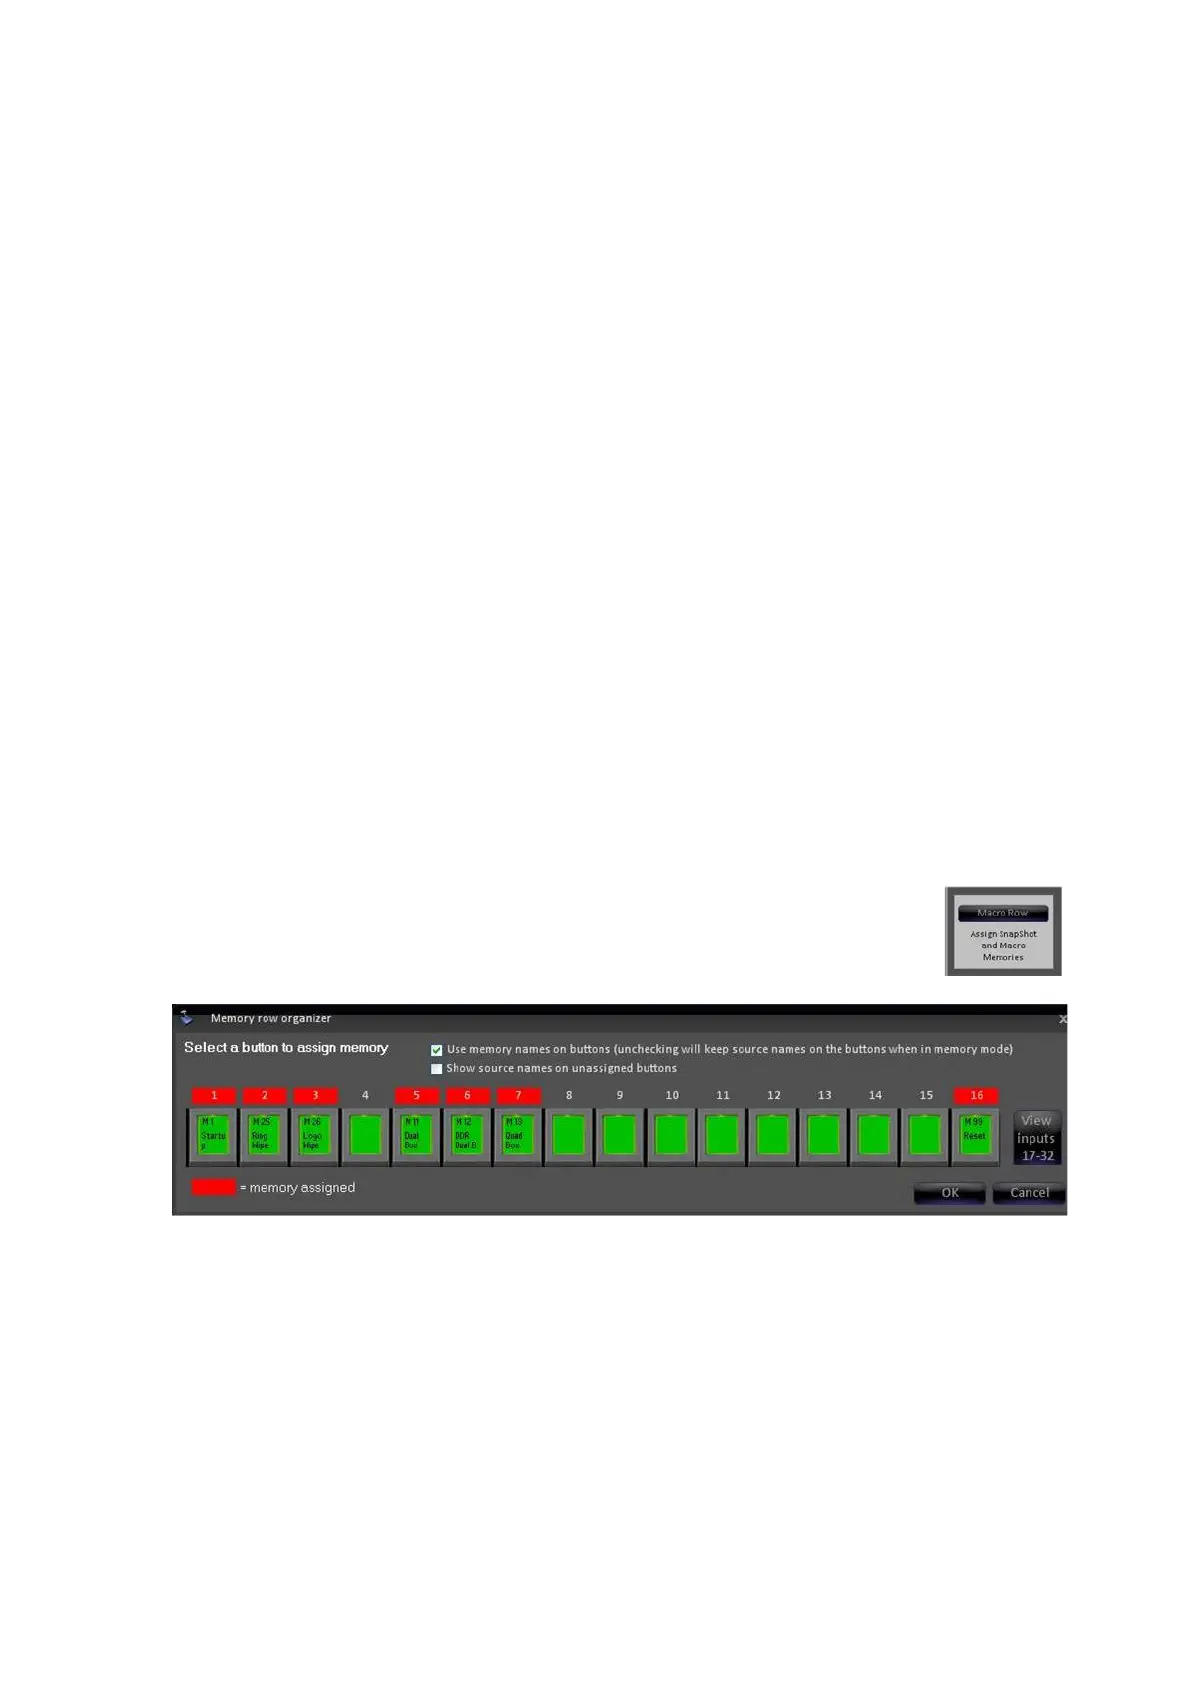
Macro Row Assignments
The 2000 control panel has a Macro row of PixButtons, which can be assigned to
trigger SnapShot and/or Macro Memories. There are a total of 16 direct and an
additional 16 assignable buttons in the shifted row, for a total of 32 assignable
memory buttons.
These buttons are useful for triggering Alpha Wipe transitions and other frequently
used effects without having the need to enter the MEM Device PixPad.
To assign MEMs to the Macro Row:
In the Edit Show Settings window, select the gray Macro Row
button. The Memory row organizer window will appear, as
shown.
Click on the desired button to assign a Snapshot or Macro Memory. To
assign a memory to buttons 17-32, click on the View inputs 17-32 button.
The Assign memory to button window will appear, as shown below, showing
a list of created SnapShot and Macro Memory. Click on the desired memory
to select it.
If desired, you can search for a specific memory by name in the Search field