BPswitch Operators Manual
375 / 413
designed to monitor any of the inputs or outputs, which is outputted from the
server's headphone jack. The mapping of where the Master, Web and Solo are
outputted can be configured, see Audio I/O.
There are two ways to float/open the audio mixer for control, either opening the
entire 8 channel mixer or opening individual channels and creating a custom mixer
to fit your production needs. In addition, Macros can be created to control parts of
the Audio Mixer, to open the Macro Editor go to the Panel-Macros menu.
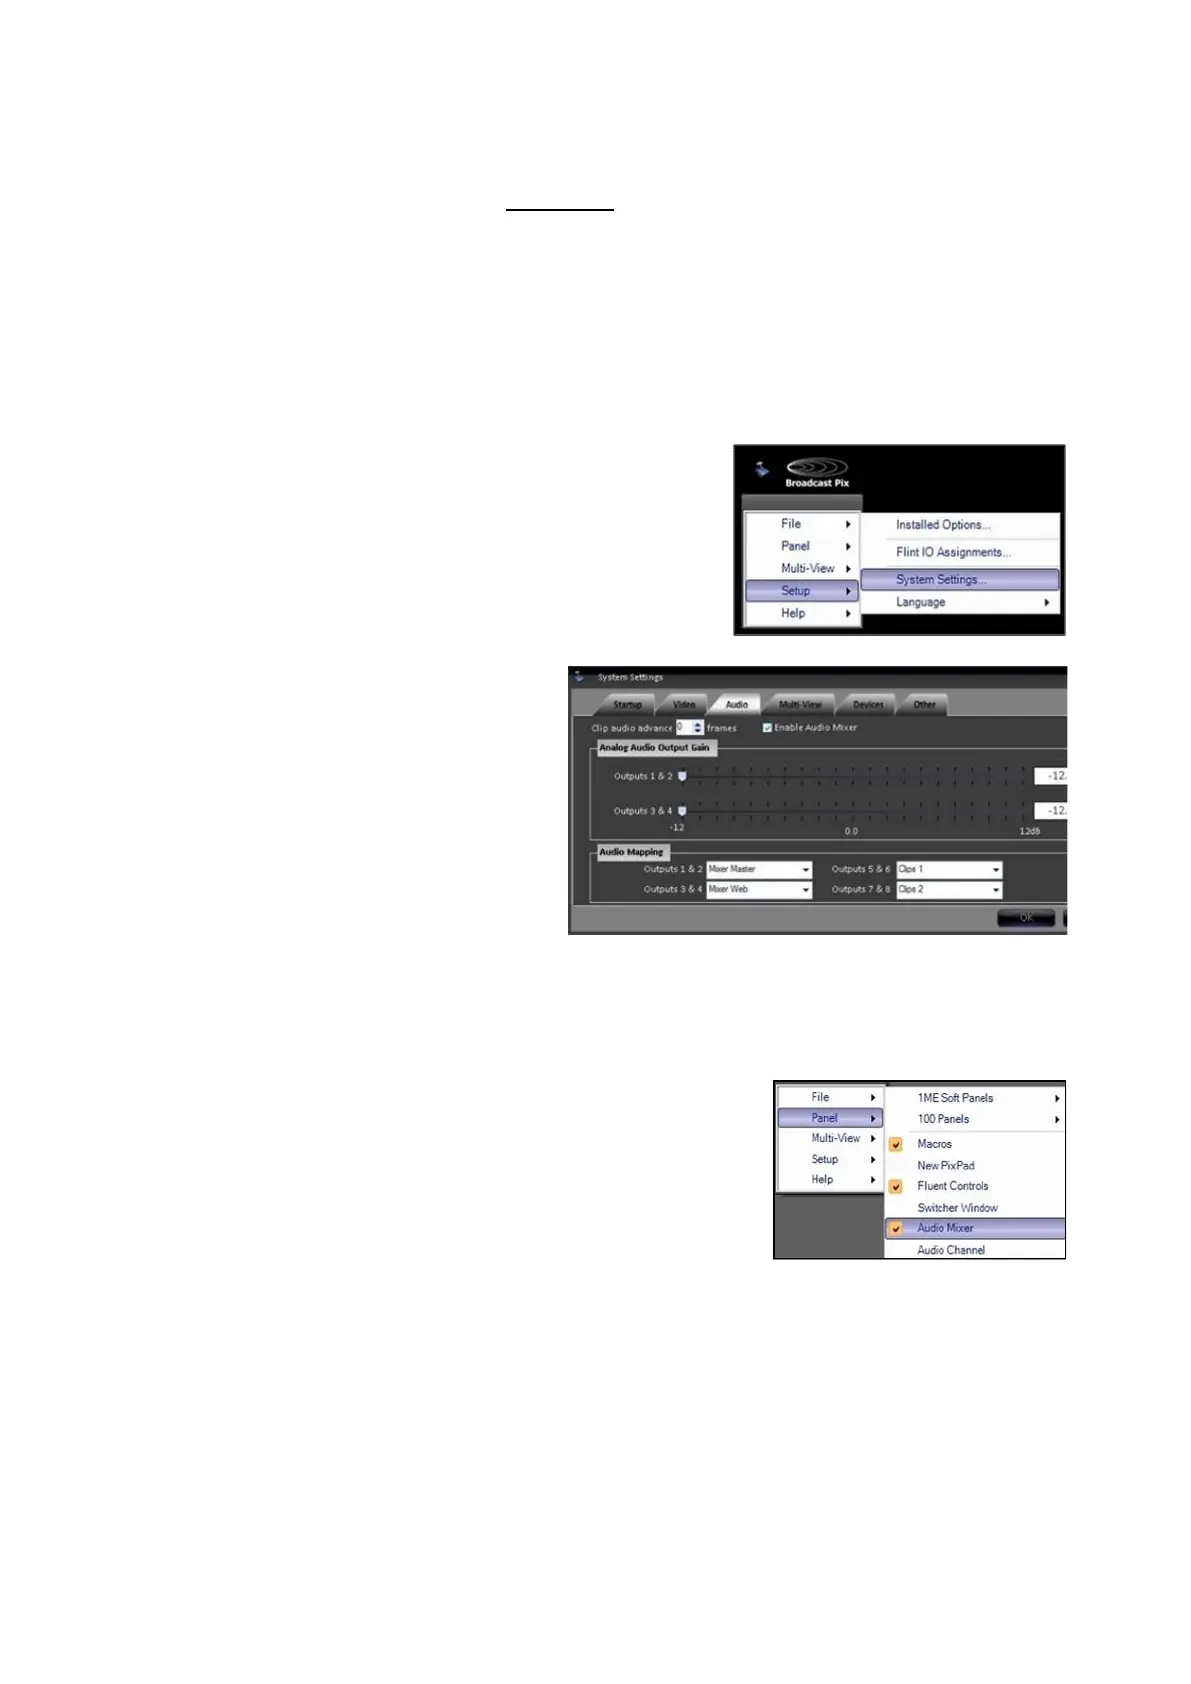
Enabling the Audio Mixer
Navigate to the Setup-System
Settings menu, as shown on the
right.
In the System Settings window,
select the Audio tab.
Place a check mark next to
Enable Audio Mixer
, as shown on
the right.
Click on the OK button, to apply
the changes and to close the
System settings window.
Opening the Audio Mixer
To open the entire channel Audio
Mixer, navigate to the Panel-Audio
Mixer menu, as shown on the right.
The entire 8 channel audio mixer
will open, as shown on the right.
If desired the left input side may
shrink to show fewer inputs,
however the right output section is
always visible. Simply drag the
black divider bar left & right to
expose the desired amount of
inputs, as shown on the right.