BPswitch Operators Manual
326 / 413
When you press the Deck Control PixButton, the active device and clip will be
whichever clip was last used, or the first device if you are just starting.
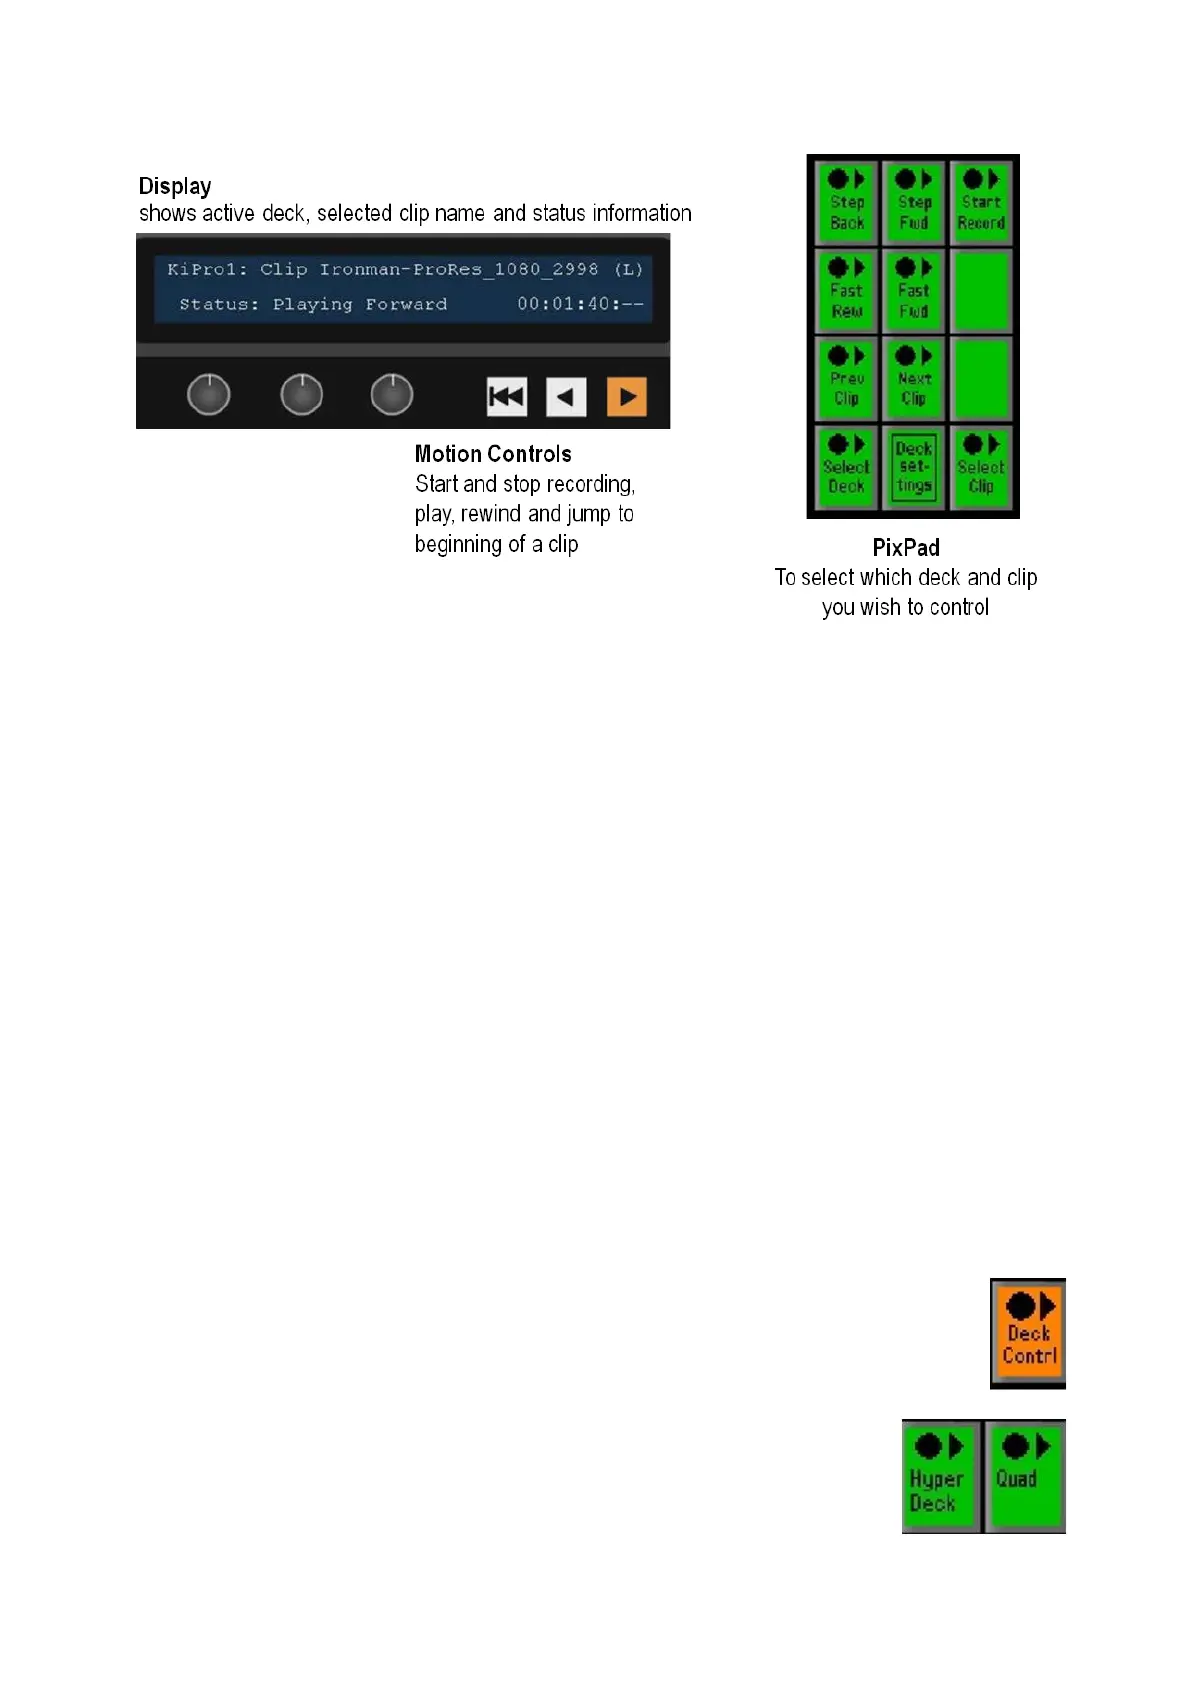
The display indicates 4 pieces of information:
1.
The top left corner always shows the deck currently assigned to the panel’s
bank of device controls. In this case, the words KiPro1 indicate that they are
set to KiPro Unit 1.
2.
Clip XXX indicates the selected clip name. Attributes such as loop, auto start
and slot number will appear at the end of the clip name, in this case (L).
3.
The bottom left side displays status information for the selected clip, if it’s
playing, recording, rewinding, and other status information like lose of input
when recording, in the case Playing Forward
4. The bottom right side displays a timecode counter for the selected clip. When
playing/recording HH:MM:SS is displayed, when stopped/paused
HH:MM:SS:FF is displayed.
Controlling a Deck
To start recording a clip:
In Device Control section, select the [Deck
Contrl] PixButton, it will illuminate orange, as
shown on the right.
If not already selected, select the desired deck in
the PixPad by selecting the [Deck] PixButton, in
this example Hyper Deck. The name in this
PixButton is the name assigned in the Deck