BPswitch Operators Manual
409 / 413
Once the progress bar disappears, the system
has been upgraded.
You may now start to use the new features.
Installing System Options
When System Options are purchased they require a unique number code to
activate them for use. On new systems, this code comes pre-installed so no
further steps are necessary. On existing systems, where options are purchased
after the fact, an activation code will be provided and it is necessary to manually
enter this code. This number is unique to your system, should you need it again it
is available from customer support by providing the board number of your system,
which is also displayed on the Installed Options menu.
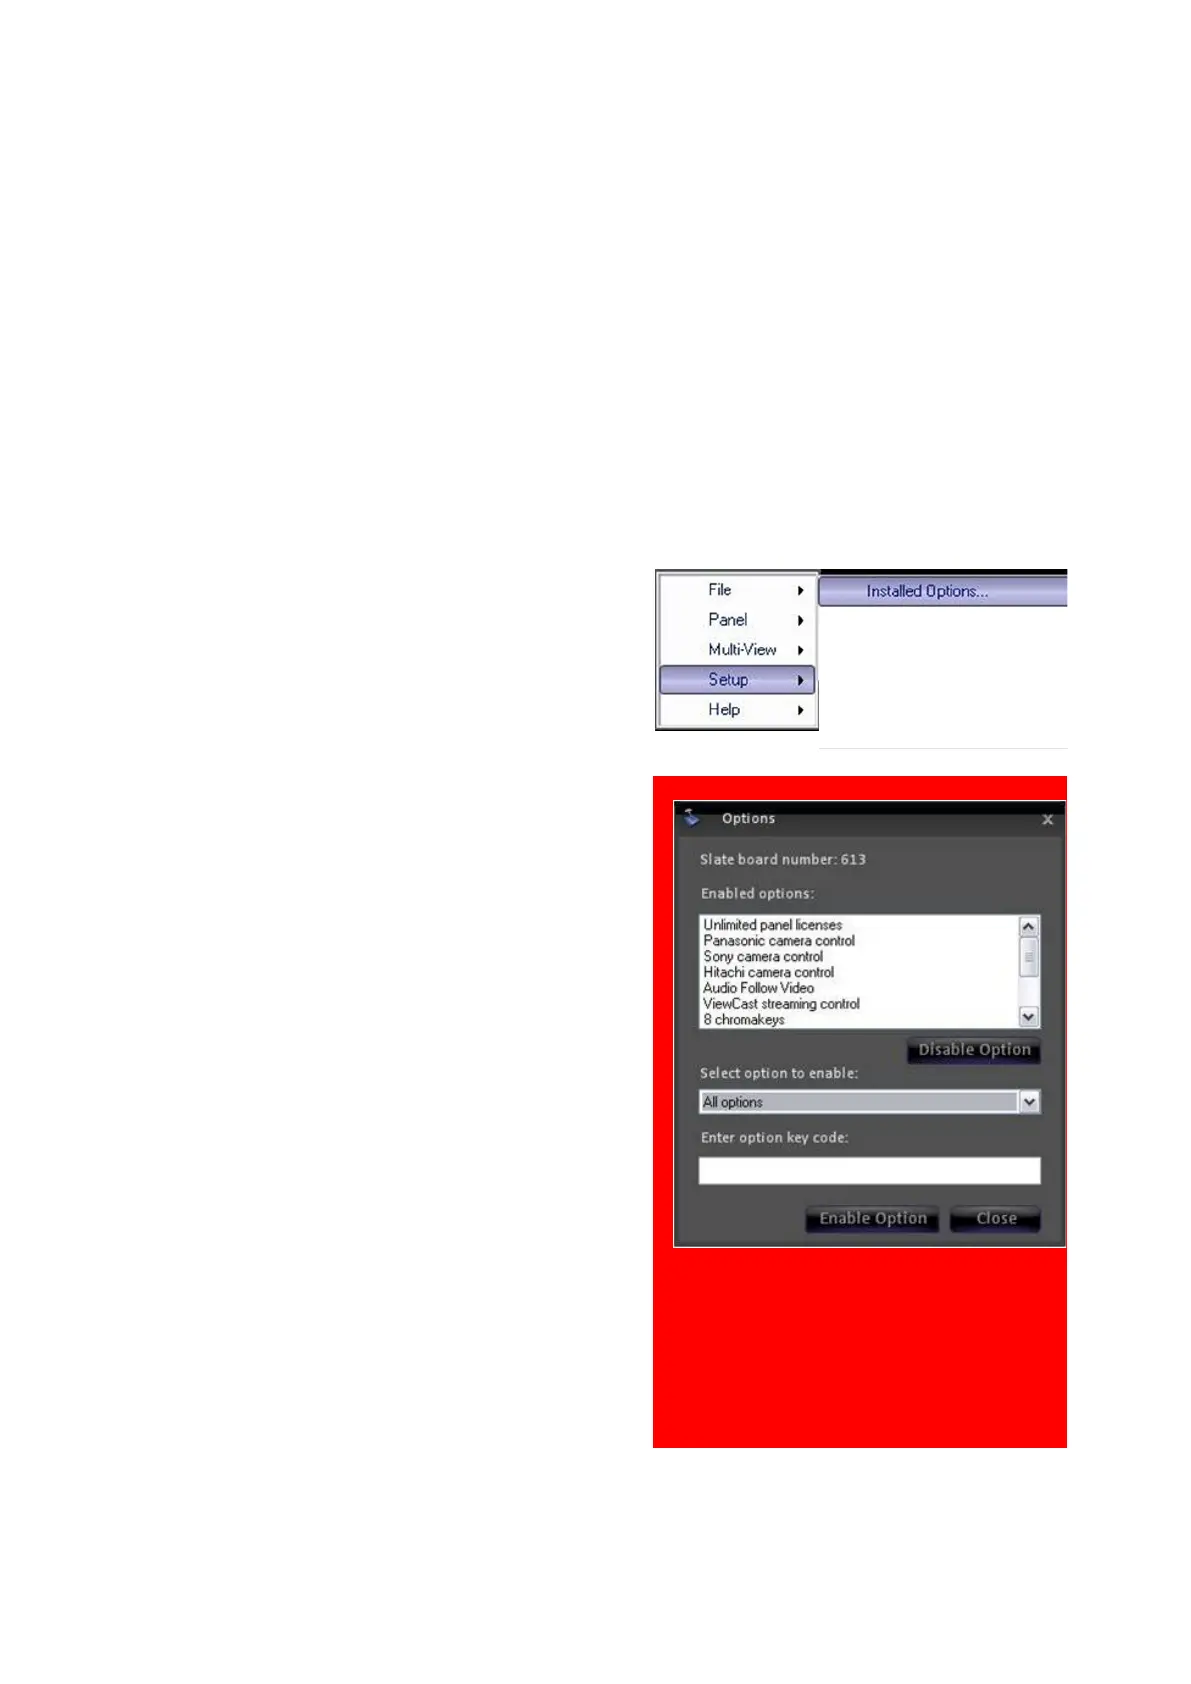
In BPswitcher select Setup menu.
Then select Installed Options…, as
shown on the right.
In the Options window select the option
from the Select option to enable
drop down list, i.e. Sony Camera Control.
Enter the code provided, in the Enter
option key code text box.
Click on the Enable Option button. To
enter more option codes repeat
step 3 & 4.
When complete, click on the Close
button, as shown on the right.
A message will pop up stating a restart of
the application is necessary for the option
to take effect.
Close the application (File, Quit) and
restart BPswitcher.
Your options are ready to use.