BPswitch Operators Manual
179 / 413
Once on, the Power LED will illuminate green, with the other buttons not
illuminated. If a show is running the Remote Panel will attempt to connect to the
BPswitch System and auto-connect if the Remote Panel has a valid IP address.
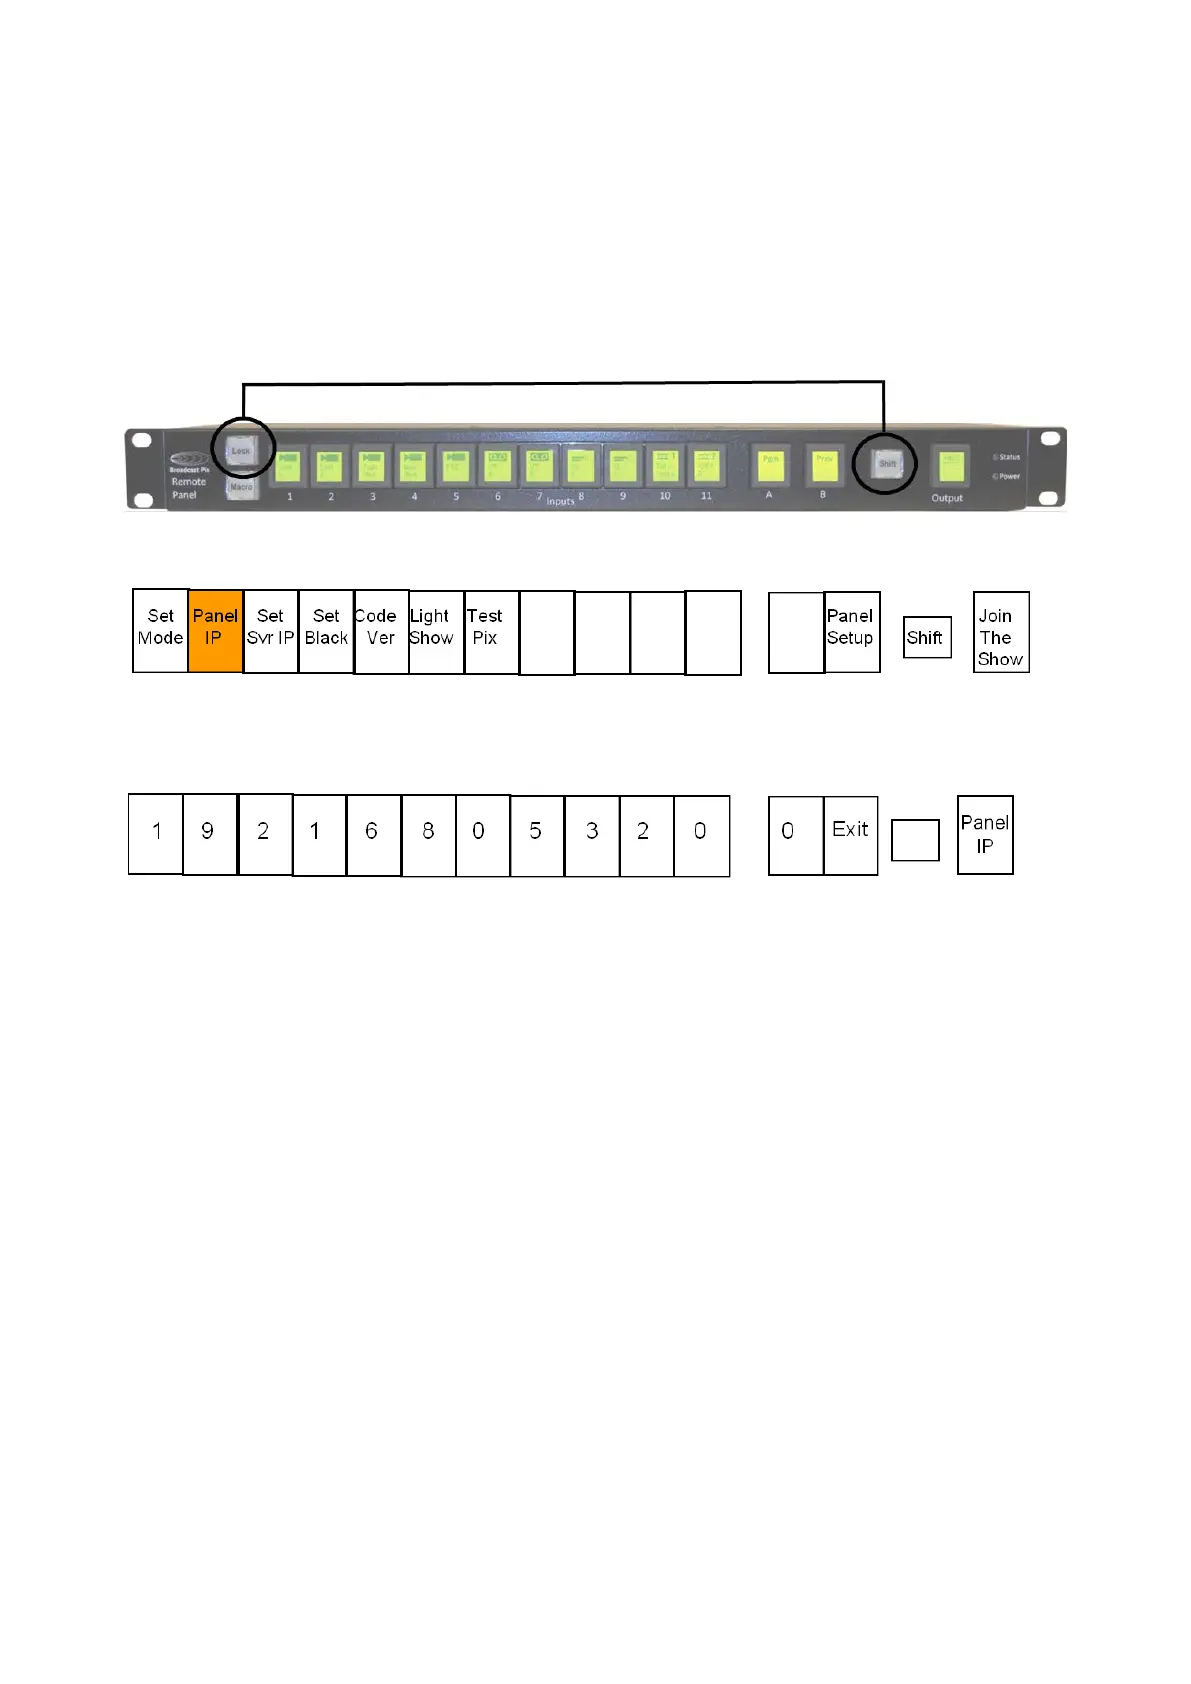
To Change the Remote Panel IP Address:
On the Remote Panel, select and hold down the [Shift] button, it will
illuminate yellow. Then select the [Lock] button, as shown below.
This will put the Remote Panel into an offline setup mode, as shown below.
Press the [2] input PixButton labeled Panel IP, and the PixButtons will
change showing the assigned IP address, as shown below.
Press the [10], [11] and/or [A] input PixButtons to enter the desired address.
The numbers will cycle from 0 to 9.
For example to enter the address 192.168.53.212, press the [11] PixButton 1
time and the [A] PixButton 2 times.
Select the [Output] PixButton labeled Panel IP to apply and exit out of the
setup function. If a show is running, the panel will attempt to connect with the
new IP address. While the panel connects the Status LED will blink blue,
once connected with a valid IP address the LED will turn to solid blue.
To Change the Server IP Address:
On the Remote Panel, select and hold down the [Shift] button, it will
illuminate yellow. Then select the [Lock] button.
This will put the Remote Panel into an offline setup mode, as shown below.
Press the [3] input PixButton labeled Set Svr IP, and the PixButtons will
change showing the assigned IP address of the Server. It is important that
the IP address of the BPswitch Server and this setup menu match. On most
installations this step is not necessary.