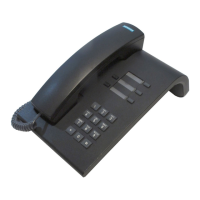
4.1.13 Connecting terminals
4.1.14 Performing a visual inspection
4.2 Installation of Hicom 150 E OfficeCom, OfficePoint, OfficeOne
4.2.1 Overview
4.2.2 Procedure for installing Hicom 150 E OfficeCom, OfficePoint
4.2.3 Procedure for installing Hicom 150 E OfficeOne
4.2.4 Selecting the installation site
4.2.5 Unpacking the components
4.2.6 Laying the cables
4.2.7 Connecting terminals
4.2.8 Performing a visual inspection
5 Start-up
5.1 Hicom 150 E OfficePro start-up
5.1.1 Overview
5.1.2 Start-up procedure
5.1.3 Supplying the system with power
5.1.3.1 Station number assignment
5.1.4 Carrying out the country initialisation
5.1.5 Entering the route telephone number
5.1.6 Performing customer-specific system programming
5.1.7 Carrying out a quick check
5.2 Start-up of Hicom 150 E OfficeCom, OfficePoint, OfficeOne
5.2.1 Overview
5.2.2 Start-up procedure
5.2.3 Carrying out the country initialisation
5.2.4 Entering the route telephone number
5.2.5 Conducting customer-specific system programming
5.2.6 Quick check
5.2.7 Station and line number assignment
5.2.8 Connecting ISDN (S0) interfaces
5.2.8.1 Connecting the ISDN CO
5.2.8.2 Networking connection (Hicom 300 CorNet-N)
5.2.8.3 Connecting ISDN terminals
5.2.8.4 Extensions for internal S0 stations
5.2.8.5 Multi-device connection
http://cmweb01.mch.pn.siemens.de/e_doku/en/h150/h15/30/sh/2/index.htm (4 of 16) [06/04/2000 13:02:10]
 Loading...
