1. Grasp the I/O Station handle and pull it toward you until it locks in the open
position.
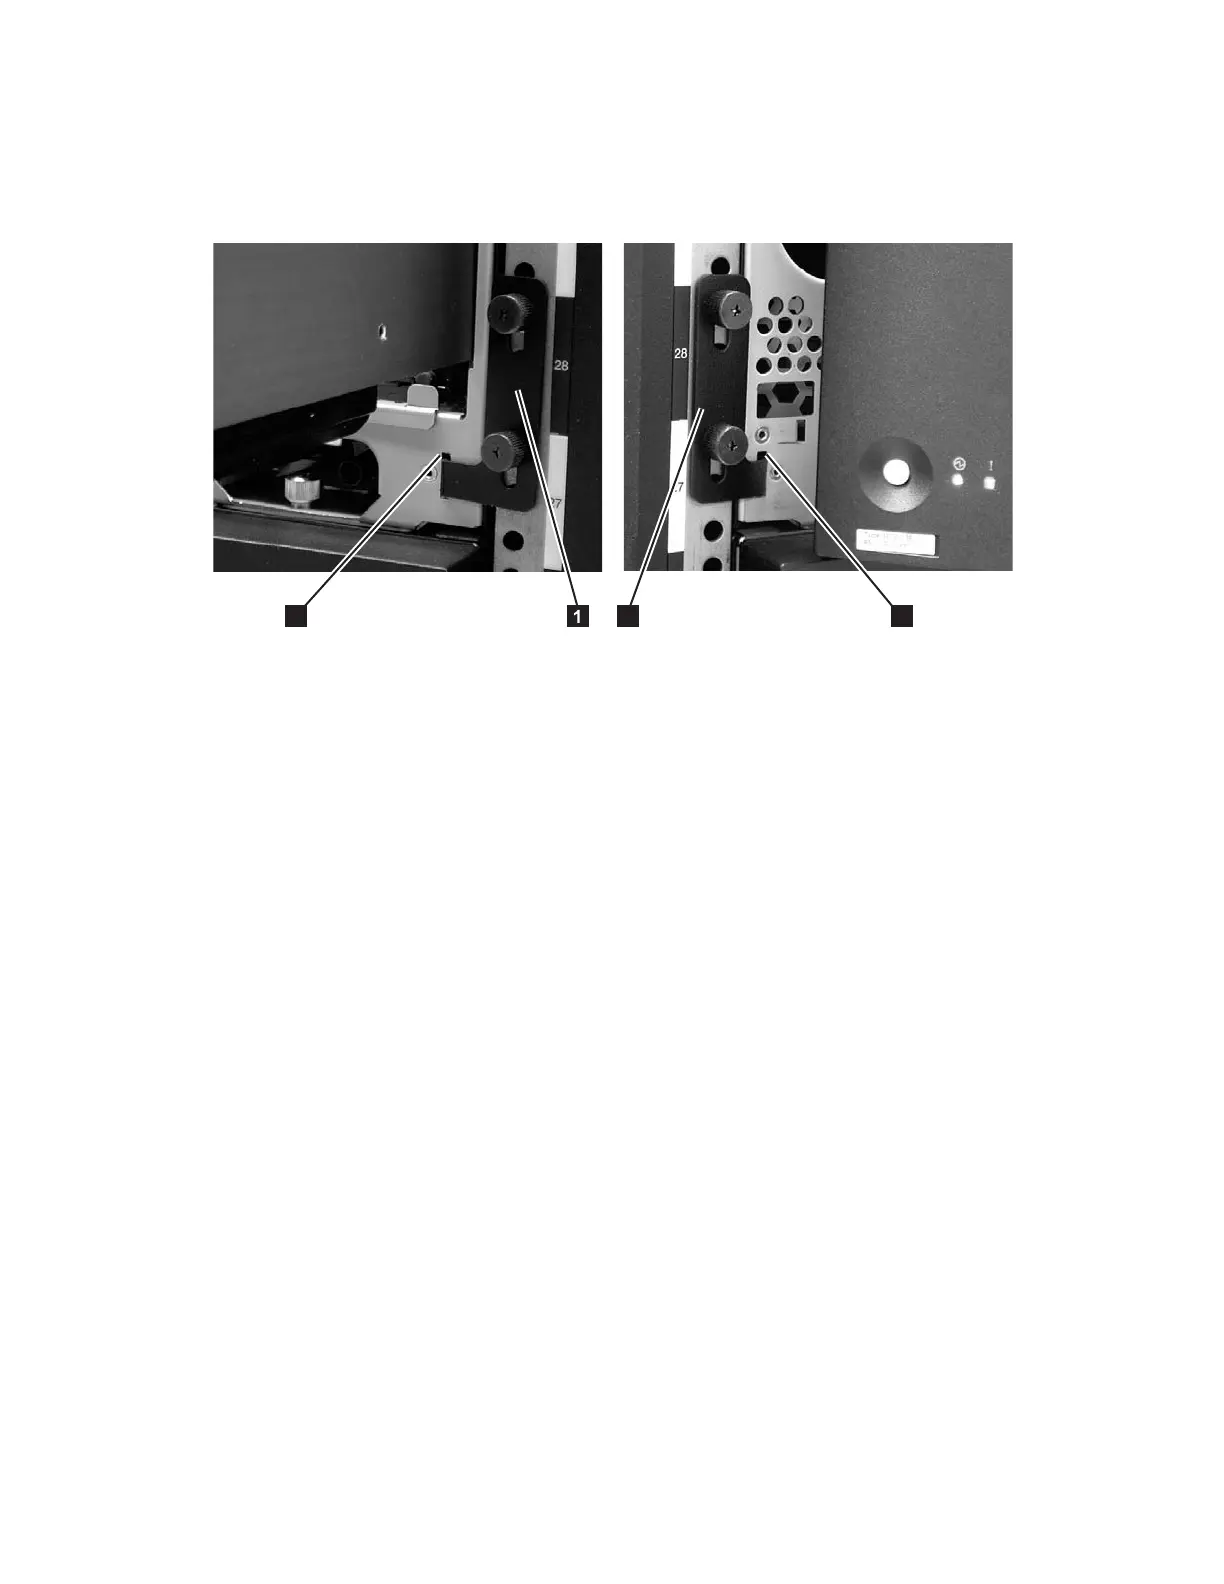
2. Remove the right rack ear (1 in Figure 8-17).
a. Remove the right rack ear thumb screws. If the screws are tight, use a #2
Phillips screwdriver to loosen them.
b. Remove the right rack ear.
3. Remove the left rack ear (3 in Figure 8-17).
a. Open the left door of the library unit slightly.
b. Grasp the hinged side of the door and, while pulling on the door, push
right to expose the left rack ear.
c. Remove the left rack ear thumb screws.
d. Remove the left rack ear.
4. Repeat this process for all units in the library, if necessary.
Replacing the Rack Ears
Complete these steps to replace the rack ears on all units of the library.
1. Grasp the I/O Station handle and pull it toward you until it locks in the open
position.
2. Replace the right rack ear (1 in Figure 8-17).
a. At the bottom right of the I/O Station position on each library unit, there is
a slot (2 in Figure 8-17). Insert the right rack ear into the slot.
b. Position the right rack ear flush with the rack rail.
c. Install and tighten the right rack ear thumb screws.
3. Replace the left rack ear (3 in Figure 8-17).
a. Open the left door of the library unit slightly.
a. Grasp the hinged side of the door and, while pulling on the door, push
right to expose the slot for the left rack ear.
b. Insert the left rack ear into the slot (4 in Figure 8-17).
c. Position the left rack ear flush with the rack rail.
d. Install and tighten the left rack ear thumb screws.
a66ug007
2
3
4
Figure 8-17. Removing the rack ears (Control Module shown)
Chapter 8. Add, Check, Adjust, Remove, and Replace Procedures 8-21