4. Remove the cover.
5. Remove the two screws from the barcode bracket (make note of the barcode
orientation for replacement).
6. Slide the drive forward approximately two inches.
7. Remove the power and interface connectors from the drive.
8. Remove the RS422 connector from the sled board (keyed).
9. Lift or slide the drive out of the sled housing.
Tape Spooled off Supply Reel
1. With the front of the drive facing you, pull an arm's length of tape out of the
take up reel from the left side of the drive.
2. From the take up reel, thread tape around the rear of the tape path and over
the head rollers on the left side of the drive.
3. Set the drive on its left side with the head and tape path facing up.
4. Moisten a cotton swab with water and wet approximately 13 mm (0.5 in.) of
the tape end and feed it onto the supply reel (inside the cartridge).
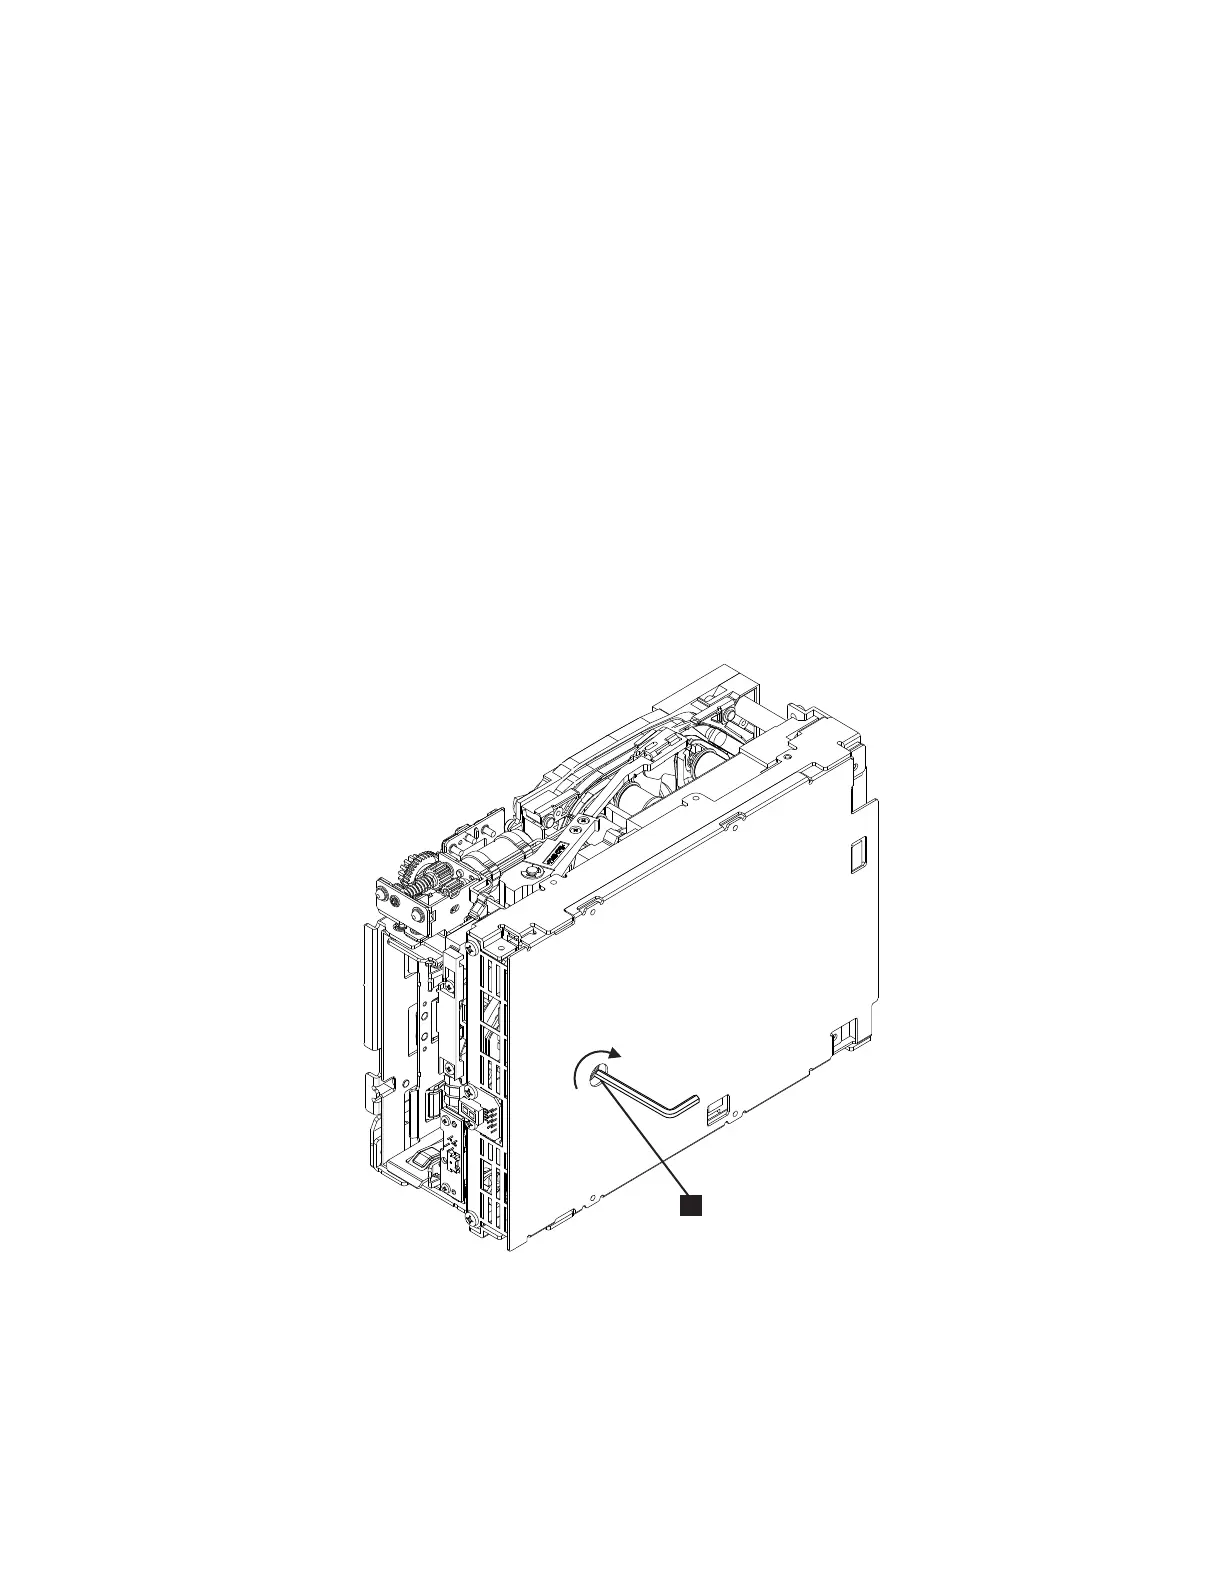
5. From the bottom of the drive, insert a 2.5 mm offset hex wrench through the
bottom cover access hole and into the reel motor axle.
6. Turn the supply reel clockwise, allowing the moistened tape to adhere to the
hub as it winds around the supply reel (inside the cartridge).
7. Continue spooling into the cartridge until the tape is taut and remains within
the flanges of the tape guiding rollers. Ensure that you do not stretch the tape.
8. Reassemble the drive, reversing the steps in “Beginning Procedure” on page
8-123.
a82ru008
1
Figure 8-135. Using hex wrench to rewind tape into cartridge
Chapter 8. Add, Check, Adjust, Remove, and Replace Procedures 8-125