2 is the rear Y-rail. 4 squeeze here to release
2. From the front of the library, open the I/O station and access door of the 9U
expansion module. Squeeze the handle of the Y-rail release mechanism, lift it
out of its locked position, and slide it downward as far as it will go.
1 Y-rail in unlocked, functional position
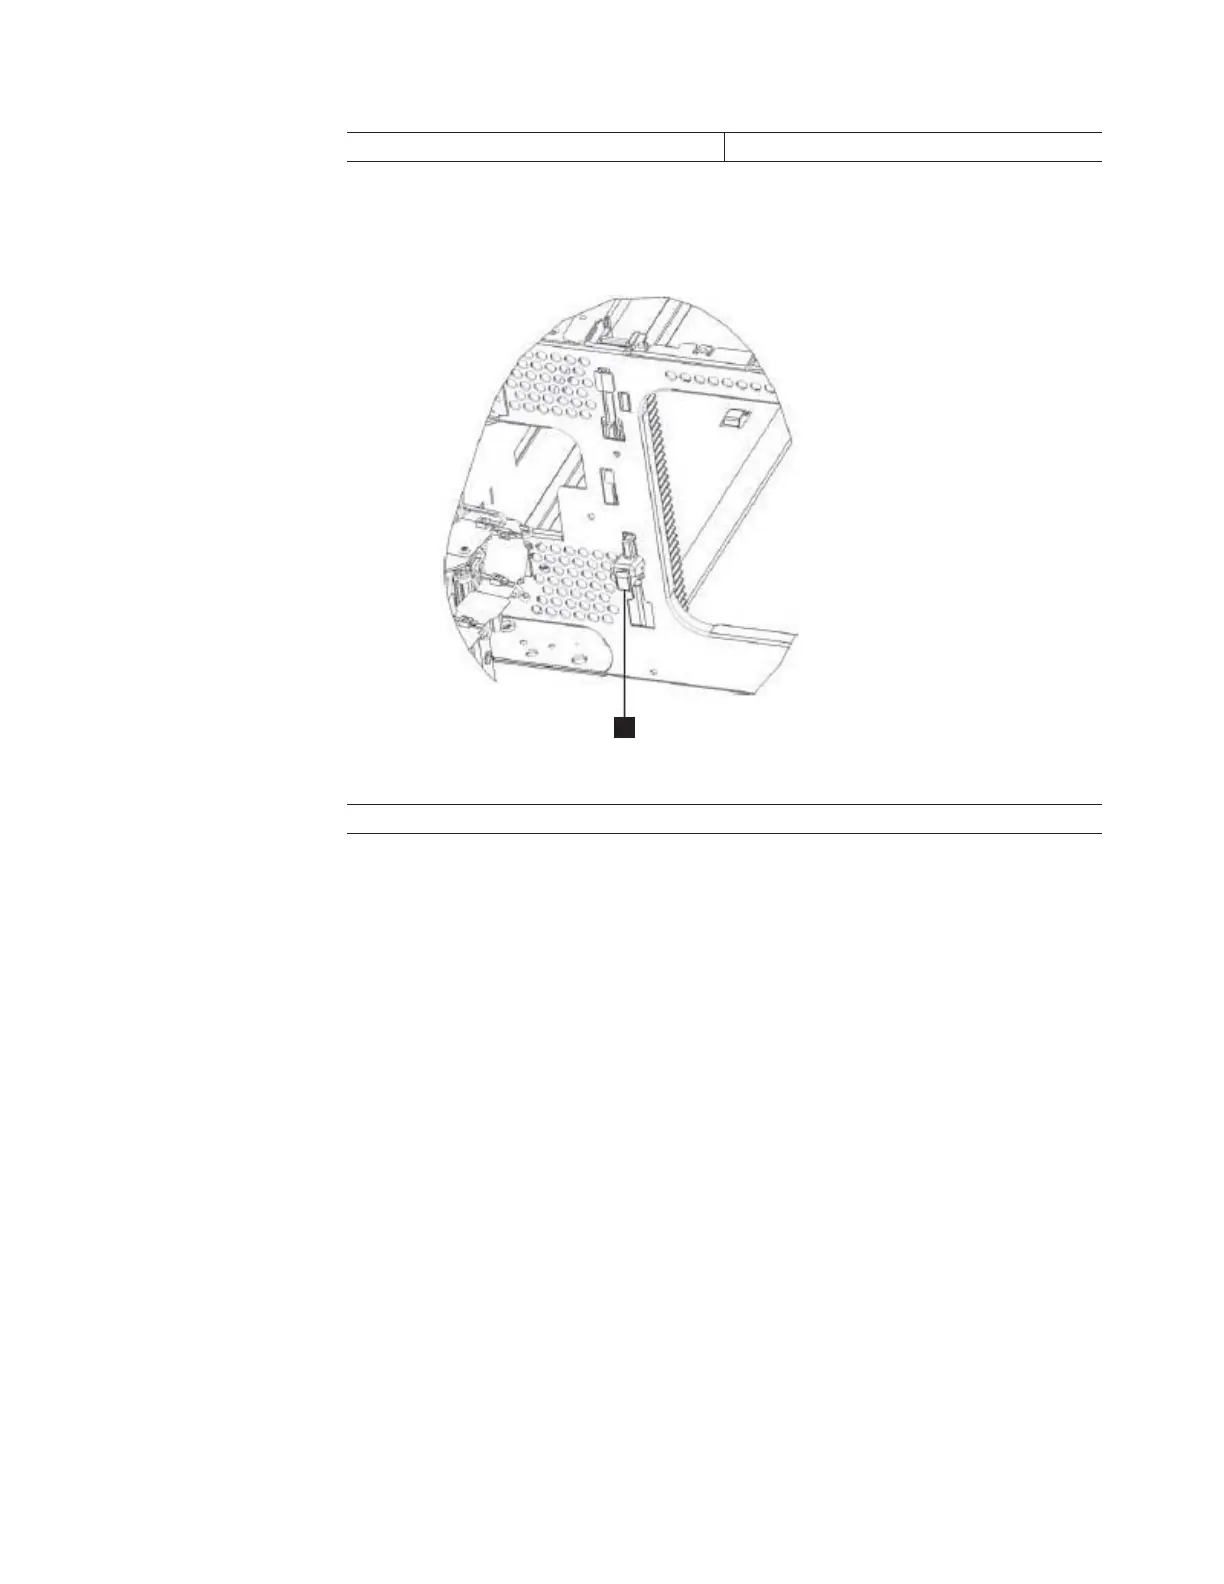
3. From the back of the library, find the rear Y-rail release mechanism, which is
located in the interior of the right side of the module. Squeeze the handle of
the Y-rail release mechanism, lift it out of its locked position, and slide it
downward as far as it will go. Doing this aligns the Y-rails with the Y-rails of
the module beneath it.
CAUTION:
Check to make sure that there is no gap between the top and bottom Y-rails
on both the front and back of the library. If a gap exists, the library cannot
mechanically initialize.
To align the gear racks in a multi-module library:
1. Slightly push up and pinch the gear rack locking mechanism (1 in Figure 8-18
on page 8-22) to unlock the gear rack in the control module.
2. While pinching the gear rack locking mechanism (2 in Figure 8-18 on page
8-22), push the gear rack down until it aligns with the gear rack in the
expansion module, then release your hold on the locking mechanism.
3. Manually inspect the track to ensure there are no gaps.
4. Repeat Steps 1 through 3 for the other gear rack.
5. Manually raise the picker and disengage the picker locking mechanism (1 in
Figure 8-23 on page 8-26) if necessary. If the gear racks are properly aligned, the
picker will slowly move to the bottom of the library.
a77qs037
1
Figure 8-22. Releasing the Y-rail
Chapter 8. Add, Check, Adjust, Remove, and Replace Procedures 8-25