a. Locate the release lever on the under side of the Picker Assembly. While
holding the release lever in the forward position, lower the Picker Assembly
onto the M2 Robot Assembly. Ensure the Picker is all the way to the front of
the Robot Assembly.
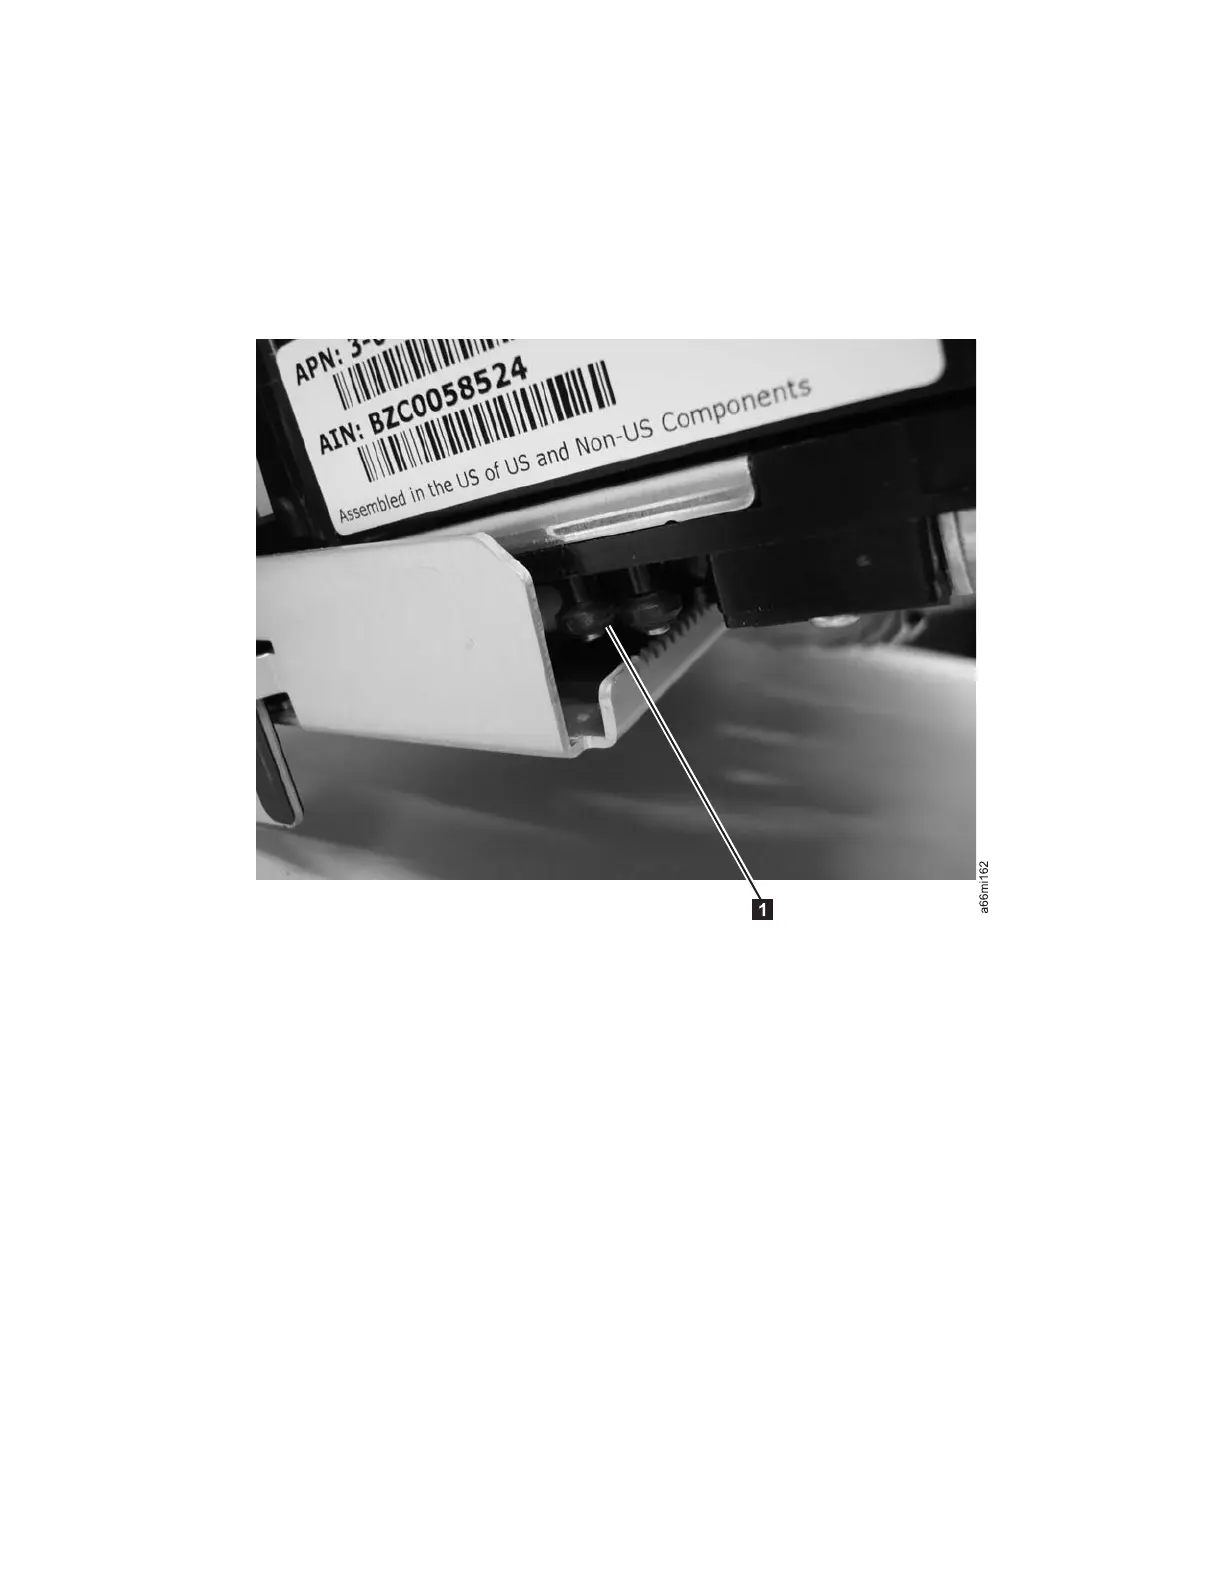
b. There are two rollers on the Picker Assembly that align with the two slots
in the M2 Robot Assembly (see Figure 8-87). Once the rollers are resting on
the M2 Robot Assembly, release the lever.
c. Verify that the Picker Assembly is fully resting on the M2 Robot Assembly
by slowly moving the Picker Assembly toward the rear. If it moves
smoothly, installation is complete.
6. Perform “Replacing the M2 Robot Assembly” on page 8-69.
Removing the Picker Assembly from the M2 Robot Assembly
Inside of a Library
The Picker Assembly is designed so that it can be removed from the M2 Robot
Assembly by a service technician while installed in a library. The M2 Robot
Assembly remains in the library, and the Picker Assembly is removed through the
front door. In the photos below, the top of the library is removed for clarity.
1. If the M2 Robot Assembly is at the bottom of the library, open the front door
and manually raise it into the Control Module.
2. Engage the picker locking mechanism. (See 1 inFigure 8-88 on page 8-82).
Figure 8-87. Picker Assembly rollers
Chapter 8. Add, Check, Adjust, Remove, and Replace Procedures 8-81