1-8
1
Step 1: Prior to placing the TR250 into the bolt down location, remove the L-Brackets from the rear of
the cabinet. (Place them inside the Note Handler, under the Recycler when install is done).
Do Not use the Vault Door as leverage to place the cabinet over the anchors !
Step 2: Place the TR250 into the bolt down area (alignment of the anchors/bolt holes will be performed
later).
Step 3: Release the electronics bay “lid locks” and raise the top lid to access the Note Recycler wiring
harness (The Control Panel assembly can be CAREFULLY folded forward for easier access).
a) Disconnect the Note Recycler VDC power cable from the LOWER connector on the front
side of the Power Supply.
b) Disconnect the Note Dispenser USB cable from the front side of the PC assembly.
c) Route the cable harness through the access hole in the front/right side of the Electronics
Bay.
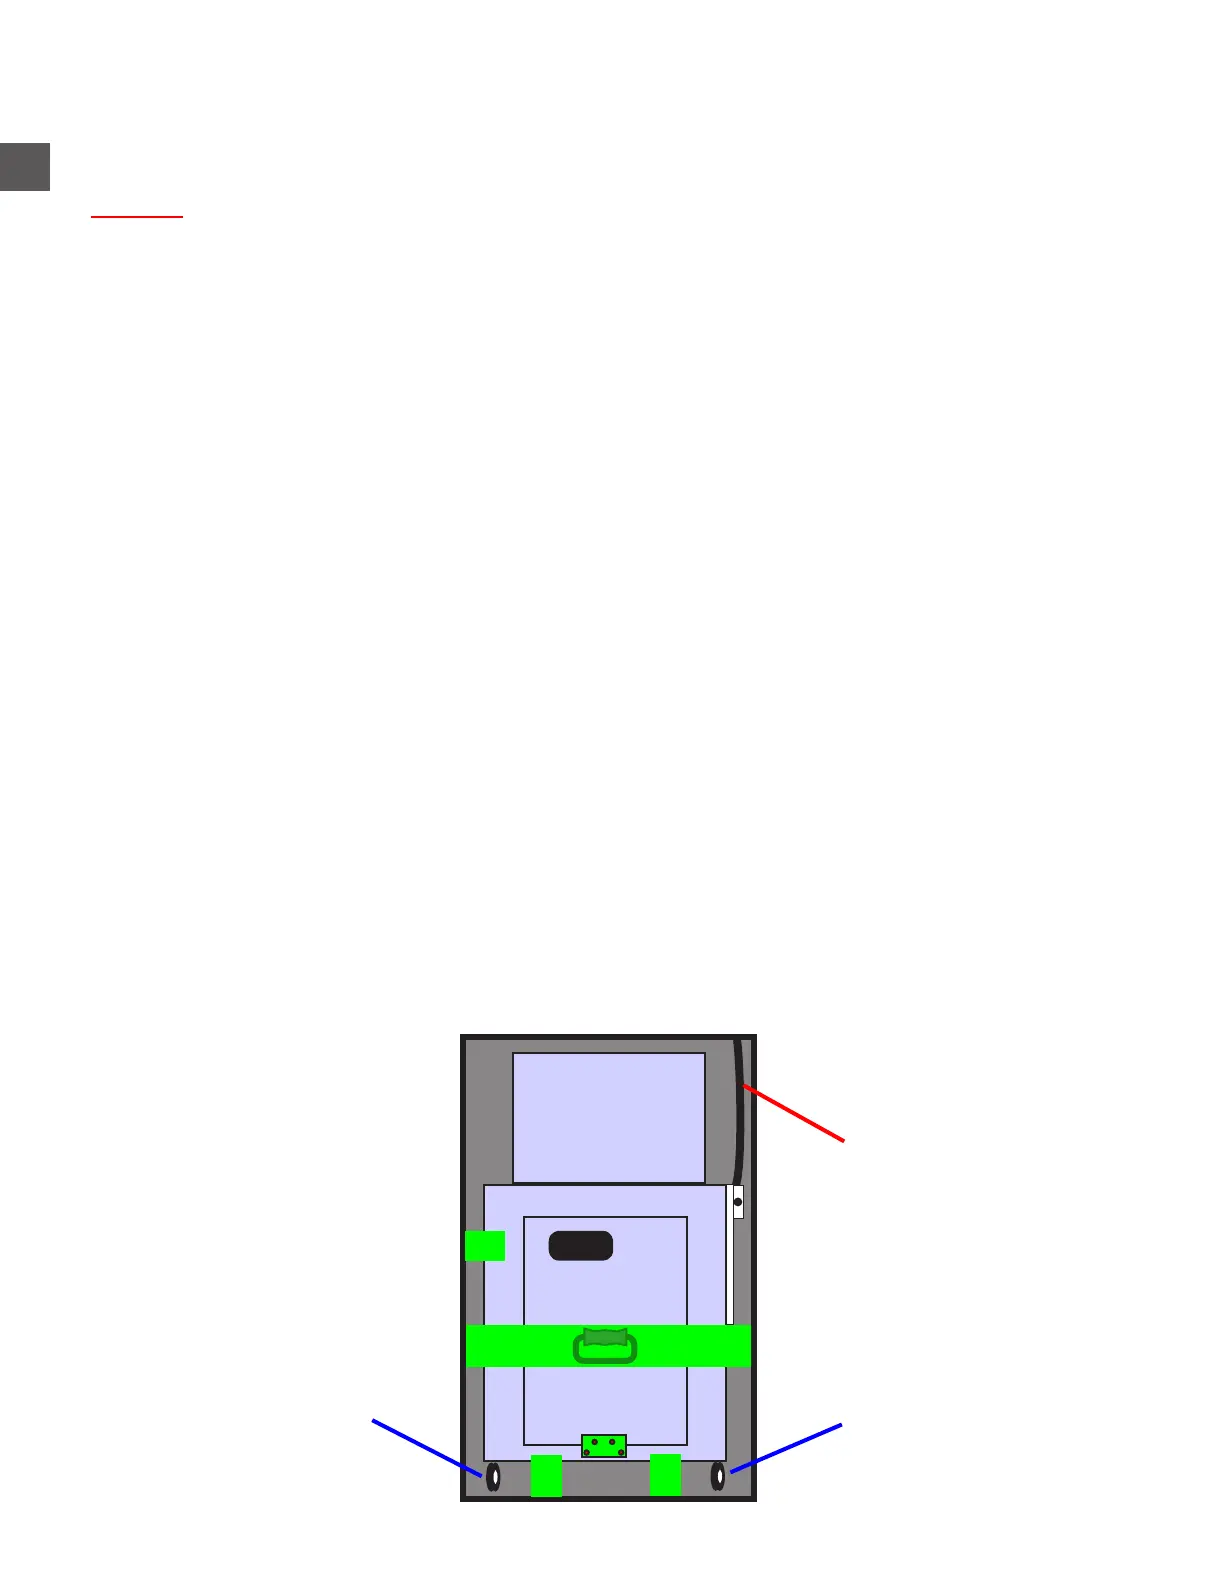
Step 4: Fully open the TR250 vault door and raise the cash insertion coverplate.
Step 5: Disengage the “brakes” on the front casters of the Note Recycler assembly.
Step 6: Remove the Note Recycler retaining bracket “A” from the upper/front/left of the Note Recycler.
(1) JIS #2 screw and (2) 7/16” nuts
Step 7: Remove the (4) phillips head screws “B” that secure the Cassette Rack shipping bracket to the
Note Recycler Cradle (retain the bracket and screws).
Step 8: Remove the phillips head screws which secure the (2) shipping brackets “C” to the Note
Recycler Cradle and remove the brackets (retain brackets).
Step 9: Remove the (2) phillips head screws that secure the Cradle retaining bracket “D” to the Note
Recycler.(Place the bracket inside the Note Handler, under the Recycler when install is done).
*** KEEP RETAINING HARDWARE - REQUIRED LATER ***
Step 10: Grasp the Note Recycler by the front handle and pull it fully from the cabinet.
*** Ensure the Note Recycler wiring harness is not damaged during removal ***
TR250 Bolt Down
A
C
Caster “brakes” Caster “brakes”
Note Recycler +24VDC
and Data cable harness
C
“B”
DD