1-18
1
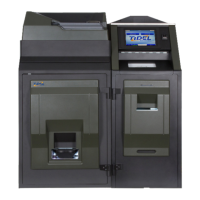
Coin Collection Tray - Rack
Step 1: Navigate to the Door Solenoid and Sensor Maintenance Menu:
Log In > Done > (1-2-3-4-5-6) > Maintenance Menu > Door Solenoids and Sensors
a) The displayed Sensor map should indicate the Coin Tray Inserted.
b) Remove the Coin Collection Tray - The Sensor map should indicate the Coin Tray Not
Seated
c) Fully extend the Coin Collection Tray Rack - The sensor map should indicate Carrier
Platform Out
Coin Dispenser:
Step 1: Navigate to the Hopper Reset Maintenance Menu:
Log In > Done > (1-2-3-4-5-6) > Maintenance Menu > Hopper Reset
The display will indicate the Hopper locations, denominations and enabled status.
Step 2: Navigate to the Hopper Statistics Maintenance Menu:
Log In > Done > (1-2-3-4-5-6) > Maintenance Menu > Hopper Statistics
The display will indicate each Hopper’s response status (should be below 3%).
Coin Handler Door Operations
Step 1: Turn the Cash Handler Vault Door “T” Handle(s) to the locked position.
Step 2: Turn the Combination Lock housing Counter-Clockwise (locked).
a) Ensure the housing cannot be rotated Clockwise (unlocked).
b) Ensure the Vault Door Handle(s) cannot be turned to the unlocked position.
The displayed Sensor Map should indicate the DOOR Sensor is UNLOCKED
Step 3: Block the DOOR Sensor, located in the top/outside corner of the Coin Handler Vault Door.
The displayed Sensor Map should indicate the DOOR Sensor is CLOSED.
Step 4: While continuing to block the DOOR Sensor, activate the Solenoid by selecting the Coin
Handler Vault from the Sensor Map.
a) The Solenoid should activate.
b) The displayed Sensor Map should indicate the DOOR Sensor is UNLOCKED.
c) The Door Handle can be turned to the unlocked position.
Step 5: Return the “T” Handle and Combination Lock to the locked position.
Step 6: Enter the default combination 1-2-3-4-5-6.
a) 2 beeps indicate correct entry.
b) Rotate the Combination Lock housing clockwise (unlocked)
c) Turn the Vault Door “T” Handle(s) to the UNLOCKED position.
Functional verification